RSS Feed

I can't believe it's already Spring! Time has gone by too fast! I don't know about you guys, I've had a hard time getting back into my full schedule after the CNY break. But I'm still really glad I'm back to my full schedule, and that the beginning of my day has moved forward an hour.
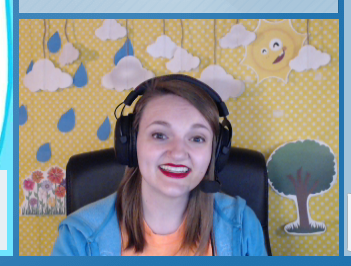
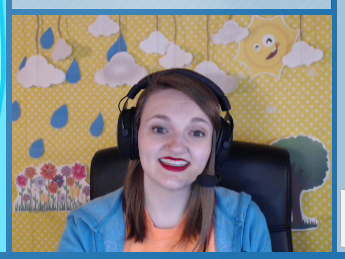
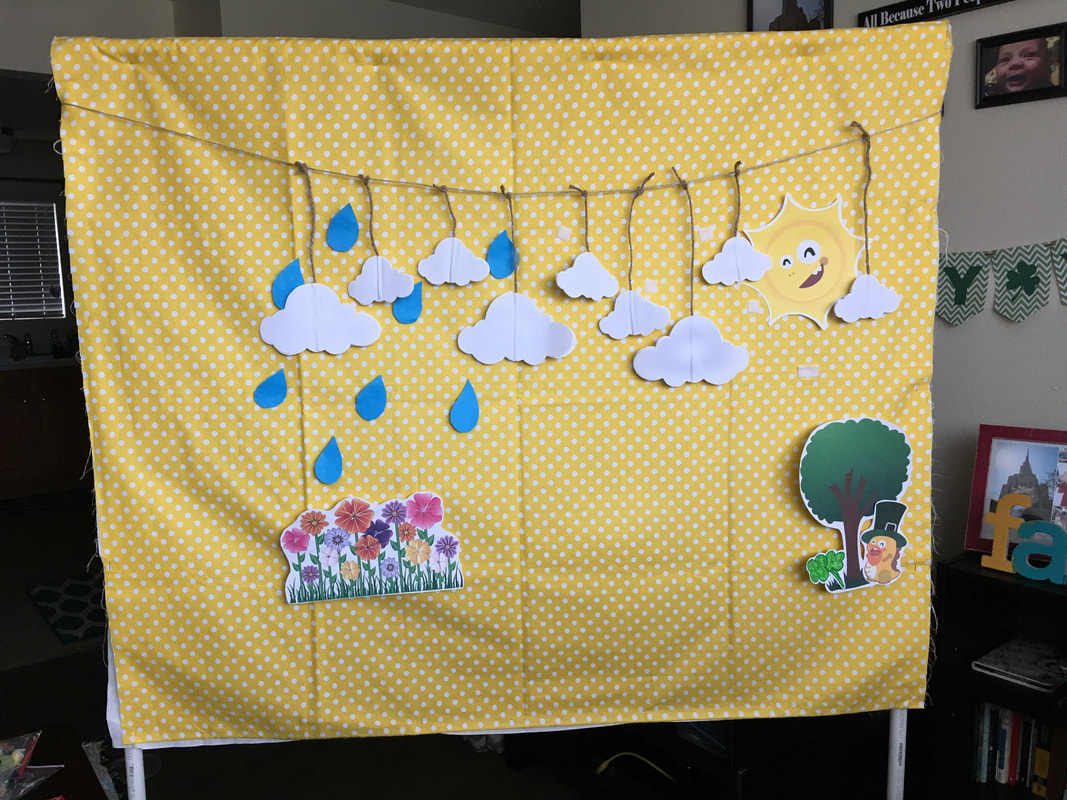
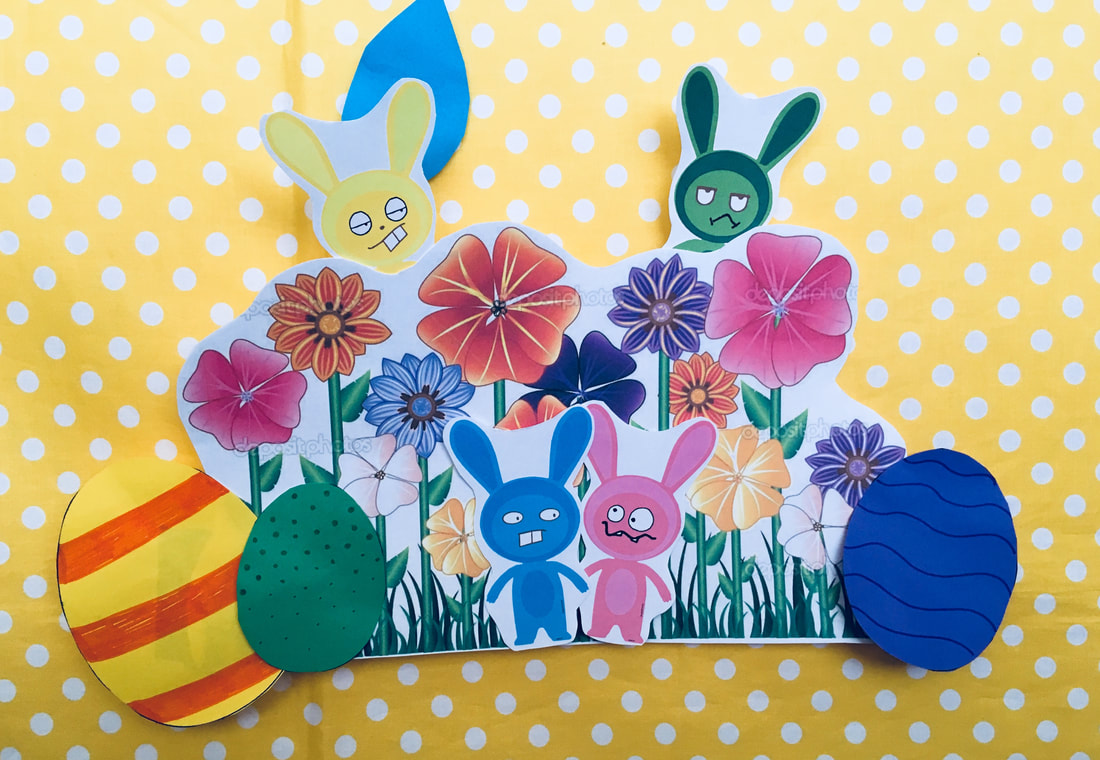
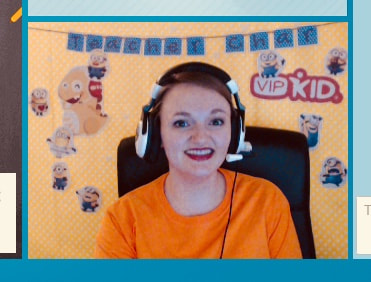
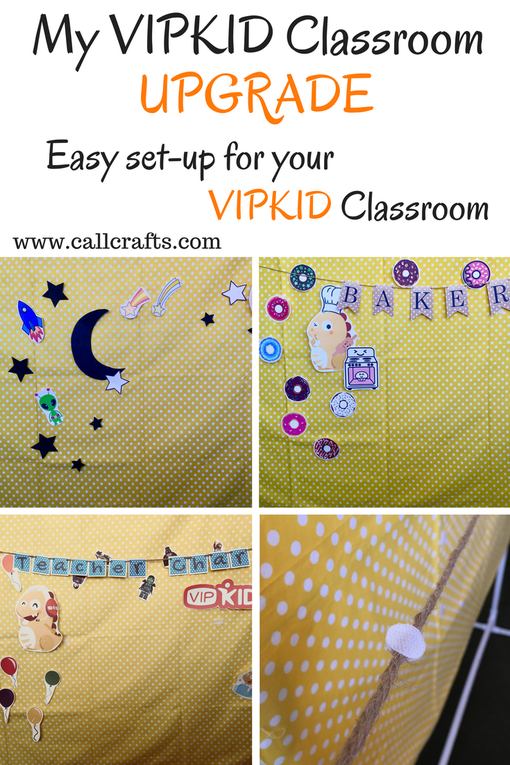
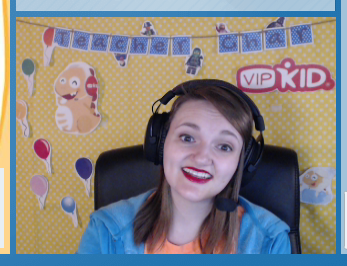
In celebration of Spring, St. Patrick's Day, and Easter, I created a background just for this time of year. In my last post, I showed you all My VIPKID Classroom UPGRADE. These have some pretty drastic changes in the design and structure of my classroom background. I shared with you that I was updating my Cloudy Sky background. I've changed it from just a cloudy sky to a SPRING background!
I've been working more on creating a scenery in my background instead of just random stuff. My last few backgrounds have been less than stellar (in my opinion) because it just looked like random stuff in the background. What I love about this background is that there is a clear theme and it seems to have movement with the rain (maybe I'm just making that part up...). But I LOVE the Dino sun.
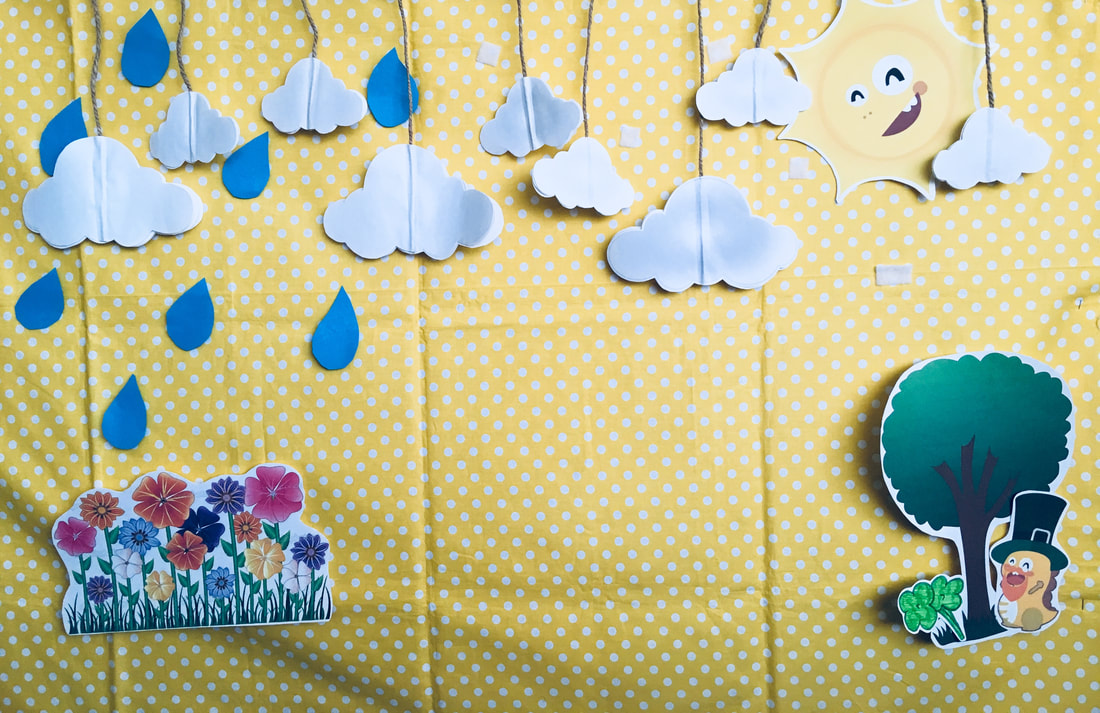
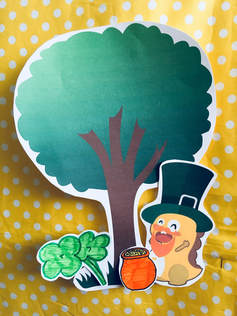
I found the tree and flower patch on Google. I can't share these photos because of copyright reasons. But you'll be able to find them if you put in "tree clipart" or "flower patch clipart." The raindrops are blue colored paper cut out to look like a raindrop. Then I put on a circle adhesive hoop velcro piece. I also attached the tree, sun, and flower patch with these pieces as well.
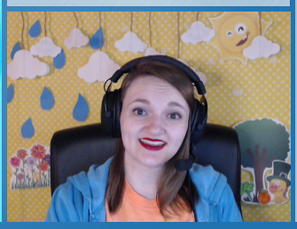
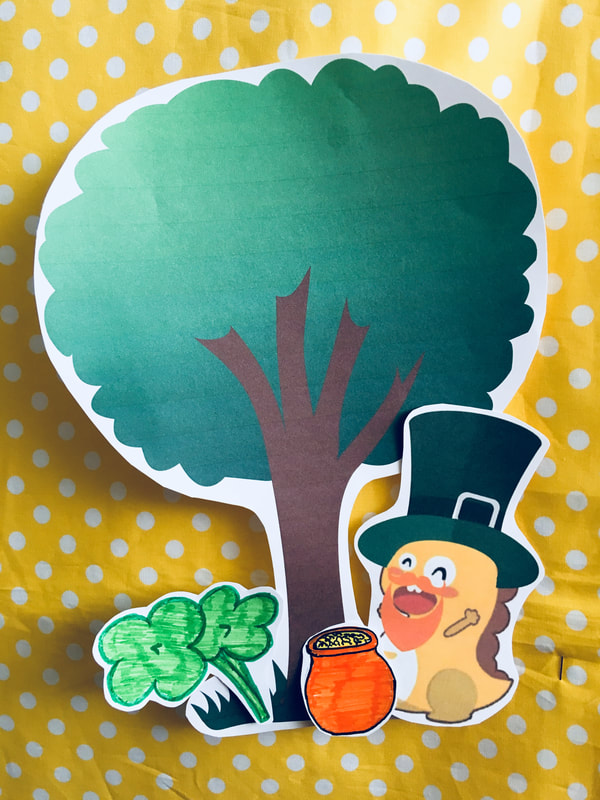
To make it more appropriate for St. Patrick's Day, I added a St. Patrick Dino, four leaf clover, and a pot of gold (which is shown below). I simply taped them onto the tree so I can take it off and replace it with my Easter Decor.
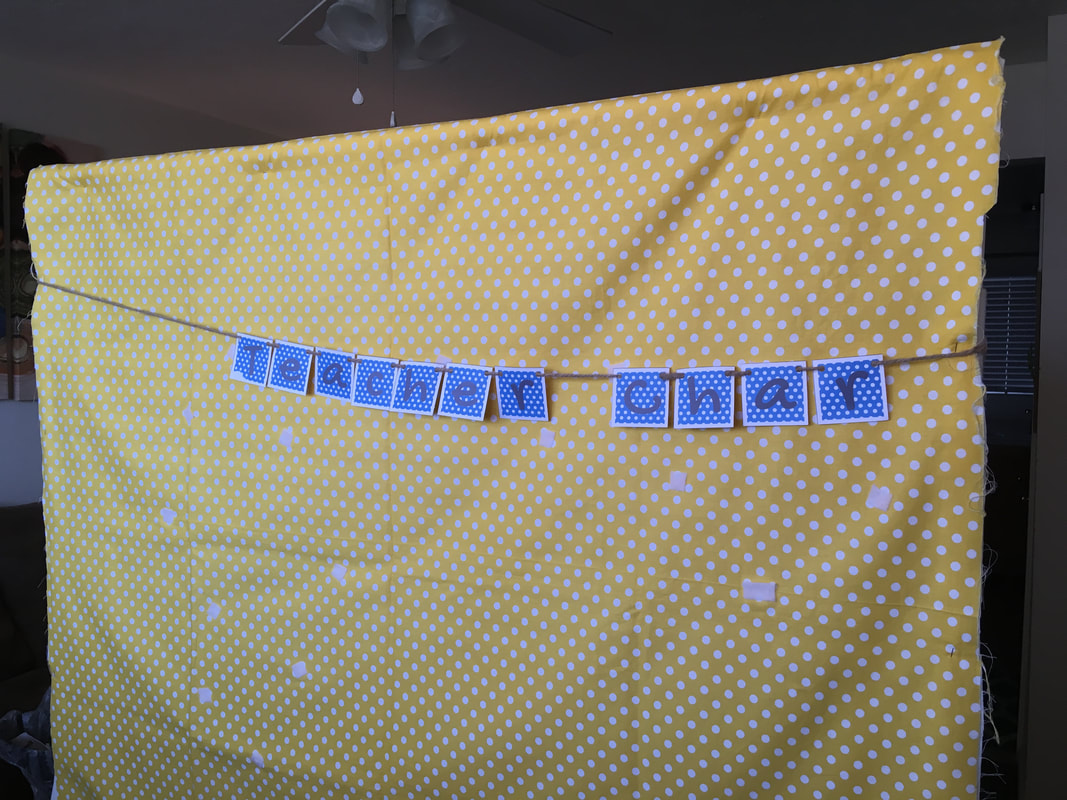
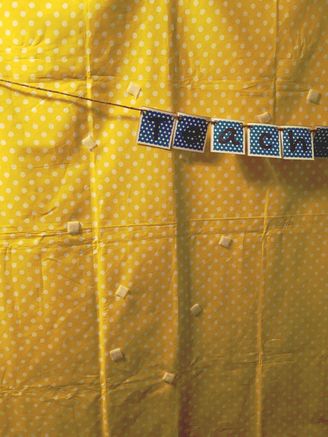
You might be wondering, how did you string up those clouds? I had used these for party decorations a couple of years ago. When I made them, you had to hang up each piece individually. I used to do this when I set the cloudy sky theme up. Doesn't quite work if you need to set this all up in 1-2 minutes. So I added another piece of twine and tied each cloud onto it. The photo is shown below. (If you need details of how I hung up this cloud banner, check out My VIPKID Classroom UPGRADE)
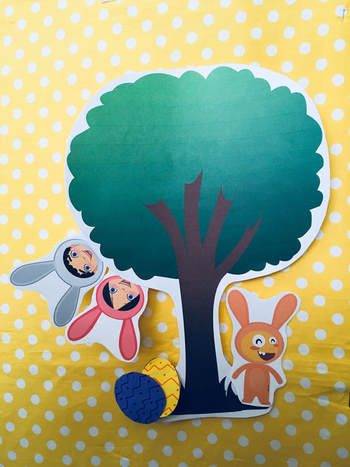
For my Easter background, I just switched out the St. Patrick's Day characters on the tree for Easter characters. I also added characters onto the flower patch.
Design credit for the Dino characters goes to VIPKID Teacher Christina. I love incorporating Dino in any way that I can. I am so thankful for talented artists in the VIPKID community. My backgrounds wouldn't be what they are with out you guys!
And that's it! Cute and easy to set up. Thanks for reading, if you'd like to see more, please subscribe (Facebook, Pinterest, email...doesn't matter). See you next time!
P.S. If you think this will be a fun job to join, I’d love to help you through the interview process. You can email me with the mail icon below for any questions. My referral code (for when you apply) is: 04A7J3
0 Comments
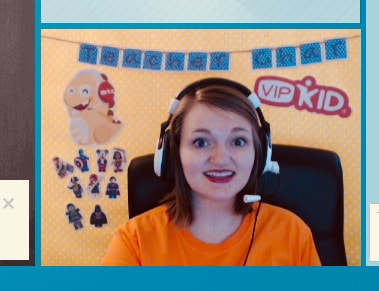
Hello, teachers and future teachers! I'm so excited to present my upgraded classroom backgrounds. I think they look TEN TIMES better than they used to. Plus set-up and take-down is much quicker than is used to be.
Those of you who have read my previous posts about my backgrounds have probably read that I used tape to place on my decorations and leave the velcro available to place up rewards. While that was a good idea at the time, I have found that the kids I teach are more interested in activity-based rewards than getting something special put up on the wall. Maybe I just didn't know how to present it so that it was fun... I dunno. I'm doing what works best for me. And you should too.
First, I will show the changes I made on my fabric for my backgrounds. Then show you before and after pictures. You'll notice that the light has changed and my hair is so much longer! (I really like that it's longer)
The first thing I did was make it easier for me to hang up my banners. I originally used tape to hold them up. BAD IDEA. As I wrap them up and store them away, the tape starts sticking to the paper and peels off some of the paper in the front. Then after a while, the tape starts to lose its stick. I've had the banner above fall down on me for a couple of classes. It's a little embarrassing.
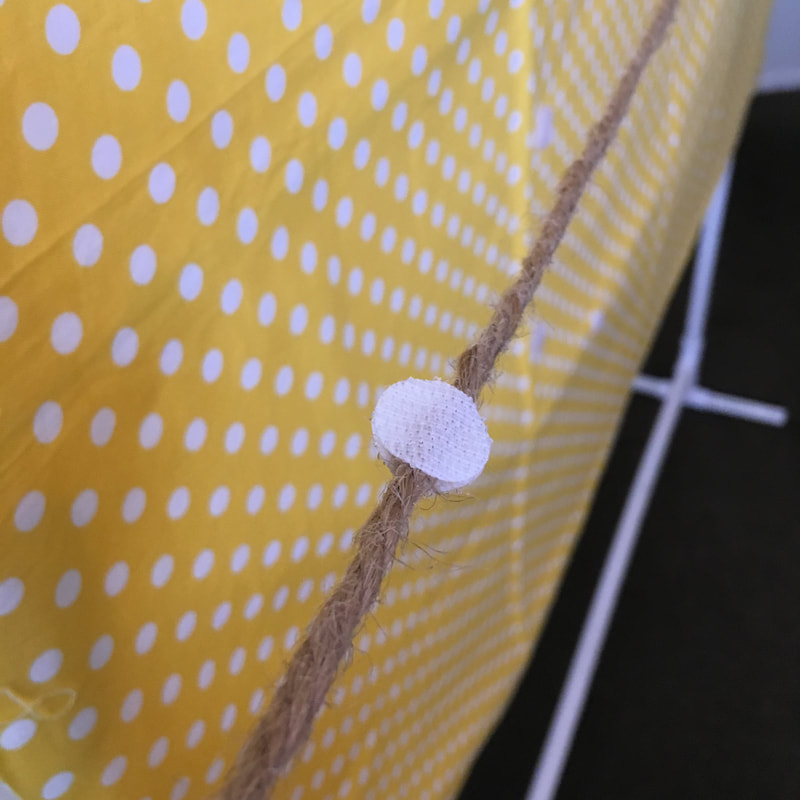
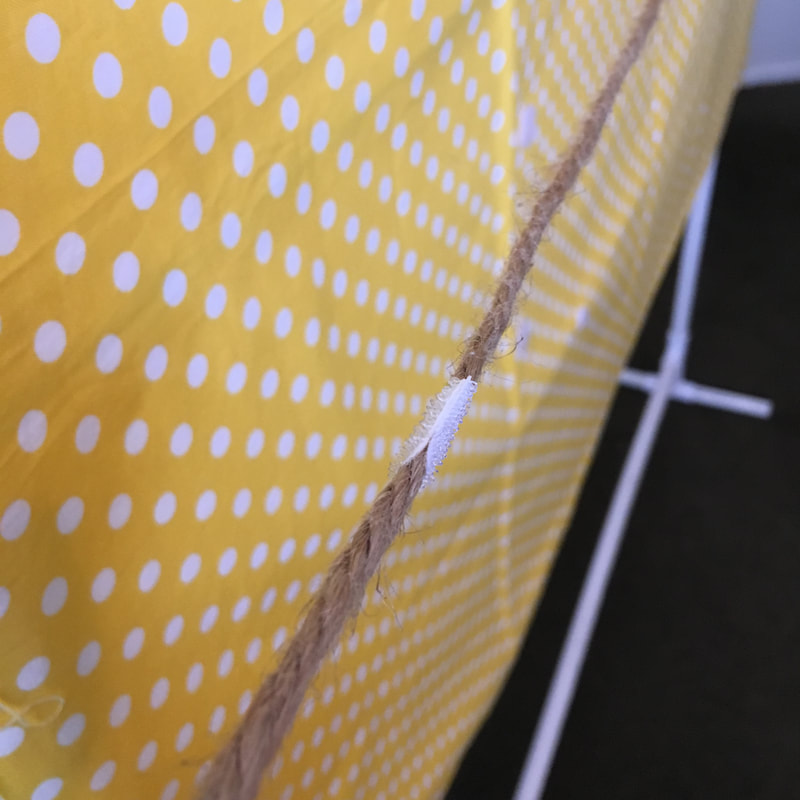
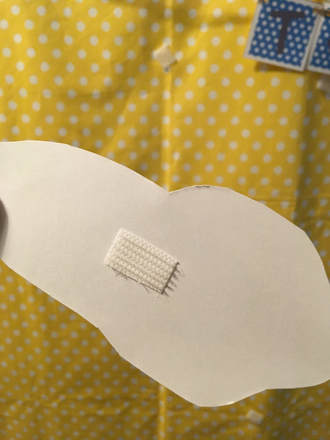
So I added some more loop velcro onto my PVC Pipe frame. I added a very long strip to give me plenty of flexibility to place the banners whatever height I need the banners to be. On the string of the banner itself, I've added hoop velcro onto both sides. I bought these circle pieces on Amazon. Specifically because the pack only had hoop velcro and not both. Here is the link if you are interested: 5/8" Coins Hook Side Only. (This is not an affiliated link, just sharing the love). I used two coins in order for them to stick onto the string. One for each side (just like you can see in the photo on the right).
After that, I added some more of those coins onto my background pieces. My Dino characters, my VIPKID sign, my stars, my raindrops, and anything else that was going to be hung up onto my background. Never again will I tape something onto my background. Never again!!
Day-to-Day Background
If there isn't a holiday going on, this background is typically my go to. It's simple and has my name on it. It used to be so boring and now I've added fun colors and characters to make it more exciting! The balloons, lego, and Elsa Dino were all old rewards that I made that no one really liked anymore. So they've just been sitting in my drawers, until now!
(This is to just show you what it's like without using my Dress Dino reward)Bakery
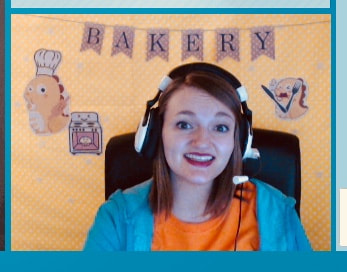
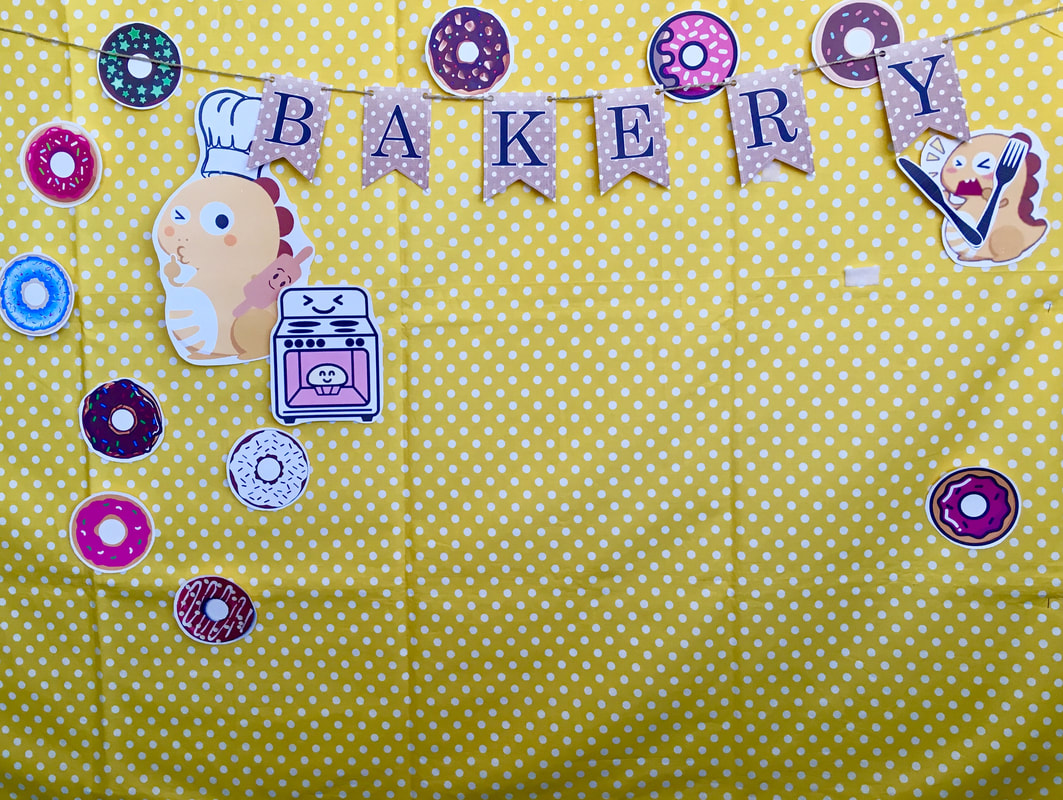
This is my next favorite. Again, it used to be so plain without the donuts around it. Now you can't stop thinking about eating donuts! (The Dino on the upper right can't either)
I totally forgot to take a screenshot of this when I was using it. But I promise it looks WAY better on the screen. (Note: I've also added another piece of loop velcro onto the right side underneath Dino. Now there's no awkward empty space there.)
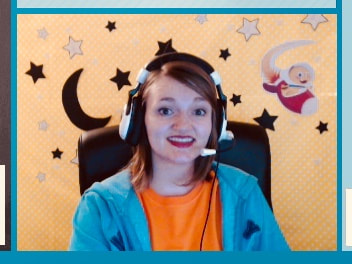
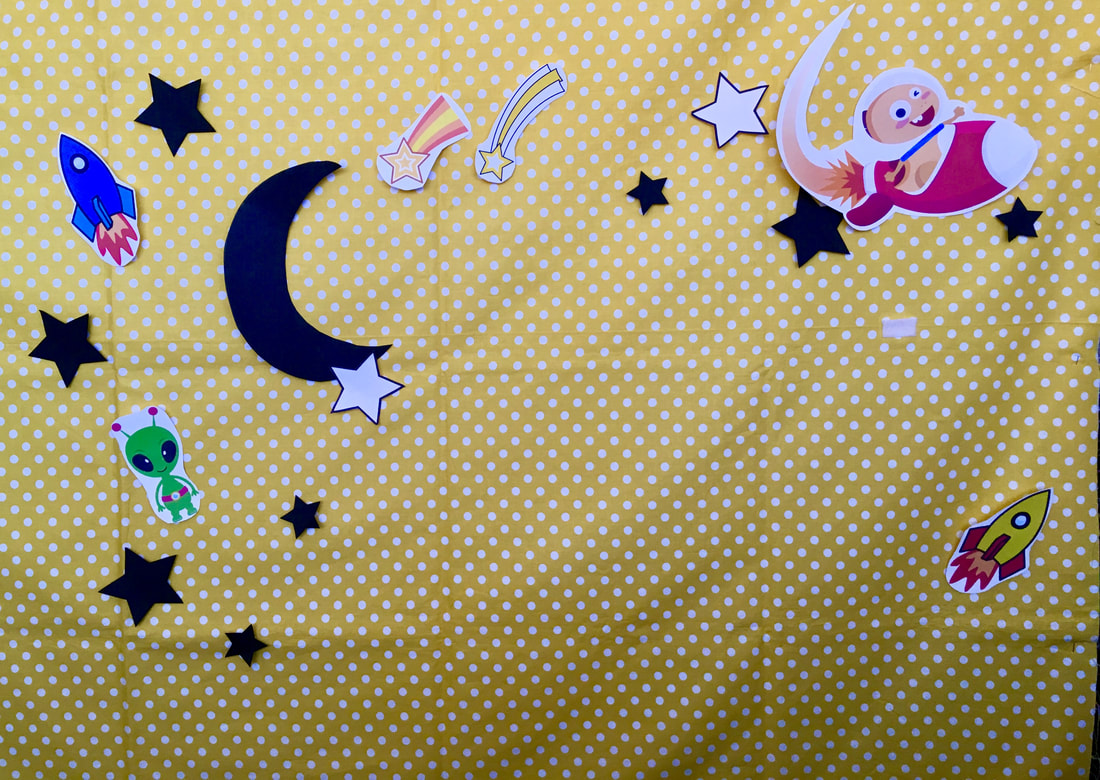
Starry Sky
There's nothing too different about this background. I put velcro on the back of all the stars, the moon, and Dino. Then I added some of the rewards I had shown you in my original Starry Sky background. Now they are up all of the time instead of only when I use them in the classroom (which soon became never). Again, adding the velcro has made set-up a lot faster!
Again, I've added another piece of velcro since I took those pictures. That awkward hole is gone.
Sneak Peak....
I had one more background that needed an upgrade. My Cloudy Sky background. At the time I finished updating these backgrounds, this one still wasn't done. I was still missing a few pieces I needed. Now its done and I'll be making a post very soon. For now, here's a cute little teaser....
Thanks for reading guys! I hope you find this helpful for your room. I love that I can have a cute classroom and not have to commit a small space in my small apartment for it. Subscribe if you would like to see more!
P.S. If you think this will be a fun job to join, I’d love to help you through the interview process. You can email me with the mail icon below for any questions. My referral code (for when you apply) is: 04A7J3
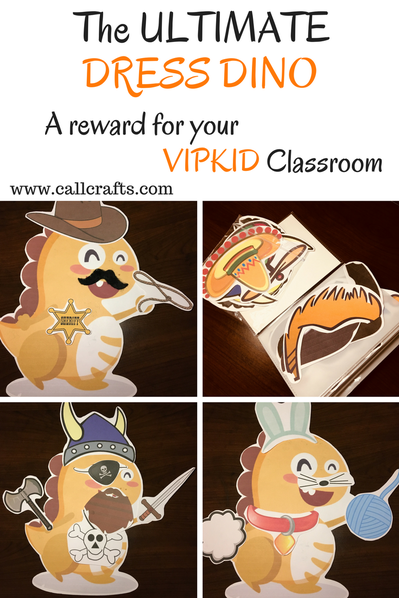
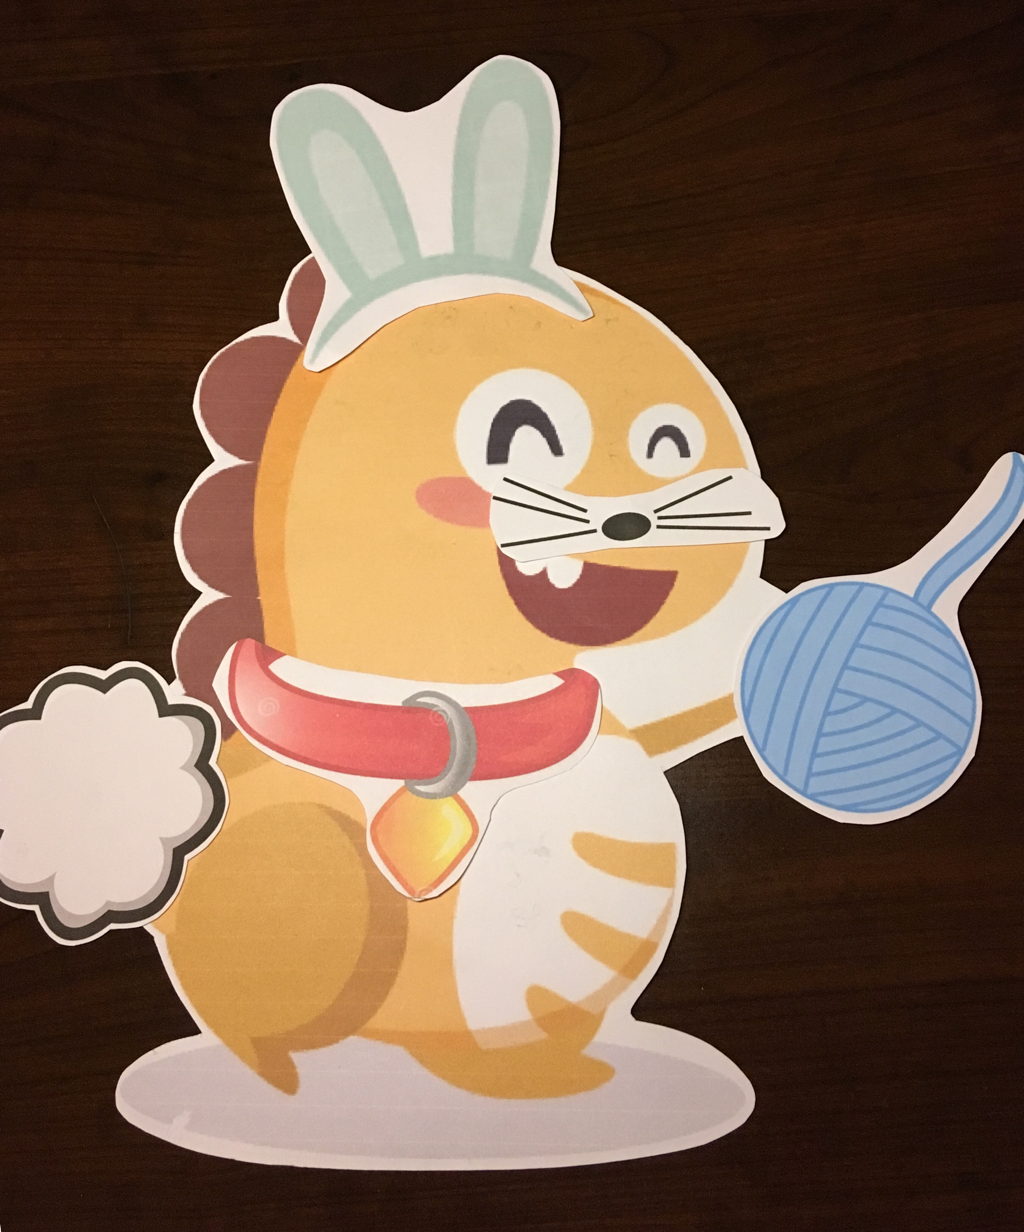
Hello VIPKID teachers! Usually I share backgrounds I've created for my VIPKID classroom and how I make them. This time, I'm going to share one of my rewards, Dress Dino. I have three rewards that I use regularly and this is one of them.
It's a popular reward among VIPKID teachers. Makes sense too, it's gender neutral and good for all ages. I started with just a PDF file with a few hats, sunglasses, hair, bow ties, and ties. Only a few pieces, but it was fine as long as no one keeps choosing this reward. And then it happened. I had a regular who only wanted to do this reward!! After a while, she had seen all of my costume pieces. She had this look on her face that said, "Seriously!? That's all you have? I've seen all of these!" I knew I had to amp up my Dress Dino game. After some downloading and printing, and cutting. I have a fun set that I enjoy using with my students.
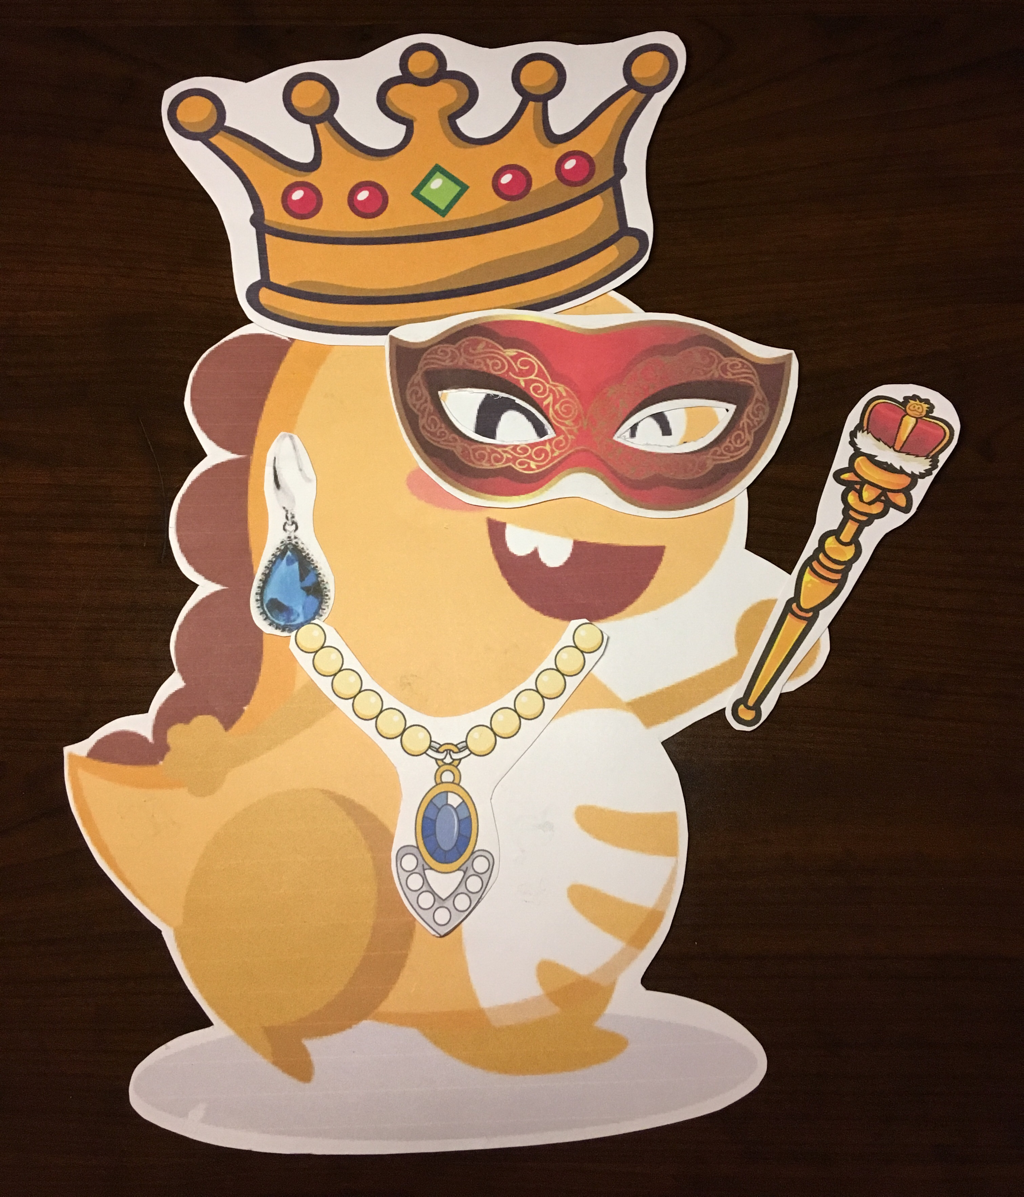
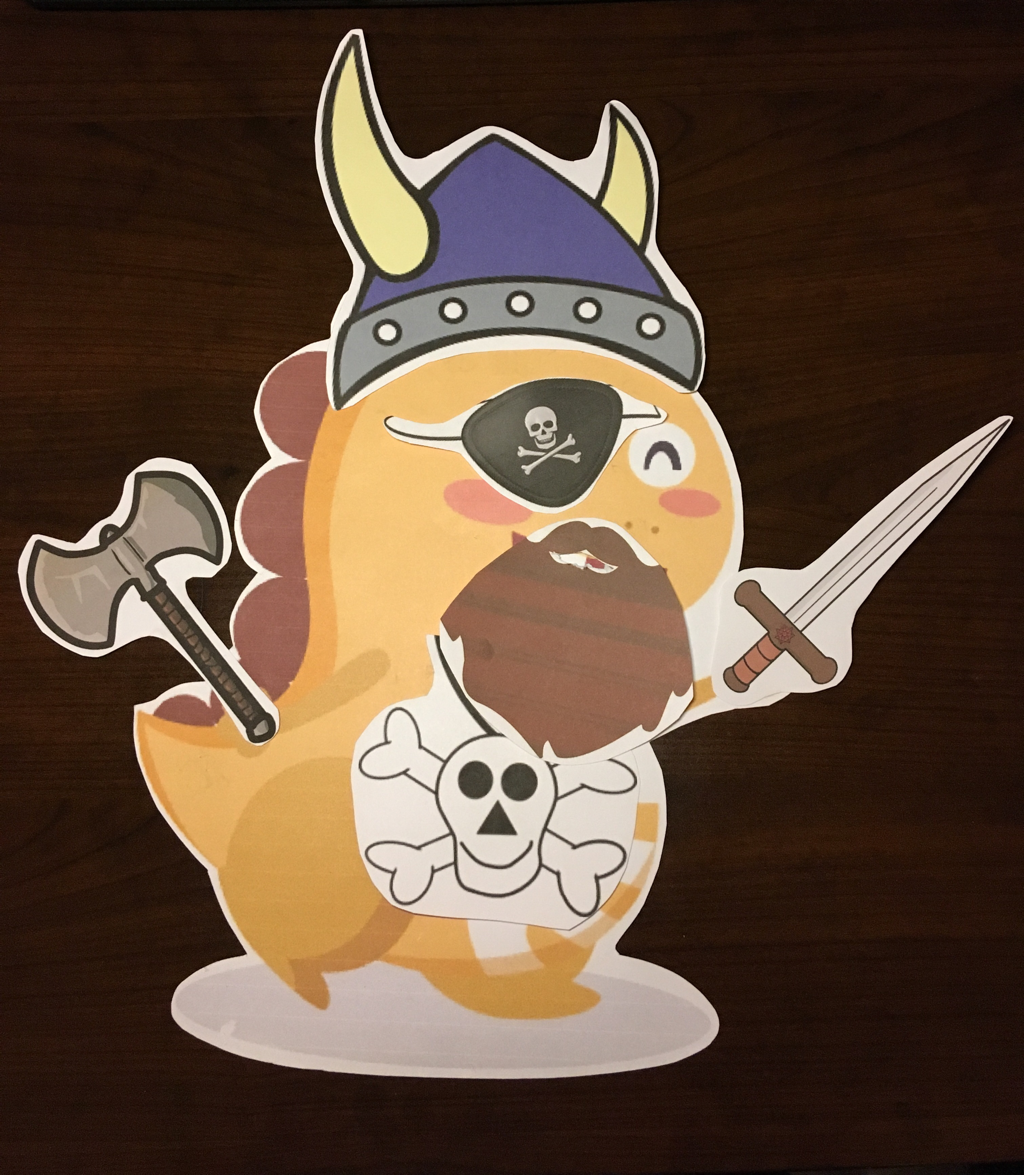
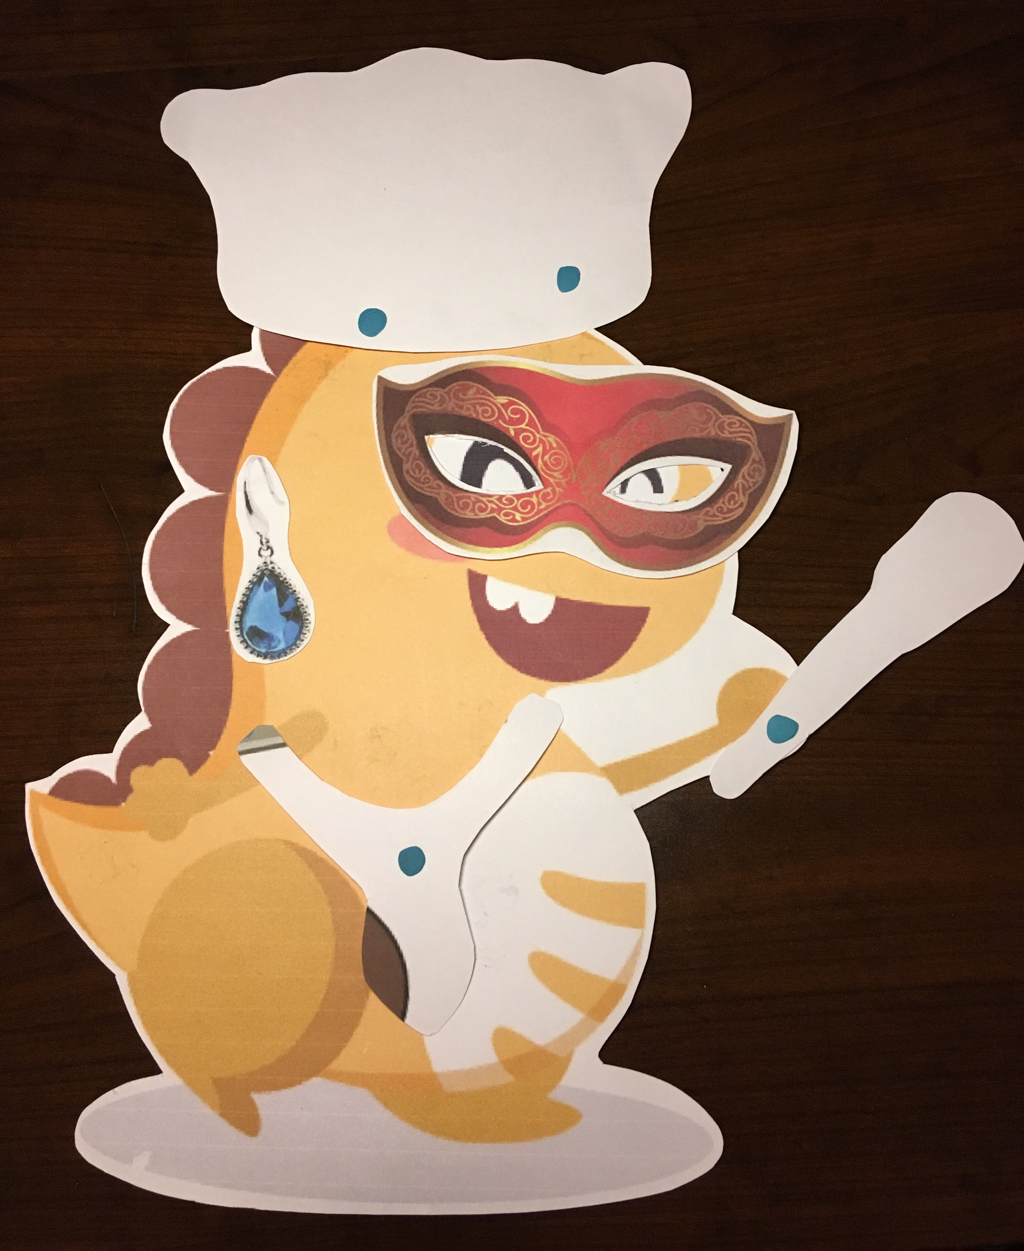
I can make themed costumes like: Cowboy Dino, Pirate Dino, Viking Dino, Mexican Dino, Princess Dino, Cat Dino, Dog Dino, Bunny Dino, Tiger Dino and more. You can mix and match to make a silly costume. This set has facial hair, hand props, necklaces, earrings, hats, masks, animal ears and more! It's the Ultimate Dress Dino. (This does not have all of the piece I use, I started with a couple of files others created and went from there. This is mentioned below.) Don't be afraid to make more for yourself if this file doesn't have the ones you want (I'll provide a link to the file later). The process is easy:
You'll need: Dowloaded images Word Printer Card stock paper Sticky tac (or magnets) Head on over to Google (or the web browser of your choice) and download costume images you want. You can do Chinese New Year themed costume pieces or Christmas themed pieces too. Once you've downloaded all the ones you want, simply paste them all onto Word Doc and change the size for your Dino. Then print on card stock. Card stock will prevent tearing in the future. Then cut. You can laminate if you wish, but I haven't run into any problems since I haven't laminated them.
I stick my costume pieces on with Stick tac. If you can use another method. I will admit, it does get annoying since the tac can flatten out so much a piece will fall off. I found that I have to use two pieces of tac for all of my hats or they fall off. It makes a good laugh, but it's still annoying. Also, don't put a hat and hair on Dino, it's too heavy.
All of costume pieces fit this Dino printed on a 8”x11” paper.
That's great and all, but where's the file to download my ULTIMATE DRESS DINO?!
As I can't legally share this file on my blog (copyright issues and all), I will be sharing this file on the Facebook group page: VIPKID - Videos & Props. You will need to be a member of this group, and an actual VIPKID teacher to access this file. I'm assuming you are if you are reading this post, right? PLEASE USE THESE ONLY FOR PERSONAL USE.
In companionship to this file, you should get the dinodressup PDF and the Dress a Panda Reward PDF (this is where you'll get the sunglasses, crown, and some other fun pieces). Woa, this is a lot! How do you organize it?!
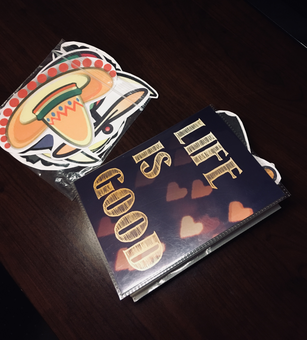
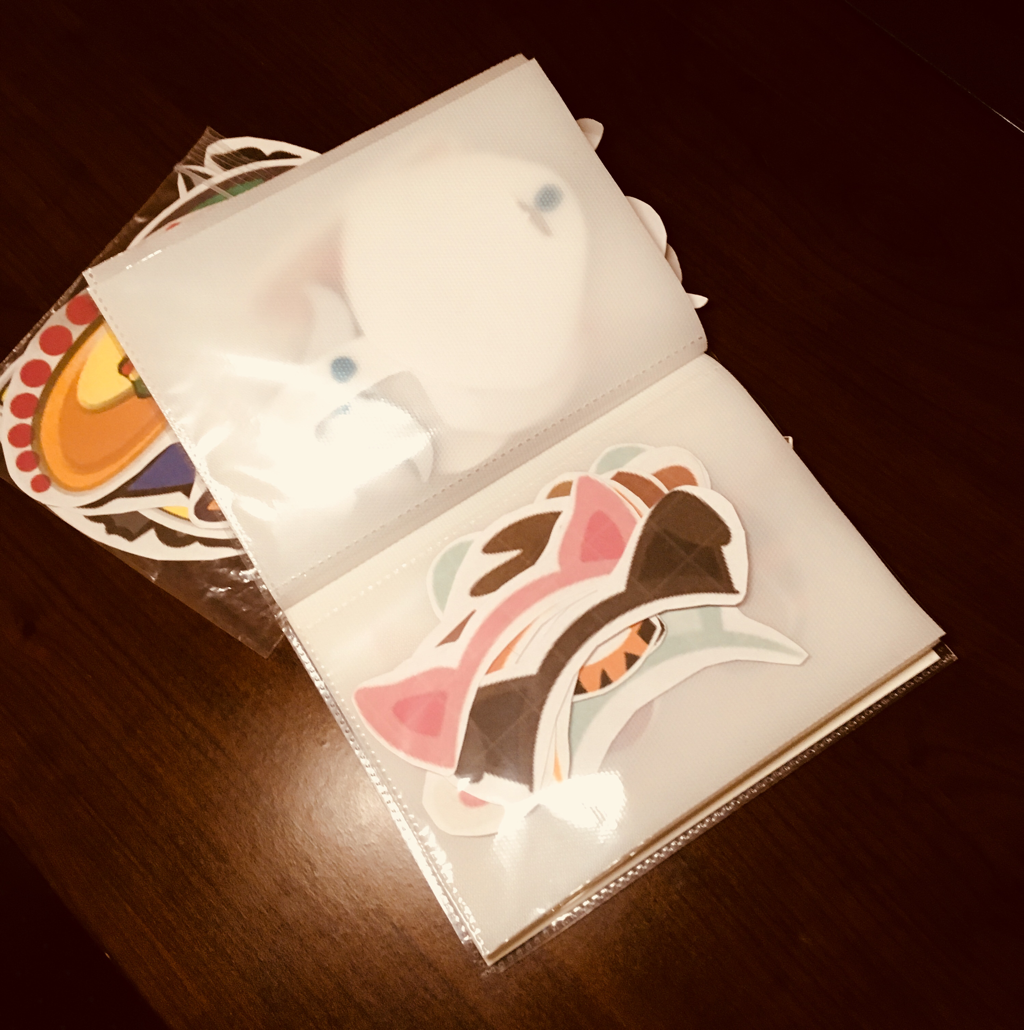
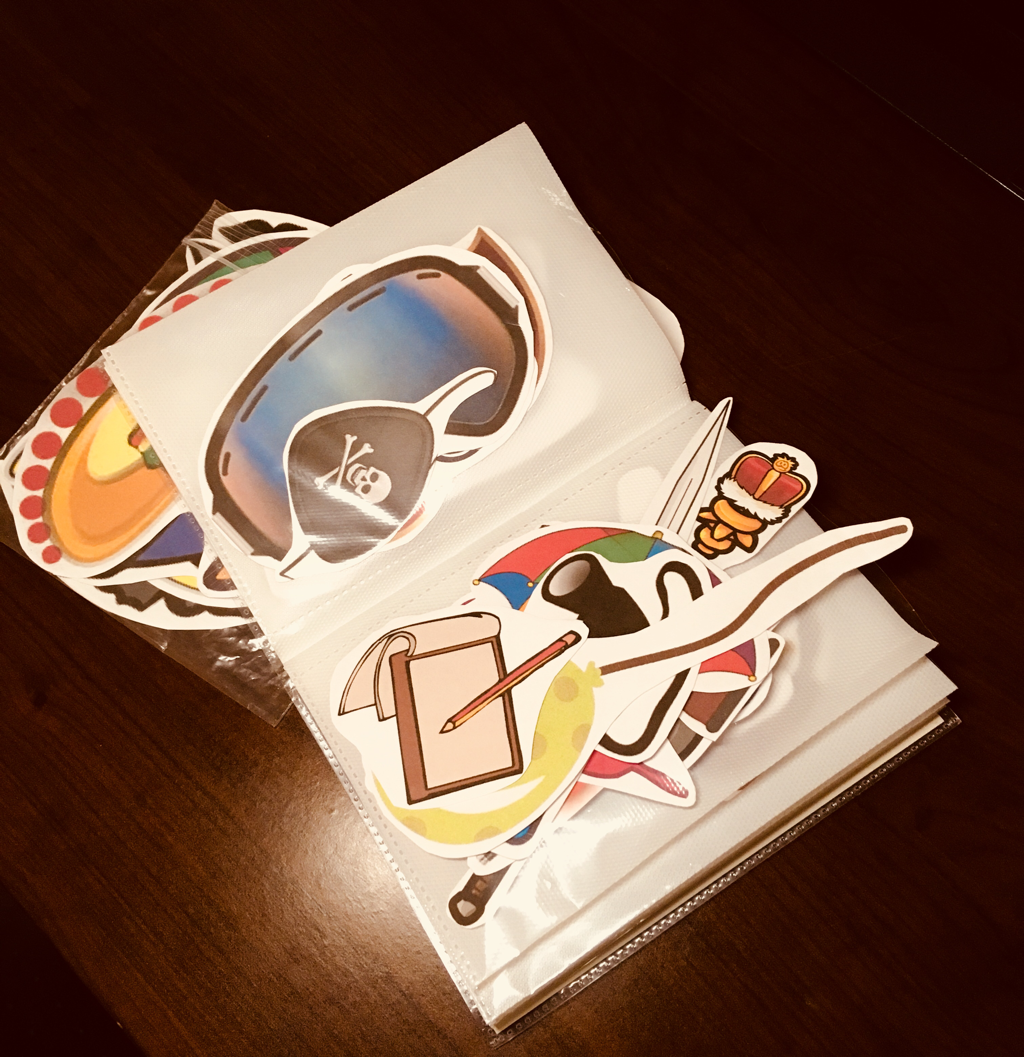
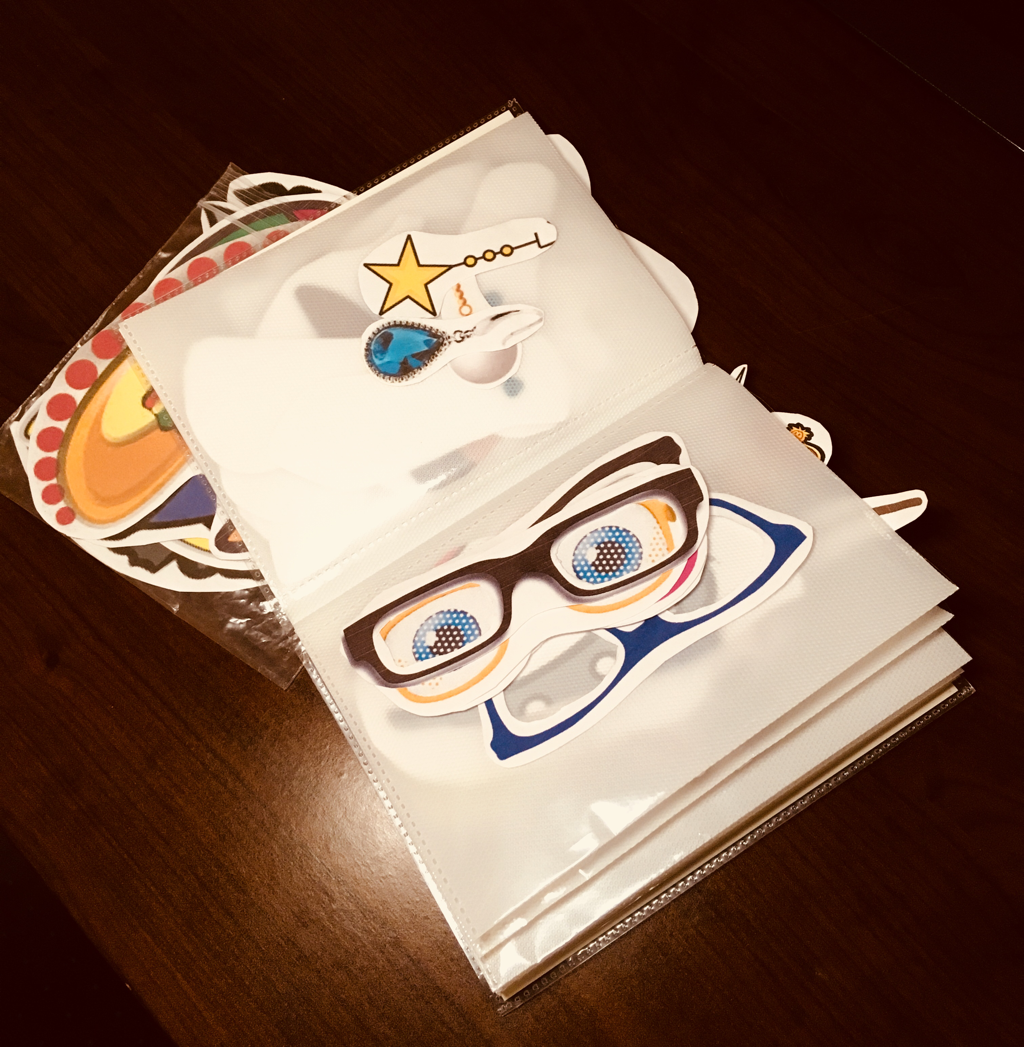
Behold! My photo album!! It’s the perfect organizing tool for these little pieces! Each page has different categories, hats, eyewear, body pieces, hand props, earrings, and mustaches (then more for the animal stuff).
If you’ve noticed, I have an extra bag of hats and hair. I was hoping to get a book 5” wide, but they only have 4”. It’s only a few pieces that are too big so they aren’t a nuisance to have just hanging around in the bag. If you use the Walmart Square Snack bags, those will work nicely (no affiliate links, just sharing what I use).
If you notice on some pages, there are pieces on just one page, or on both pages. I found the trying to put pieces back to back in the book made them hard to get out. This is a no-go for a 25 minute lesson. So each category is on one sheet, not both sides. THOUGH I use the back side for further organizing. Example: I have a ton of glasses and a few special masks. So I keep the glasses together and put the special masks on the back to find it quickly (as you can see above). Can't do this with the hats though...
So...how do you use this in your classroom?
I made 5 clothing categories for the 5 stars. About 5 minutes in, I start with the first piece, usually the hats/hair. I hold up three options and number them for the student. Then they pick the one they like. For my advanced students, I’ll start by saying, “Do you want Dino to be a person or an animal?” Then I show them the 3 options. For a lower level student, I’ll just show the animal ears as an option.
Then I’ll place the piece they selected on Dino, present it, and give them the star. 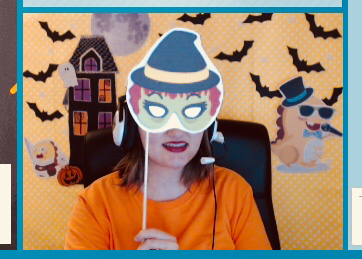
I hang my Dino up onto my background with Velcro. This photo is my Halloween background. If this is your first time reading my blog, I create different backgrounds for my classroom. I don’t think it increases my bookings, but it sure makes class fun for me. If you're interested in my ideas, you can start by reading Backgrounds for you VIPKID Classroom. I have plenty of posts about themed classrooms. Feel free to browse.
For every 5 minutes of class, we pause and Dress Dino. Sometimes we get to do it 5 times, sometimes only 4. It depends on the lesson. At the end of class, on the goodbye slide, I take the completed Dino off my background, and bring him up to the camera and we say bye together. And that’s it! Fun, easy, and for all ages. If you’ve enjoyed reading this post, please follow me on Facebook, Twitter, or Pinterest. The links are below and the top of the page. Warning: this is a craft blog, there will be lots of postings about crafts. See you next time!
P.S. If you think this will be a fun job to join, I’d love to help you through the interview process. You can email me with the mail icon below for any questions. My referral code (for when you apply) is: 04A7J3
Ultimate Dress Dino File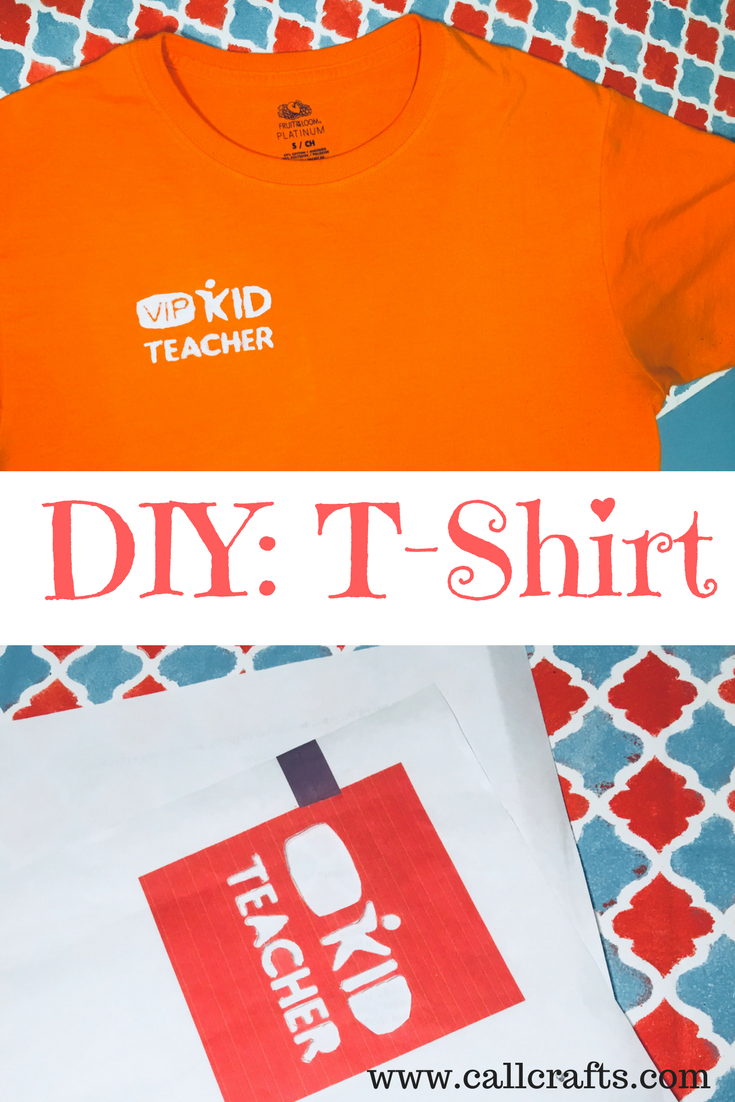
Wow....it's been so long! Sorry guys! I accidentally let the time slip by! I can't believe it's been so long!! Well...I'll probably do two posts this week to make up for it. Can't make any promises though....
Had a super fun time making this project. It's pretty simple, though the cutting take a long time. If you have a cutting machine (Silhouette or Cricut) PLEASE use it. It'll make it look super nice. And then you don't have to buy vinyl (yay for being cheap!!). Here's what you need: Freezer paper Cutting device (craft knife or cutting machine) T-shirt (color and size up to you) Iron and ironing board A piece of cardboard Brush Fabric paint (color of your choice) Get a photo of the design that you want. I chose the VIPKID logo below because I work with this company (I've been so tired this month getting up at 2:30 every day...part of the reason why I haven't been blogging as much). I love this job so much and I wanted to look more like I work with the company. I found this tutorial online with someone else. But this just needs to be shared with everyone multiple times. You know, having the freedom to make any kind of shirt you want? Heck ya! Get your freezer paper and cut it out to 8 1/2"x11". You'll print your design onto the non-glossy side of the paper (the glossy part is what sticks the paper onto your shirt...). I estimated what size I wanted my shirt to be (and it worked!). Unfortunately, with this tutorial, you're limited on what size your design can be. But maybe you can print out multiple parts of you design to make it bigger. Get creative. 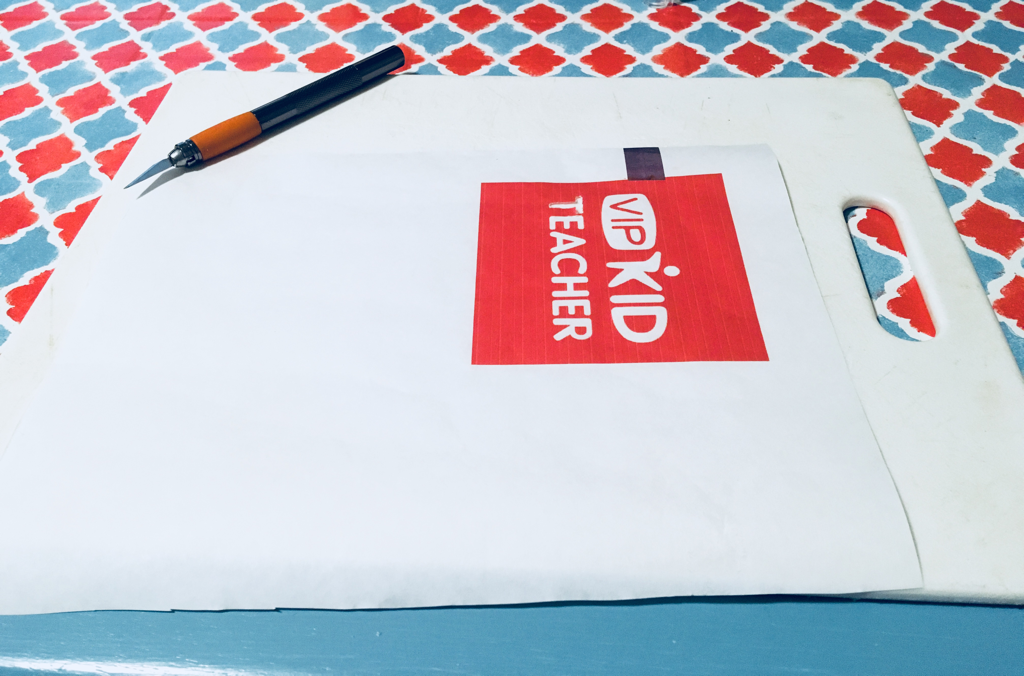
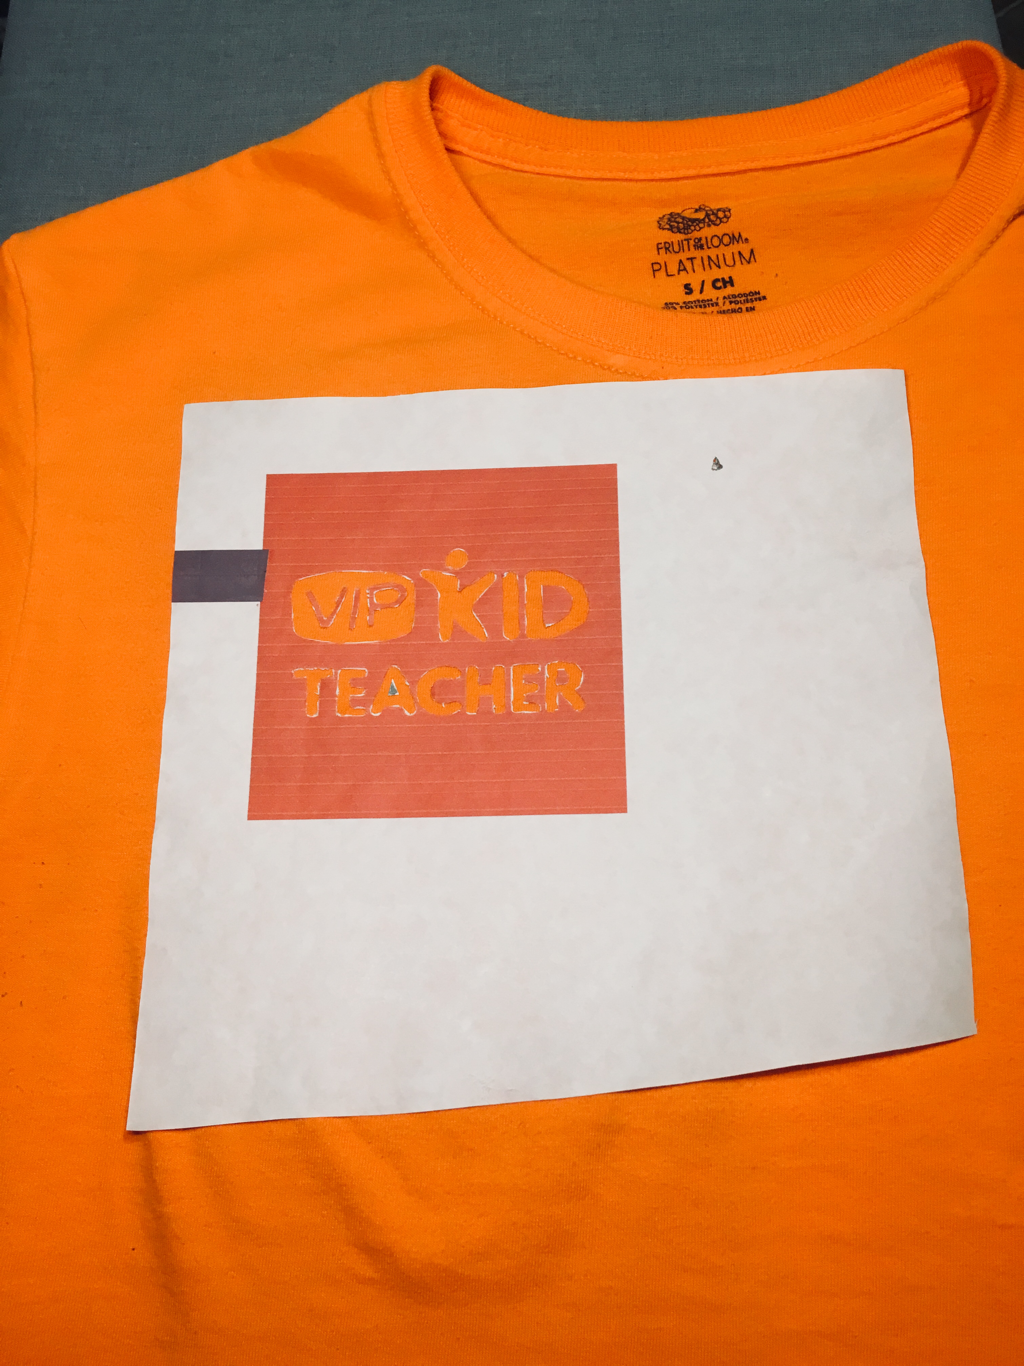
Now, we must cut out the design. This took me about a half hour to do, because I was cutting with my craft knife. In the image below, you see the complete project. Not bad, but definitely looks homemade. Since this logo is only going to be about a quarter inch big on a computer screen or tablet, I'm not too worried about it.
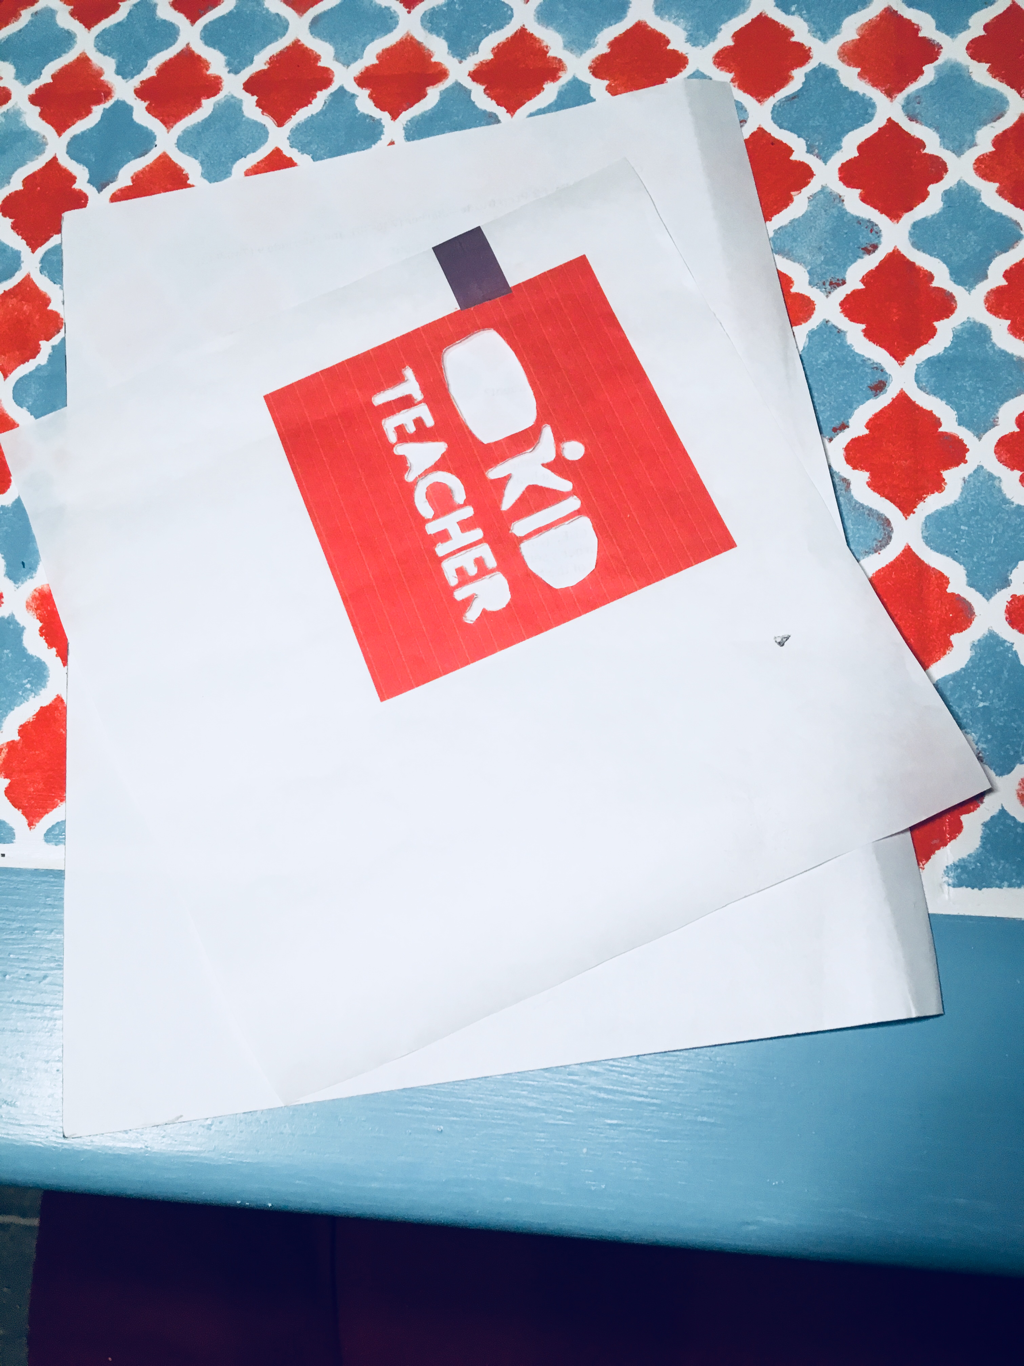
What's not in the photo above is the cut out of the letters in the box or the space for the letters A, R, and D. But you will need to cut them out individually and place them off to the side. I have them, I promise.
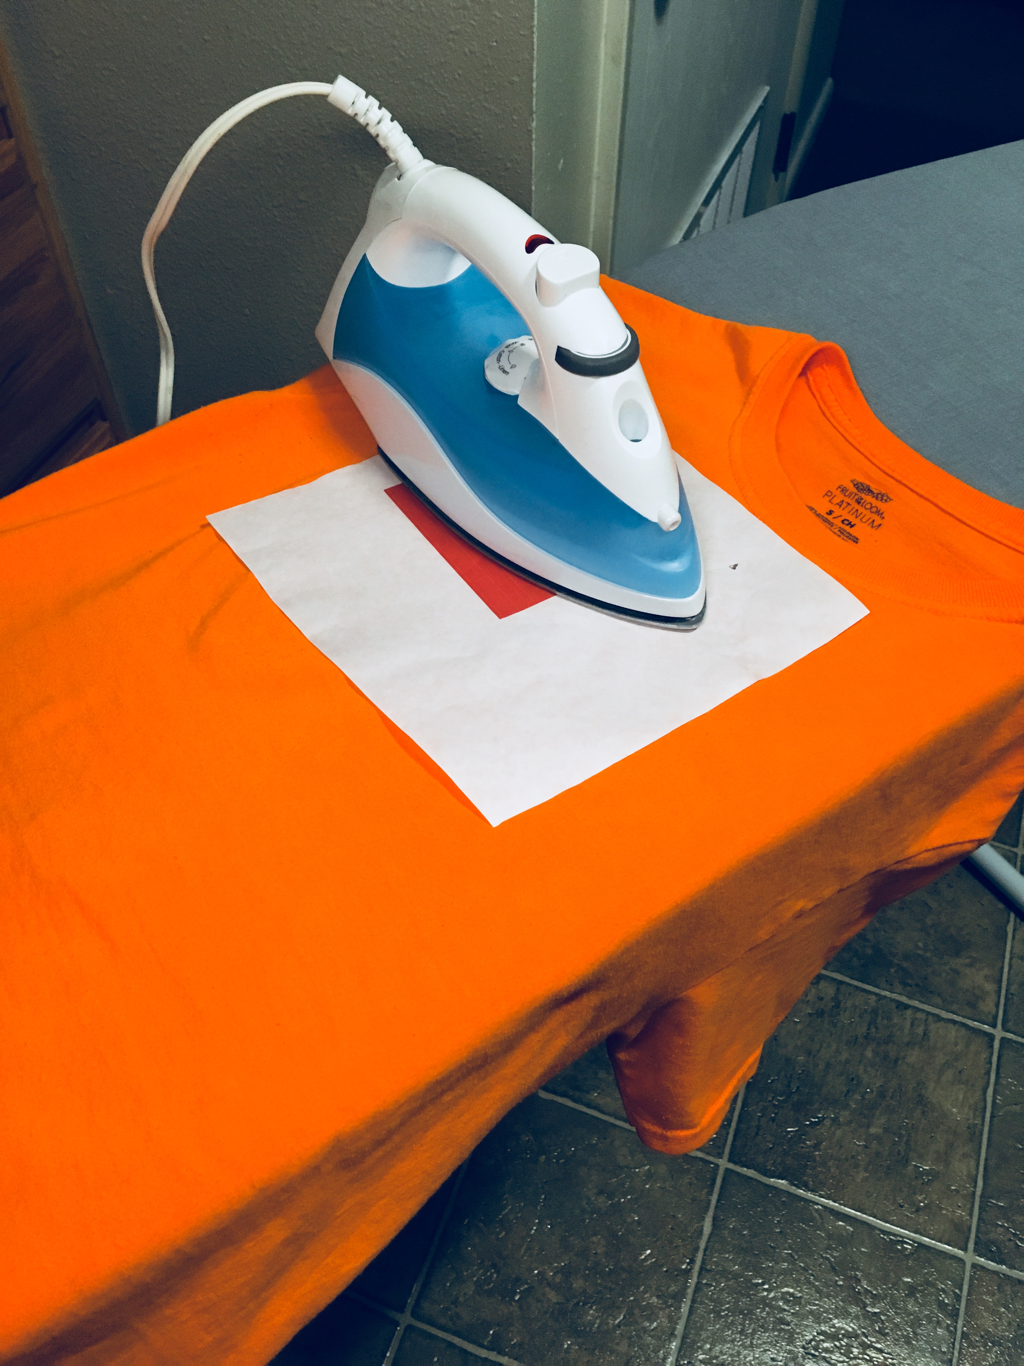
Now, place your logo onto your shirt and iron it on. Get your piece of cardboard (I cut out a piece of cardboard from a box I had just lying around) and place it in your shirt. Probably prevents sticking, but I don't want to find out. I used the wool setting on my iron. Don't forget to put on the little parts that make up the letters like A, R, and D. I set it on the shirt for a minute just to make sure it was on. I didn't want the paint to bleed through the lettering.
Now it is time to paint! On the tutorial I saw before, I read that you only need 4 coats of paint. I did six (just in case, the paint didn't look like it was covering the orange enough). Don't do six. Just stick with 4. I had a really hard time peeling off the paper when it finally got dry. Well, after I finished painting. I let it dry overnight. I did this project pretty late into the evening. It seemed like an easy thing to do. 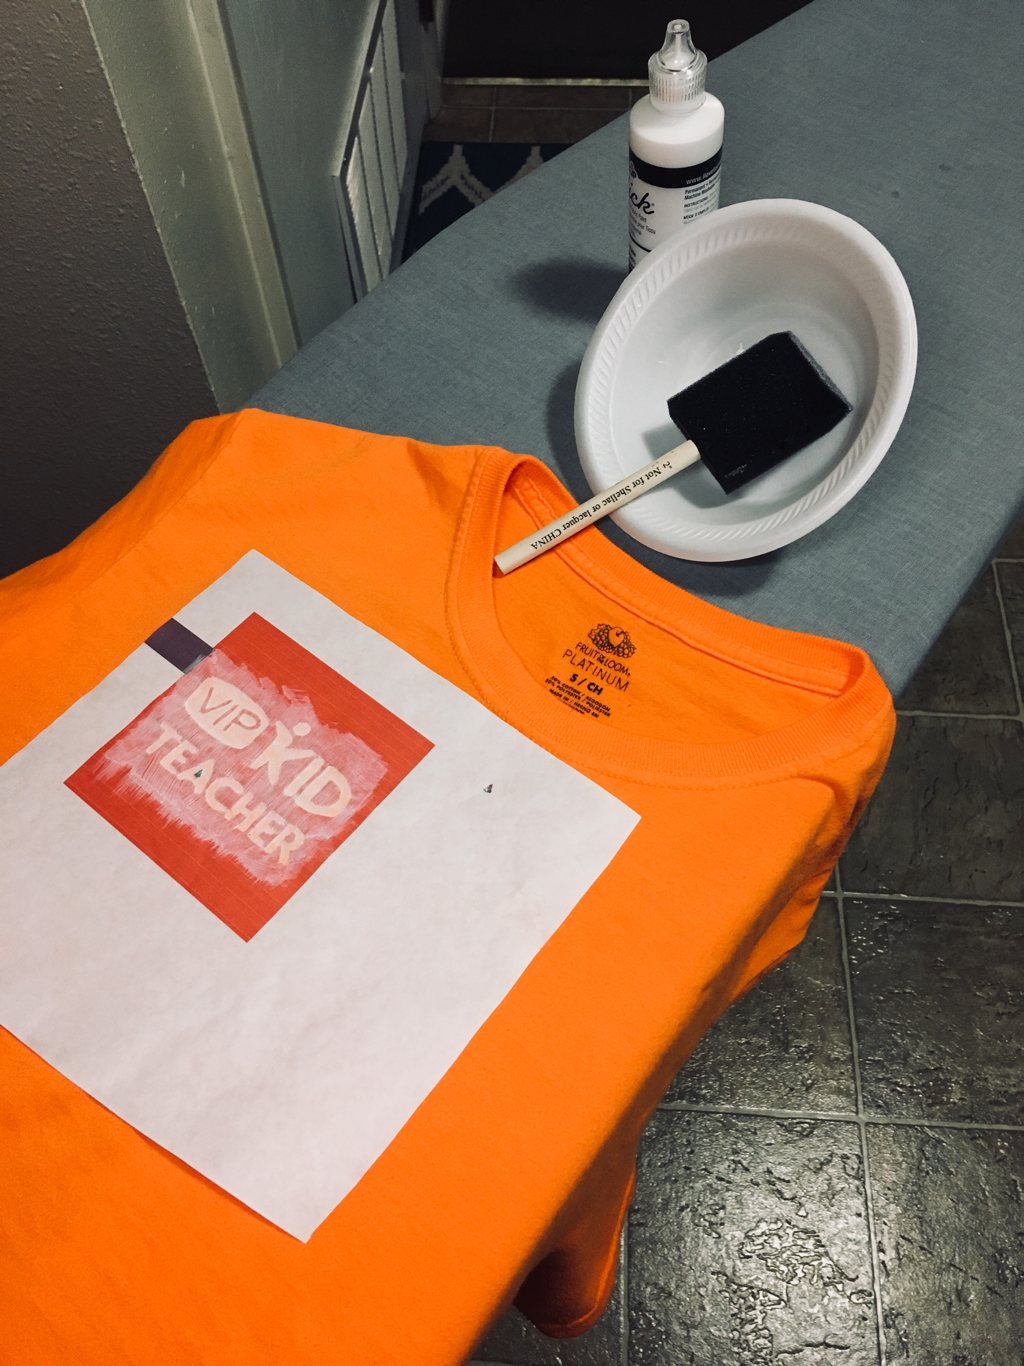
The next morning, I eagerly started peeling off the paper to see my creation. But like I said before, I put on too much paint. It became very hard to peel it off. I ended needing a tweezer to get the little parts. So, learn from my mistake. That's we share things, right? To learn from each other? I hope so...
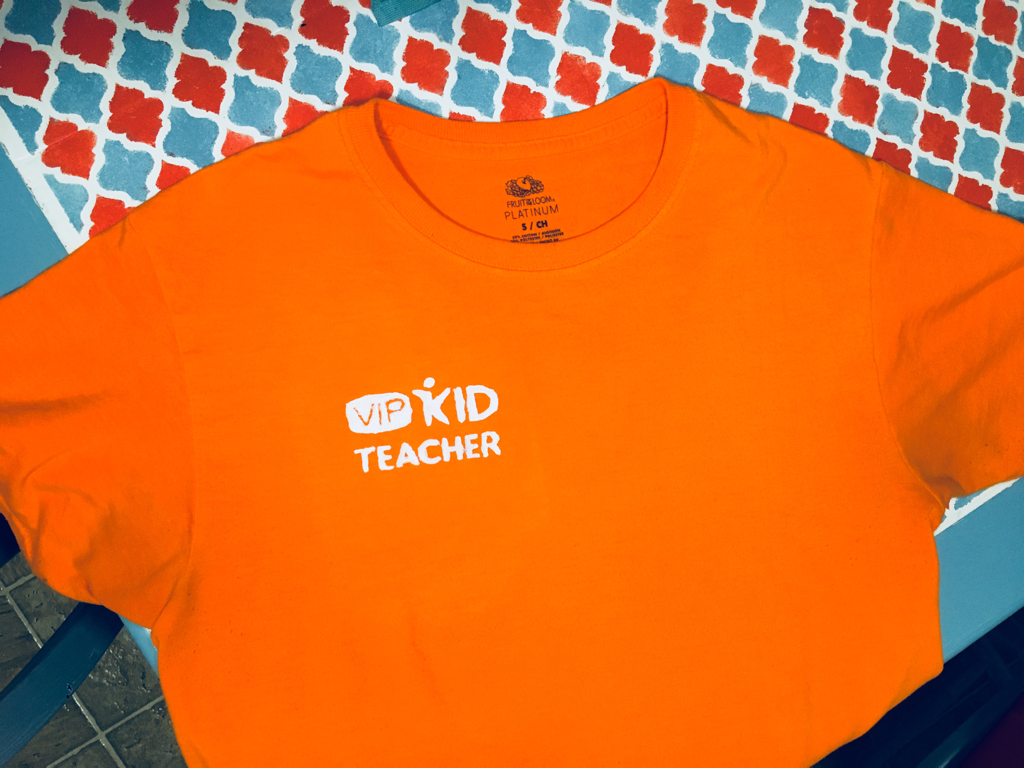
Ta-da! My very own VIPKID shirt! I'm pretty proud with it, seeing this is my first shirt. I learned some things, made mistakes on the way. And now you've learned from them too! Again, I'm not too worried about how homemade it looks because on a computer screen, you can't tell.
Thank for reading! Shout out to Teacher JulieAnn. You can see her tutorial here. Her shirt also looks nicer. This post is not meant to take away from what she wrote, but to add onto it. It gives extra pointers so that your shirt will look amazing. See you next time! 
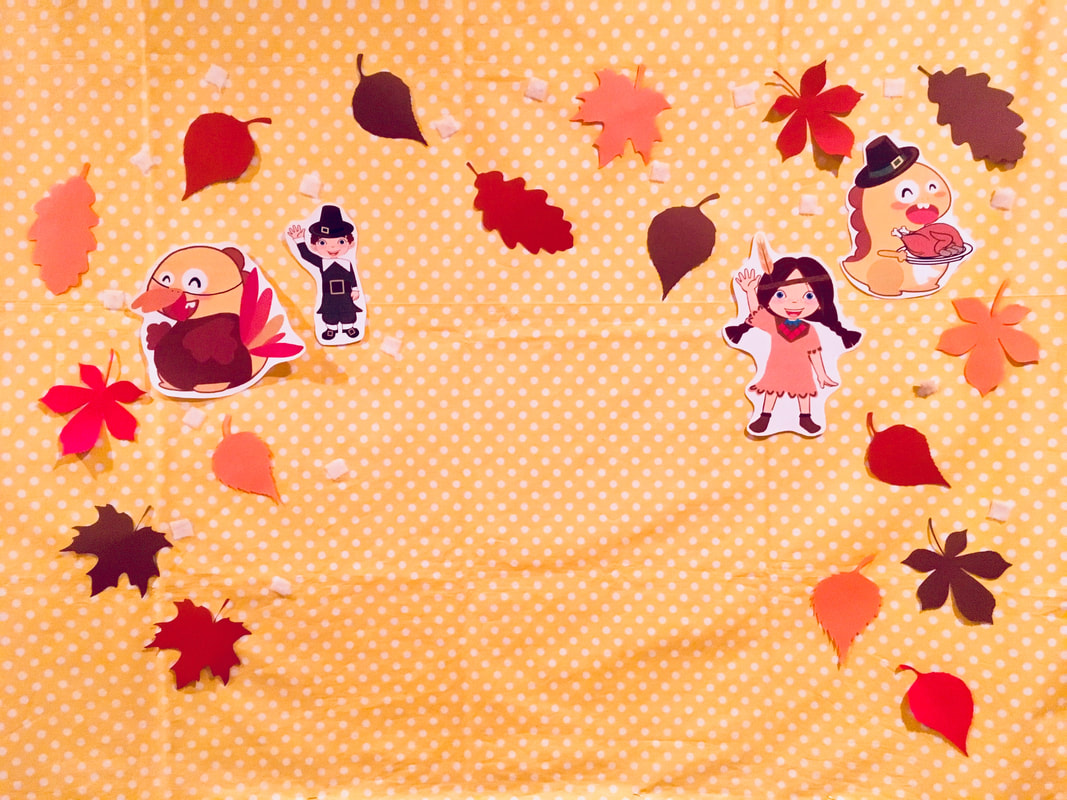
Uh.... Happy Thanksgiving? Somehow, November went by so fast. Before I knew it, it was over and I hadn't posted my Thanksgiving background. Nothing super fancy, I just found a few Thanksgiving VIPKID characters I liked and printed them out.
It was also hard making crafts that month because my printer had decided to malfunction. I've gotten a new printer that I like MUCH better. The leaves are from another crafting site. I've used this template for my Fall Leaf Banner. Click here to go to that post for the link to the template.
I also remembered why you don't use yellow paper on a yellow background (see photo on the right). You can hardly see them! No worries, I had enough leaves to fill the space.
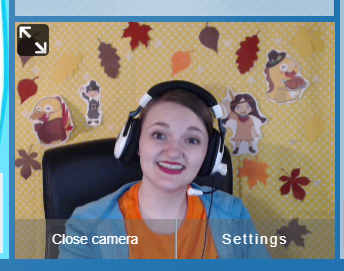
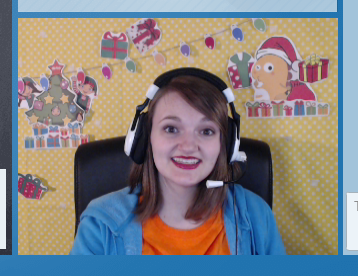
Since my last post, I've also changed how I light my classroom, I really like it! Plus it saves energy. I bought two selfie lights and use a lamp to fill in the background. It looks especially nice in my Christmas background photo below. #nofilter
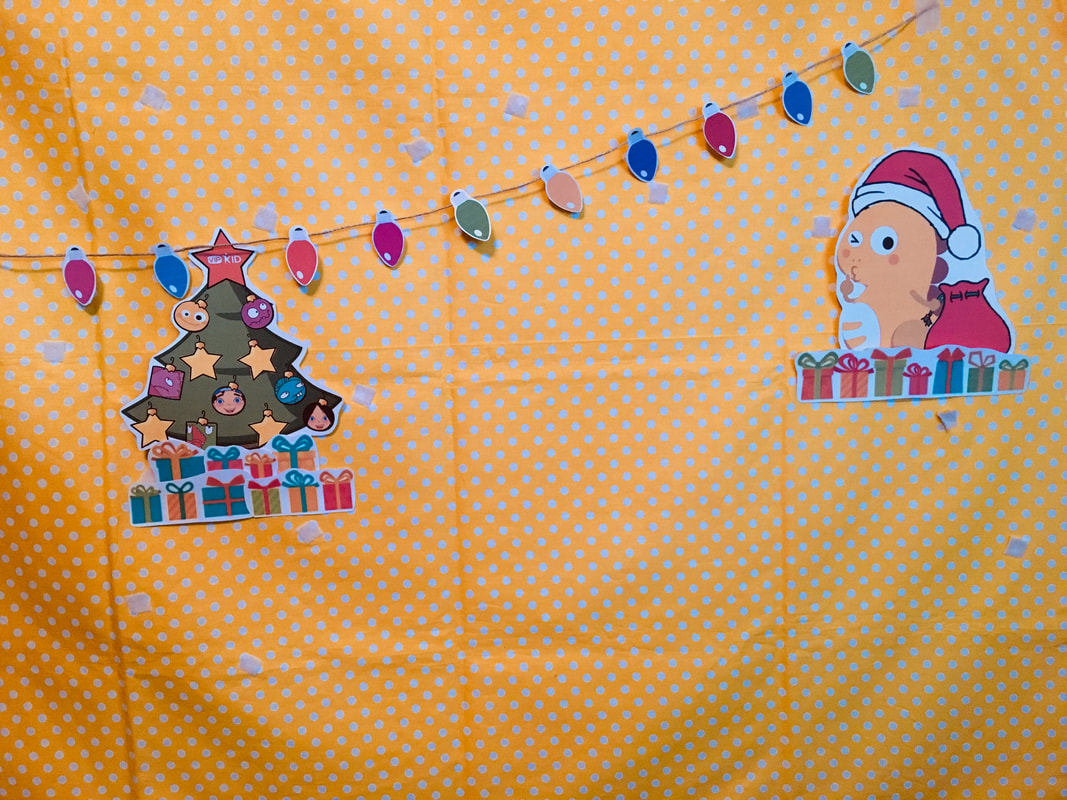
Here is my Christmas background! Shout out to Teacher Sara who created this Christmas tree! I don't know who doesn't love this tree. I was looking through the Christmas Background some of you shared on the Hutong and so many of you used it. It is pretty great. The photo on the left is my first draft. I looked at it from my screen after the first day and decided I needed a little more. So up came Elf Meg and Elf Mike. Then I added my presents.
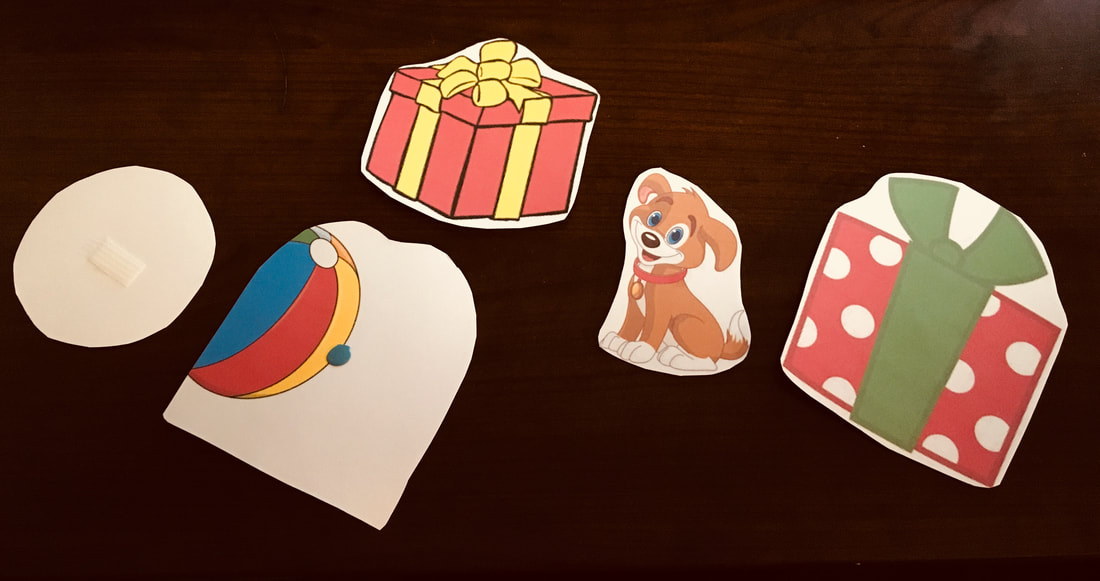
I've honestly become a little lazy with my rewards, my go-to is now Find the Star. I have so many new kids that it doesn't even matter. The kids have fun with it and it's so easy to make sure you're pacing is still on track. But this present reward is something I created for my Super-beginners. The ones who can't count in English yet and know very little English. I have them up on my background everyday as decoration, so my higher level students have no idea there's stuff behind them (ha-ha!).
Hopefully the photo is self-explanatory. I have the printout of the present and a printout of the gift inside. I wanted things that were generally gender neutral. I've chosen a dog, panda, puzzle, beach ball, and a bike. When it's time for them to earn a star, I pull a present off the wall and reveal what it is (in this case, the dog). The little ones like it because for some of these items they already know what the words are. Then I place the gift (in this case, the dog) back on my background and put the printout of the present on my desk. The gift (the dog) has the velcro, not the printout of the present. Merry Christmas VIPKID teachers! Have a wonderful holiday! Good luck on the Winter Bonanza! Please Contact Me if you'd like a copy of the present reward I made. For legal purposes, I can't have it posted on my site. Just promise it'll be for personal use.
P.S. If you think this will be a fun job to join, I’d love to help you through the interview process. You can email me with the mail icon below for any questions. My referral code (for when you apply) is: 04A7J3
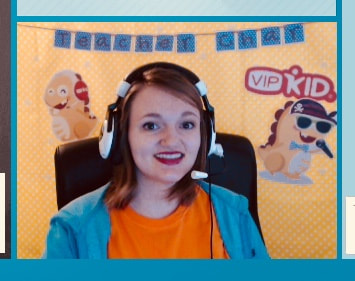
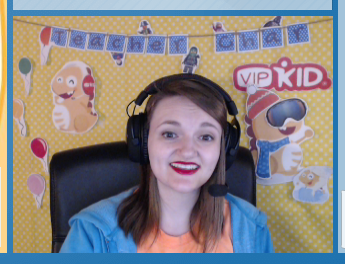
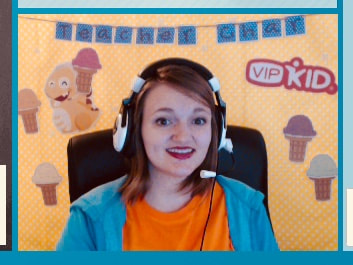
Hey, VIPKID teachers! It's been a while, huh? Sorry about that, it's been one of those months. I never knew I would hate Daylight Savings. Our family is still trying to adjust. Especially me. I did create a new background. I'm thinking it might need a little tweeking, but here it is: Dino's Bakery.

Pretty simple, the fun part is when you add the food rewards. I have several that I use regularly.
Snacks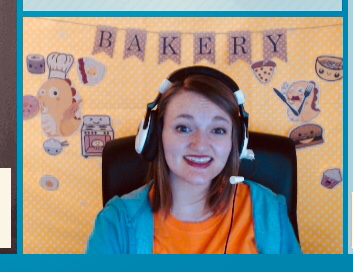
Donuts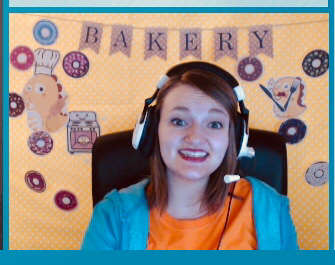
Hello Kitty Food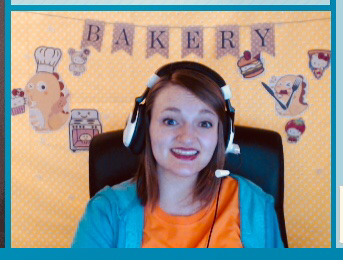
My favorite part is Hangry Dino.
I collected the parts from different sites and sources. The chef Dino and angry Dino is from a Facebook Group that I am a part of, VIPKID-Videos and Props. If you havent, you should join, they have SO MANY printouts. I’ve made some of mine, but now I can find whatever I need on that site. Its especially great for holiday themed Dinos (post coming on that soon...). So thank you all for your contributions, even if you're not named. I printed out the knife and fork from the internet. I just found a photo that I liked. Same with the oven. I’m not at liberty to post these photos on my site for copyright reasons, but you can easily find them online. Last, but not least, the banner. Its so cute, huh? I found it on this site: The Cottage Market It’s free to download, yay!! On the PDF it has one letter on a page, what I did to save paper on printing was take a screenshot of the letters I wanted and then resize them on Microsoft Word. That way, I easily got the size I wanted. After that, you just cut it out, punch holes in the upper corners, and string it on your choice of string or twine. Have fun with your classroom decorating! See you next time! Subscribe if you’d like to read more.
P.S. If you think this will be a fun job to join, I’d love to help you through the interview process. You can email me with the mail icon below for any questions. My referral code (for when you apply) is: 04A7J3
I'm back! Fellow crafters, my apologies for not creating more posts on crafts, it's the holidays you know.
Anyways, onto the post, VIPKID teachers! This was the second theme I created for my classroom, the Cloud Background was the first (feel free to check it out). Out of all the ones I've created, this one is probably the one that gets used the most. I guess it's my favorite... I don't know. I love the Halloween background I created and the one for the Chinese Mid Autumn Festival. Feel free to check those out too.

Making the background itself is very simple. It's just a bunch of stars and a moon I cut free hand from black and white paper. I added the rocket Dino later on when I found him on Facebook (thanks again for sharing, fellow teachers!). They all stick up with tape.
Obviously, I couldn't use yellow stars in a yellow fabric, so I though black stars would be a fun contrast, and I was totally right! The white stars you see came to be on accident. I was printing out the stars on black paper and accidentally ordered two copies instead of just one. Oh well, might as well use them. Turns out they're a fun addition to the background as well. So I've kept them. (Want your own starry sky? Get the printable below!) 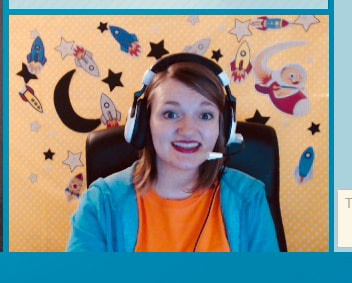
I place the stars in a different spot every time. I use the loop Velcro stuck onto my fabric as a marker for where the stars should go. That way, all the stars are shown on the camera and they fill the background nicely. And these I stick up with tape. I don't move them during my classes, so I haven't had any issues with them falling off. If it ever happens, then I just replace the tape when I finish classes.
The photo you see above is one of the rewards I only use with this theme: rockets. This is how I add variety to my classroom and make sure I don't use the same rewards over and over again. Sometimes I cheat and use the rockets if I feel like the kid will really enjoy it for another theme. But usually, they only appear when I put up this theme. Here are some other rewards I've made:
Aliens
Robots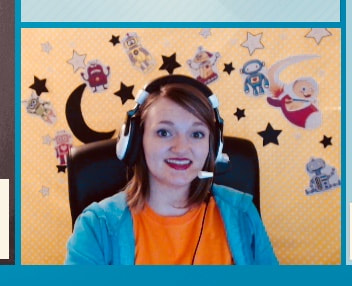
I also have one for Shooting Stars as well for the girls. Right now I'm kicking myself for not taking a screen shot of this reward. I'll share a photo of it on my Facebook Page so you can see what it's like later on.
Here's the link for the stars printable. Click on the title to download it: (Note: here's what I originally made this template for) 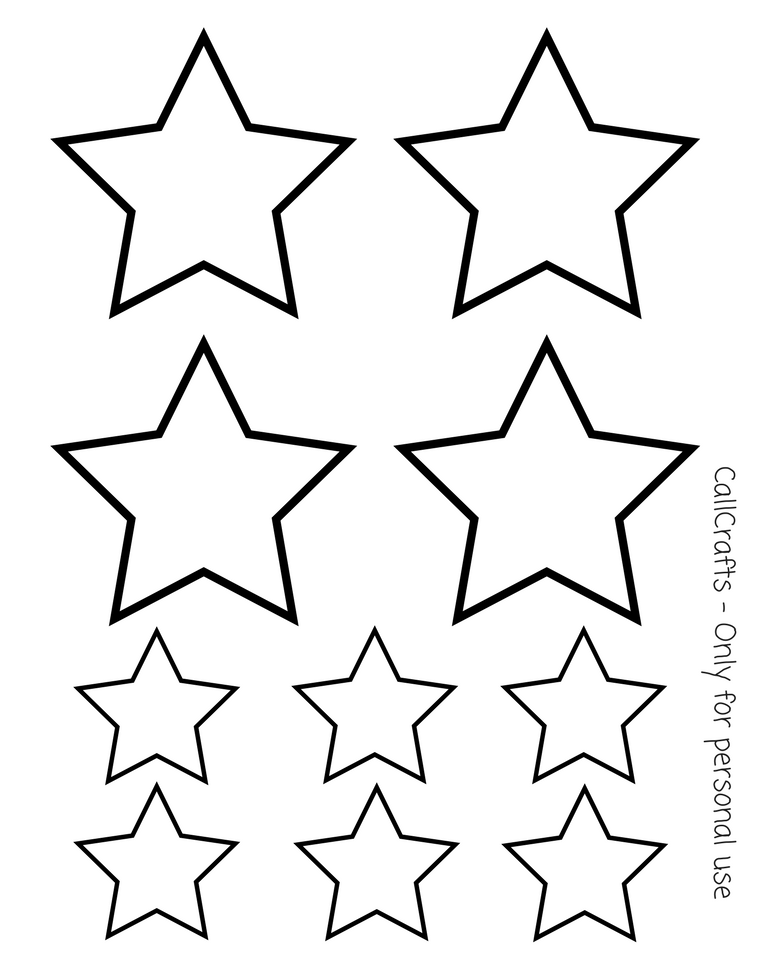
Stars Template
Thanks for reading. If you are interested in getting a copy of the rewards you saw today, Contact Me. See you next time!
P.S. If you think this will be a fun job to join, I’d love to help you through the interview process. You can email me with the mail icon below for any questions. My referral code (for when you apply) is: 04A7J3

This week's VIPKID post is about how I use Velcro in my classroom. I'm fairly new, so I've been partially making up my own way of creating a classroom, and then borrowing things from other people, especially with rewards. One trend I've been noticing is that people use baking sheets to hold up rewards they give in their classroom. If you've read my previous posts, you've seen that there is NO WAY I can use a baking sheet. There's my husband's desk, which has my props, and then the PVC Pipe Stand behind my chair. The only thing my students can see is me and my PVC pipe stand-made background behind me. There's no where to prop one of those up.
Those are great rewards for brand new students or little 5 to 7 year olds, but what about the older kids? Those rewards are BORING. I have loved how we share with each other, it's so great. I hope this is making a great contribution. It's my way of giving back.
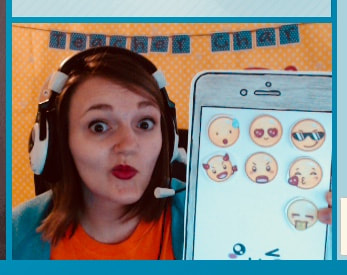
I've read how teachers give their students emojis and stick it onto a phone. Or how they play the game, "Find the Star." I have a few students who LOVE that game. Dress Dino has also been a hit with my kids too. However, most people I know use a cookie sheet to help display this reward. Well, here's how I've overcome that problem for my classroom. Emoji/Phone Reward
Let's start with this one. It'll lay the foundation for the rest of rewards I use. What I've done to display the reward is that I've placed a piece of adhesive hook velcro onto the back of my phone. Like this:
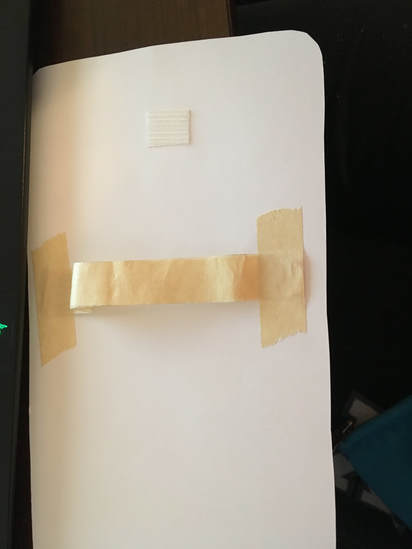
I also made my own handle out of tape on the back to make it so I can hold onto the phone without having my fingers in the way when I bring the reward up close to the screen (I hardly use it though). At the beginning of class and when I'm not using the reward, I'll fasten it on a piece of loop velcro on the fabric behind me. When I'm using the reward, I'll unfasten it from the fabric and bring it up close to the camera so the students can see the details better.
So that's all fine and dandy, but how do you stick the reward onto the phone over and over again? Tape? That's what I used to do. However, I found that over time, the tape would lose it's stick. Or even worse, it would rip off some of the paper from another reward. I have several rewards that just look awful because the tape has ripped some of the image off. But I guess you have to live and learn.
So my friends, I've decided to use Sticky Tack! I've had this stuff since I first went to college almost ten years ago and it's still going! It's pretty easy to take on and off, it doesn't lose it's stick as easily, and it won't ruin your other rewards. 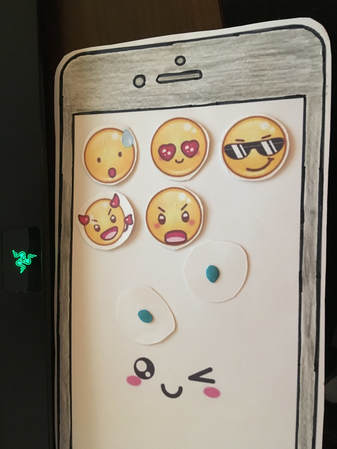
Pretty easy, and very effective.
I use this same concept when I put my "Find the Star" reward together. I cover my "Find the Star" sheet with a sheet protector. Then I cover each image with a numbered square, stuck on with sticky tack, and hang it in the back just like this phone. Easy!
Dress Dino
I love when I get the kids who pick all the crazy items, like the clown hat and the pirate's cap. So fun! As you can see, same principle, Dino has a piece of adhesive hook velcro on the back and it's fastened to a loop piece on my fabric.
All of the costume items have a piece of sticky tack and I simply place it on Dino during the lesson. Because I haven't laminated Dino, he now has some nice blue spots where I usually put the sticky tack (oops, didn't see that one coming). 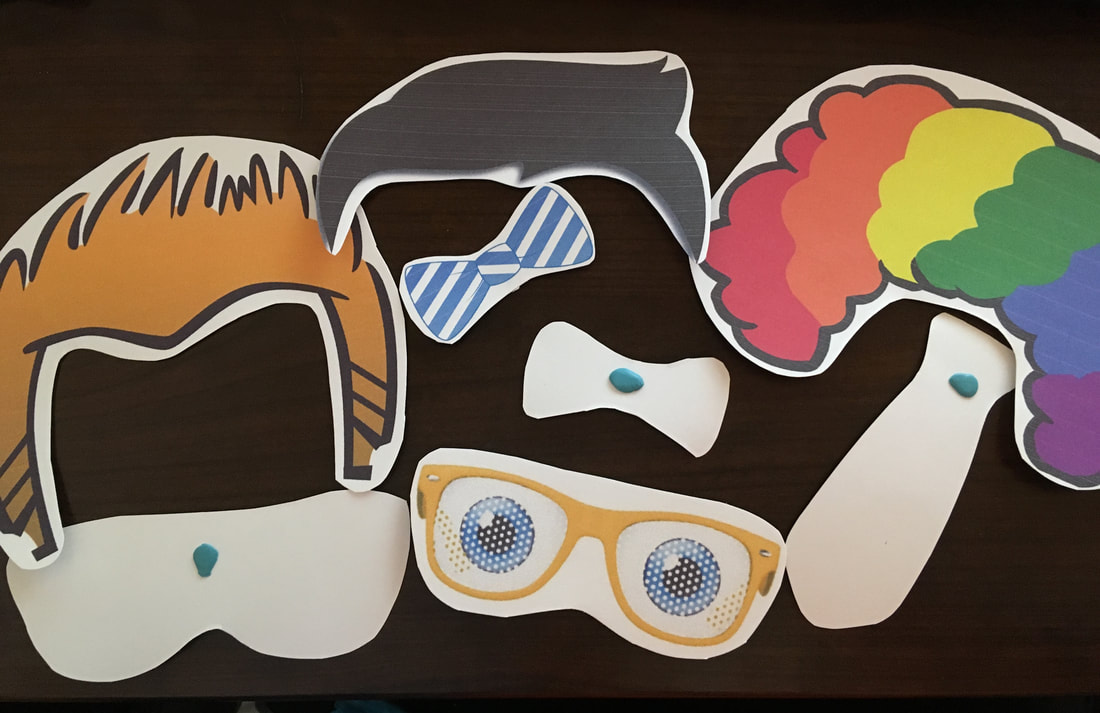
Here's something to keep in mind. Most of the time, one piece of tack will work. But if the item is pretty big, like the clown wig, you'll need an additional piece. I've had the wig fall off on me a few times during a lesson... I normally play it off, but it wastes time having to pick it back up and put it back on.
We dress Dino after I've award a star, it gives them a little break. So with 5 stars, we put on 5 pieces. We start with the smaller pieces (sunglasses, tie, etc.) and save the big ones for last. They don't have as much time to fall off that way. Now, here's a teaching technique I'm going to share. Right now, I mostly teach Level 2 and a few Level 3 students. With their limited English, they don't know the word "dress" yet. So this image you see below is what the kid would see at the beginning of class (except I'm waving hi): 
Then when I tell them what they get to do today, I unfasten Dino from my fabric and bring him up to the screen saying, "You get to dress Dino!" And they see Dino in his costume and think, "Oh, that's cool. Dino looks funny." But then, I take off the pieces and that's when they understand, "Oh! We're putting stuff on him! That's cool." I've seen several light bulb moments happen when I've done it this way. Then they're excited for the reward.
Recently, my technique is that we "build" the background with the rewards. The background starts with just the base decor and is built from there. In this case, you see the end from the beginning. I also use this technique with my Emoji/Phone reward as well, but I usually just have one on there from the beginning and keep it up there for the entire class. Well, that's it, folks! That's my classroom set-up. As I've stated before, I don't know if this has affected my ratings. I haven't had a parent comment on my background in the feedback. I have had parents say that the class has a fun atmosphere, and I feel how I've made my classroom background look and function has something to do with it. But like I've heard from someone on Facebook about bookings, "personality and talent win through in the end." I think that's very true. We're all our own individuals. If this is something that interests you and would like to read more posts, subscribe to my email list below. Or like my Facebook or Pinterest page (the links are also below). I generally post a new VIPKID-related craft once a week. Next week, I'll be sharing my Starry Sky theme and rewards I've created for this theme. See you then!
P.S. If you think this will be a fun job to join, I’d love to help you through the interview process. You can email me with the mail icon below for any questions. My referral code (for when you apply) is: 04A7J3
Want more tricks? Check out my new post: My VIPKID Classroom Upgrade. You'll love it!
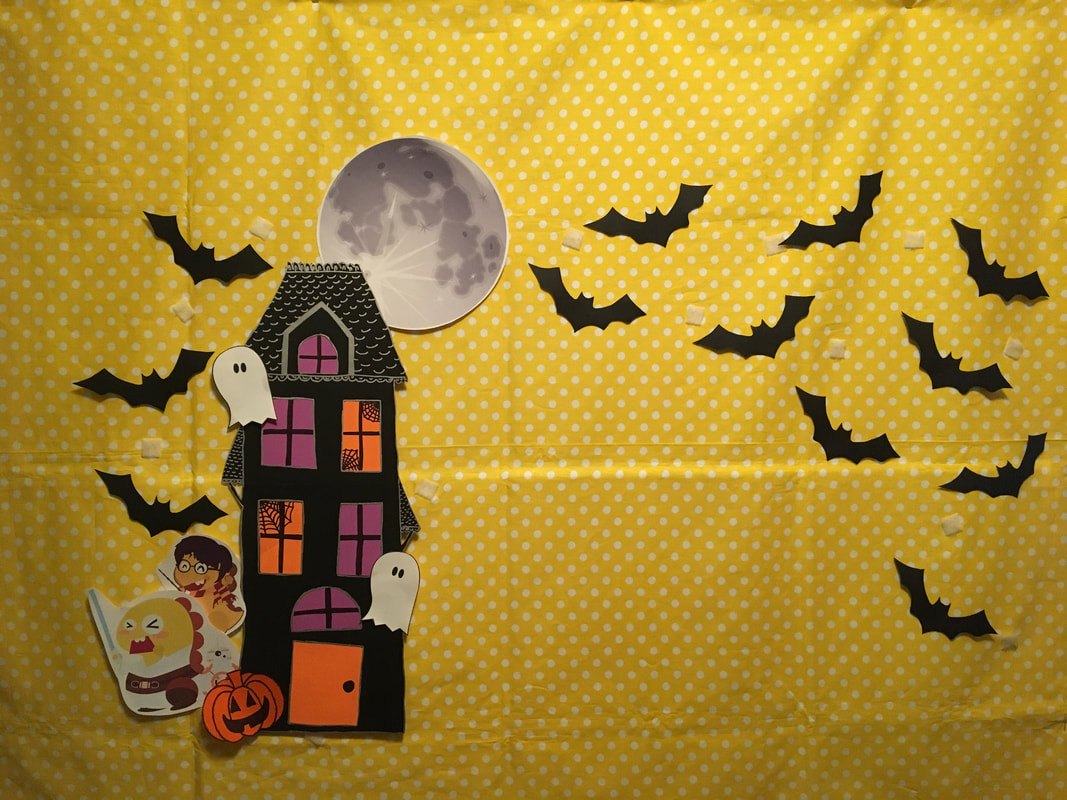
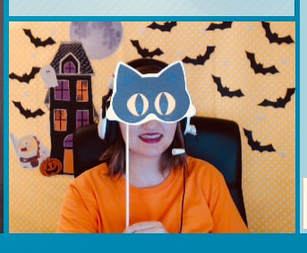
Happy Halloween everyone! What a fun time of year. All the decorating, treats, parties. It's so great! I've heard about VIPKID teachers dressing up for their students on Halloween, which sound so fun! I decided to add my own fun to my classroom by creating a special background for the holiday.
Ta-da!! I actually tried it out today for my classes, and I LOVED it. If you look at the moon, it's the same one I used for my Mid Autumn Festival background. The bats were from another project I've done recently. If you go to DIY Decor: Halloween (Part 2), you'll find the link to the site where I got these specific bats from. You can also google bat template as well if that's easier for you.
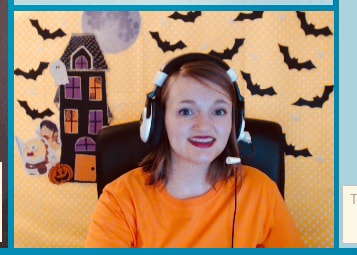
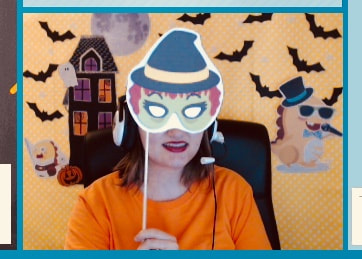
In addition to this fun background, I also found a couple of masks from a Holiday Incentives PDF file someone shared with a ton of holiday rewards on them. So what I plan on doing with my regulars is surprise them by wearing these masks right when I open the screen.
Yea, I know, I probably should cut out the holes for the eyes. I'll get to it later. But it's a fun little thing I've added. I like good surprises, and I like giving good surprises.
In the photo on the left, you see my Dress Dino reward. What I do at the beginning of class is I put a few things on Dino, then I bring Dino up to the screen and take off the items. That way if a student doesn't know what "to dress" means, I've demonstrated it at the beginning of the lesson. So far, its been successful with my older students (thank again for sharing friends!). This Dino is sticking onto the fabric using velcro. Next week, I'm going to show you all my tricks with velcro. If you're like me and don't have somewhere to place your cookie sheet for the student to see, or if you're finding that magnets are expensive, this is a great post! Below is another reward I used today in my classroom, all hung up with velcro. 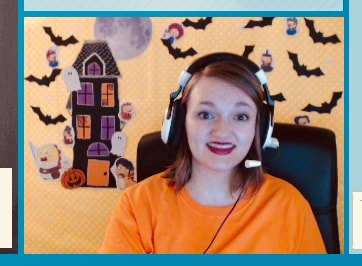
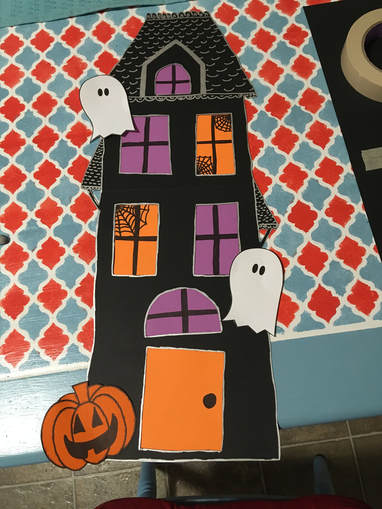
The Haunted House
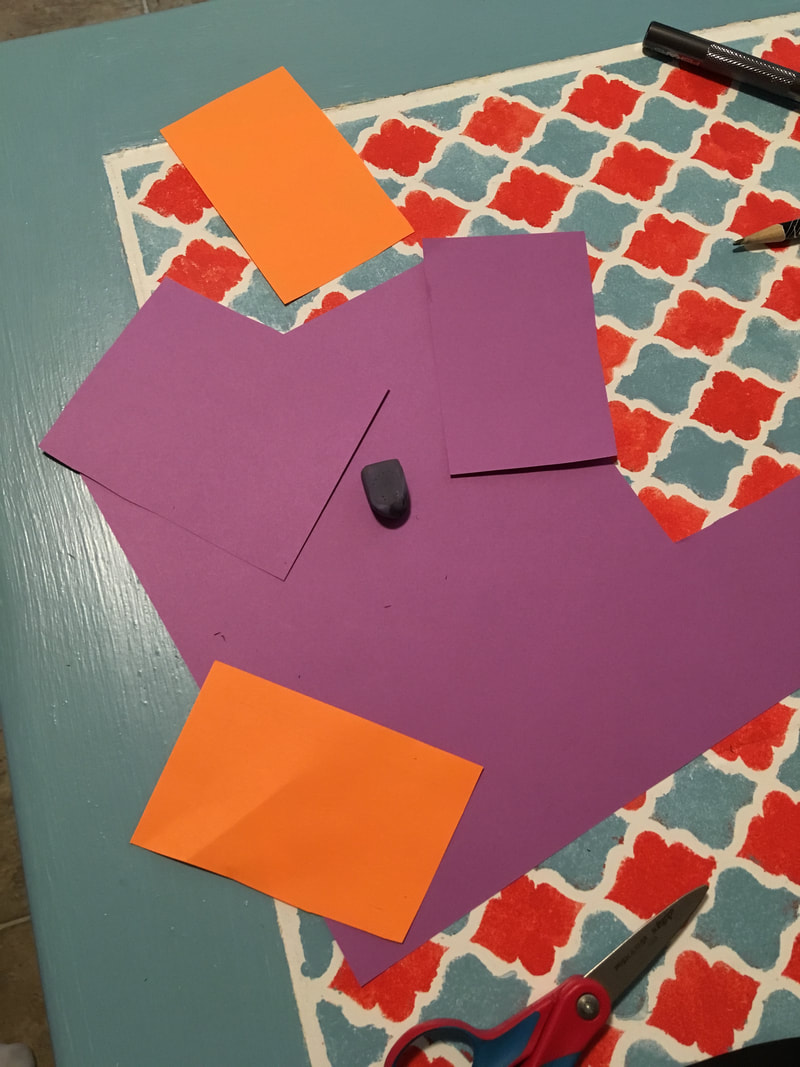
This project took a couple of hours to put together, but it's totally worth it. Very first thing I did was google cute Haunted House clipart. I was looking at different types of houses to see what kind of look I like and what fitted with what I needed. I realized that I needed something tall and skinny for my background, or else my chair will cover up most of the house for most of the lesson. So after finding a house I like and suited what I needed, I set up the papers I needed for the house and drew the template by hand.
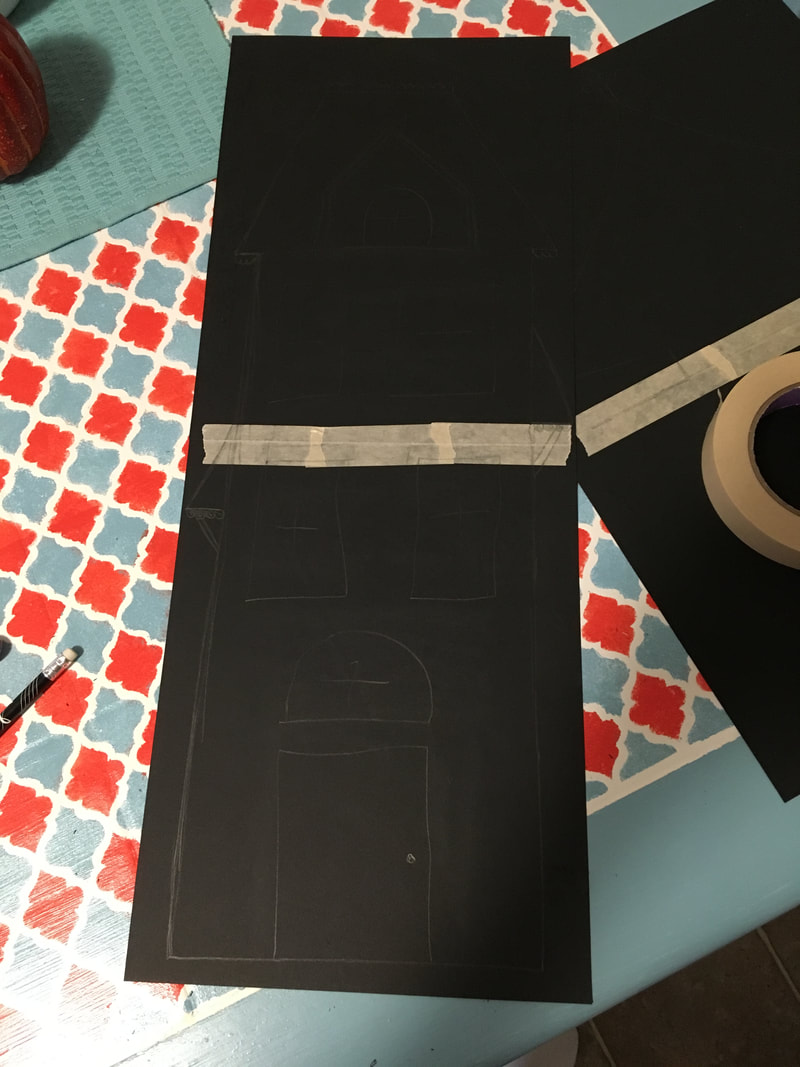
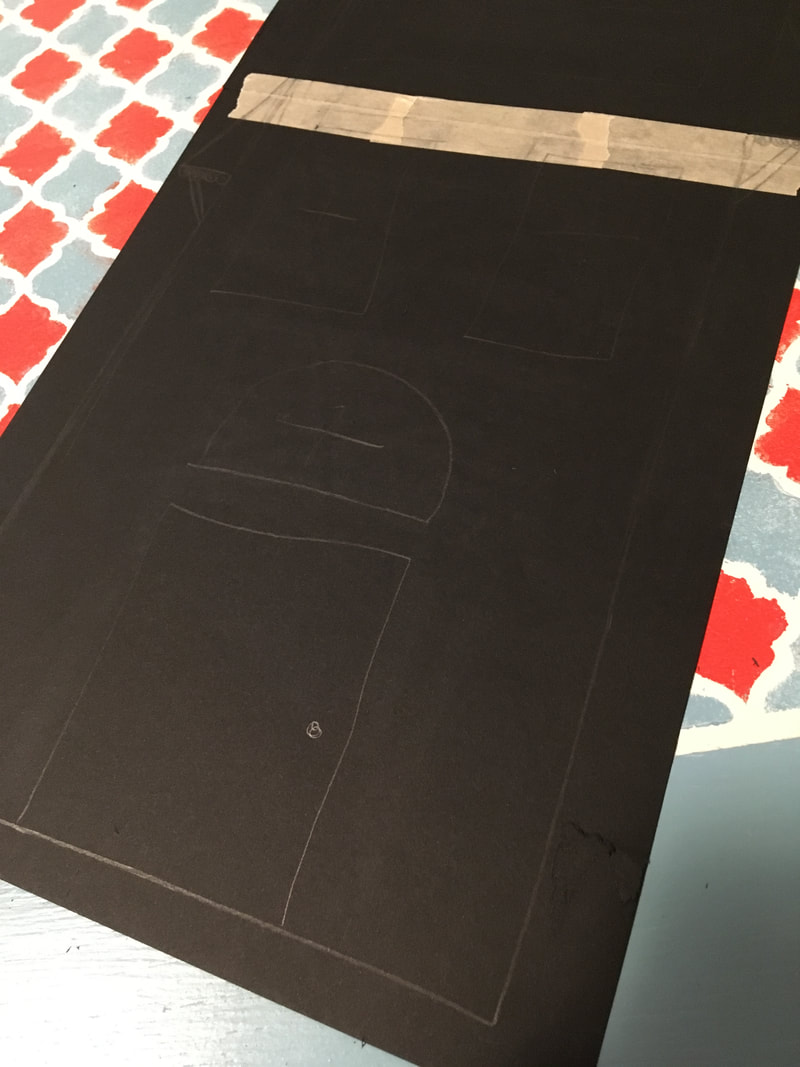
Trust me, I am not an artist. What I love about making Haunted Houses is that it's meant to look funky and wobbly. So any artistic level can make a haunted house. I kept the photo of the house next to me for reference as I drew it out.
As you can see, I took 2 black papers and taped them together vertically, creating a tall and skinny house. I did not tape or glue the papers on the front together. Later on, you'll be using plenty of tape that it won't need it. After this is all done, I cut out the house. 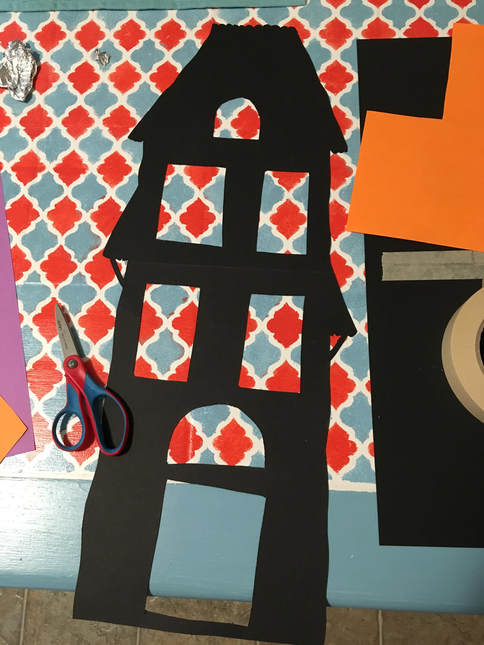
I used a craft knife to cut out the windows, door, and bar under the roofs. Craft knifes take some practice to cut perfectly straight lines. Luckily for us, this is a Haunted House. It doesn't matter how straight the windows and door are!
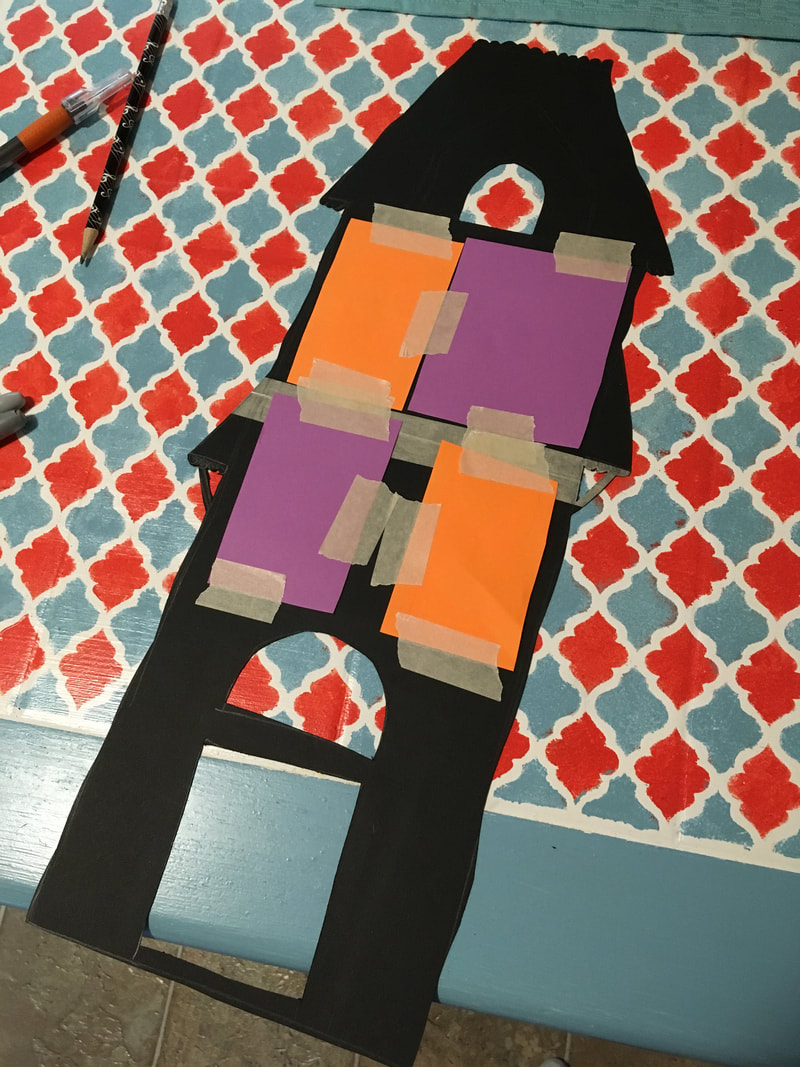
While you have the option of leaving the windows be and color them in yourself. I decided to add a little color to my house and make the windows and door different Halloween colors. I saw this from another haunted house as I was doing my research and LOVED it. You grab the colors you want and cut the paper to the size of your windows. To get the size I needed, I took the paper and lightly traced the edge of the window onto the paper. Then when I cut out the paper, I made it bigger than the trace I drew from the house. Then I taped it onto the back of the house.
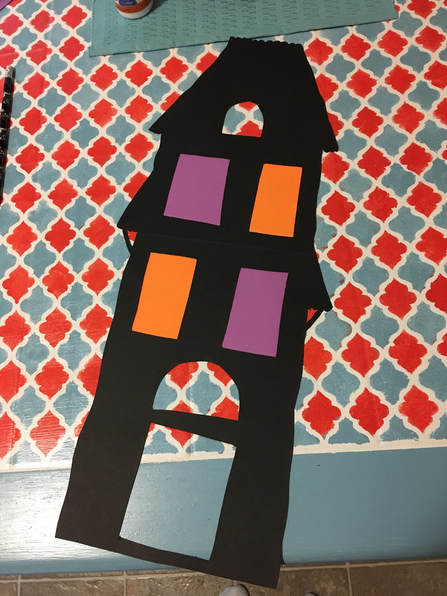
So far, very simple. The longest part of this project is coming up with your design and then adding the decorations. I used a silver sharpie to draw the tiles. I drew a line because I wanted to make a distinction between the house the roofs on the side of the house. From there, I just decided to draw an outline for the entire house, including the windows and door. I drew on the spider webs and bars to make the window pane. You can do this before you tape the windows onto the house, but I did it afterwards. Either works.
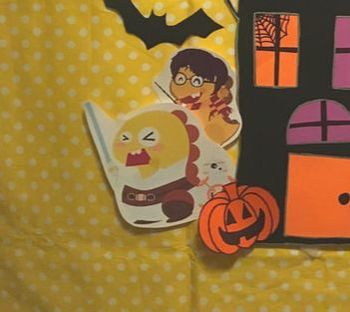
I added the pumpkins and ghosts to add to the overall cuteness of the house. I already had them from previous projects. You can find the link to download a printable for the ghosts on this page. So there you have it, my adorable Halloween background. I have several rewards created just for this background, Dress Dino, Dino costume, Halloween Hello Kitty, and I'm going to create a candy reward for my 5 year old beginners. All of these you can find on Prop and Reward Facebook groups. Because they're not my creation, I do not feel I can share them on my site. I'm sure you can find them. Thanks for reading! Like my Facebook or Pinterest page. Subscribe below if that's your thing. Again, next week, I'm going to be talking about my tips and tricks for using velcro for those classrooms where you don't have another surface to prop up your rewards. Stay tuned!
P.S. If you think this will be a fun job to join, I’d love to help you through the interview process. You can email me with the mail icon below for any questions. My referral code (for when you apply) is: 04A7J3
Welcome back, VIPKID teachers! I hope last night's frenzy treated you just as well as it treated me. I FINALLY have a completely booked schedule for the next two weeks! Whoot whoot! Took me 6 weeks to get there, and here's hoping it stays that way!
Anyways, I'm assuming that if you're reading this post, you've probably already read my other two background posts: Backgrounds for your VIPKID Classroom and Mid Autumn Festival Background. If you haven't read those posts, be sure to check those out for some inspiration. Today's post is a little more about the nitty-gritty details of it's development. Plus, I'll be revealing some of my newest background projects (!!). Before we continue, I wanted to make this disclaimer: I am not advertising in any way. I have no idea if this set-up has affected my booking rates in any fashion. This is something that I have come up with and I wanted to share it with you. For me, it keeps the classes interesting. I love decorating and making decorations; it's a creative outlet for me. All I know is that in my 40 days, I've had consistent bookings. But it just might be my adorable personality...no idea! This is also with Level 2 students in my mind, I have no idea what older kids would think... 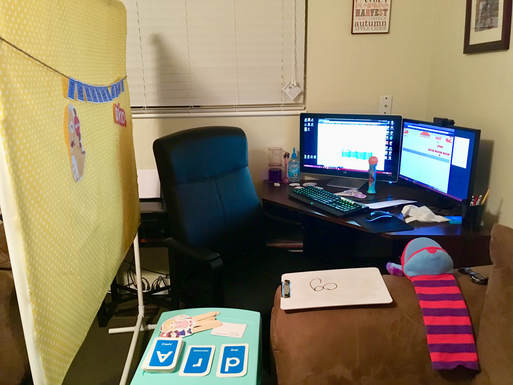
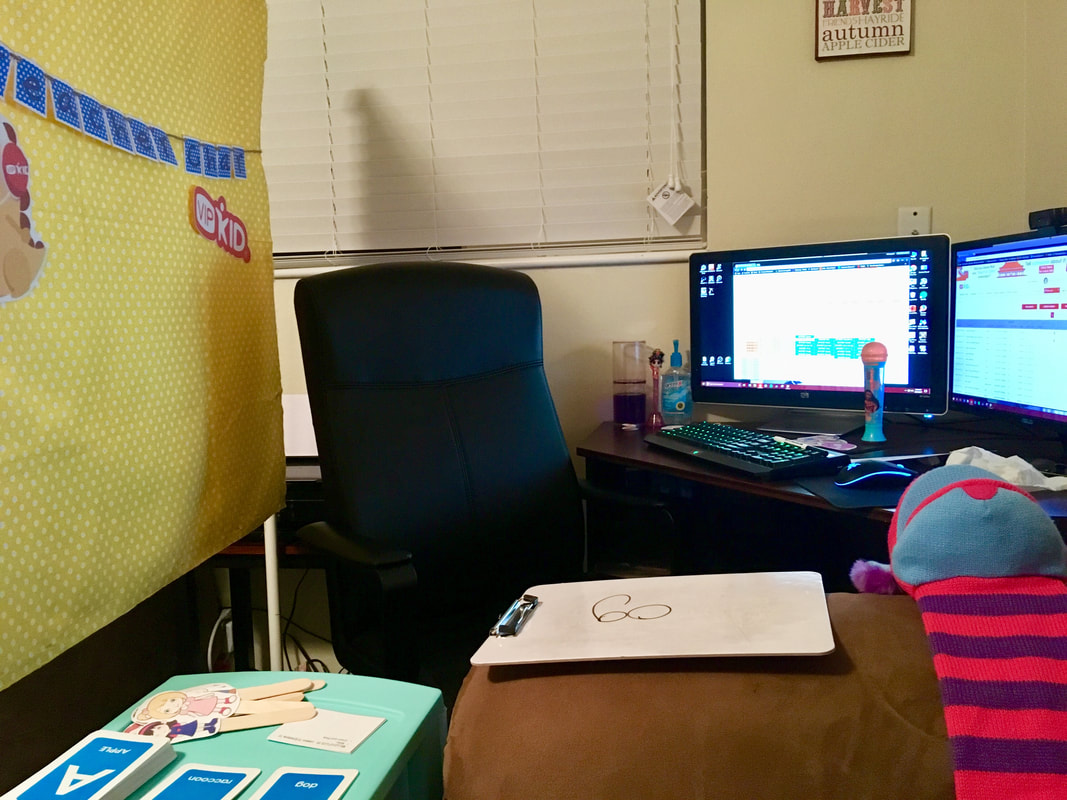
This is my classroom. I work on my husband's desk, which sits in a corner of our living room.
As you can see, my classroom background is held up by a PVC frame, you can read about how I constructed this frame here: PVC Pipe Stand. So far, it's pretty great. It takes 3 minutes to set up and put away the frame and the fabric and another minute to set up the background I want. It's also easy to store as well. The down-side is since the pieces are 5' long, I can't take this frame with me on a plane. Unless you cut the pieces into smaller chunks and connect them... I might do that and let you know how it goes...stay tuned.... I've printed out several images of Dino and tape one them up everyday, again, it's the variety that keeps things interesting for me. I've also printed out the VIPKID logo, and then I've created a banner that has my name on it. This is my "typical" set-up. It's for days I don't feel like being creative and just want something up.
Pretty simple, but cute. This isn't a specific theme, so in terms of rewards, I can use any of the ones I've created, like Legos. As you see in the photo on the right, I have some rewards placed up after the student has earned them. These rewards are put on with tape. It worked for a while and if I only put those rewards in that corner of my background. Eventually, the tape gets old and doesn't guarantee sticking for an entire lesson. I've had several drop on me during lessons. It's a little embarrassing.
So here is my solution:
VELCRO!!
I've placed about 15-20 (I lost count...) pieces of loop velcro onto my fabric. I used the velcro that has an adhesive back on it. And unless you buy a industrial strength version, you'll need to sew the loop velcro onto your fabric as well for reinforcement. Just be aware that it'll ruin your sewing needle with a awful stickiness...so maybe don't use an adhesive back for your loop velcro and just sew it on in the first place. :D Or just don't care about it because you don't want to buy two versions of velcro. I LOVE this because now my set-up is even FASTER. I use the velcro as markers for where I place my pictures and banners and I'll know that they'll fit on the screen the way I want them to. Plus now my rewards can be scattered throughout the screen instead of just stuck in one corner, like this: 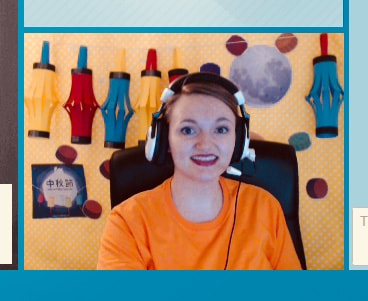
This is from my Mid Autumn Festival Background. Read more about it here.
As I've been taping hook velcro pieces onto my rewards. I came across another problem: I need WAY more hook pieces than I need loop pieces. I don't want to keep buying loop pieces whenever I run out of hook pieces! Well luckily Amazon is amazing and they sell just hook pieces. You can find it here. Note: I am not a part of an affiliate program with Amazon, I'm just sharing the wealth. I'm going to make life EASIER for me buy purchasing the count coins instead of the roll of tape. It saves time on cutting out the pieces. So there you have it, a typical day in the set-up of my classroom. Next, I'll be sharing my Starry Sky background. Further on this month, I'll be revealing my Halloween background. I'm so excited! I've been collecting reward clipart, including this fun one where Dino is dressed in different costumes. Thanks for reading, subscribe if you can't wait to see my Halloween background. Or join my Facebook page. Links are at the top of the page. See you next time!
P.S. If you think this will be a fun job to join, I’d love to help you through the interview process. You can email me with the mail icon below for any questions. My referral code (for when you apply) is: 04A7J3
Want more tricks? Check out my new post: My VIPKID Classroom Upgrade. You'll love it! |
About Me
Hello! My name is Char. Thank you for visiting my blog, CallCrafts. I am a wife and mother who LOVES to make things. Read tutorials on crafts I've created to decorate my home, for parties, and more! Read more about me in My Story.
Categories
All
Archives
April 2018
Popular Posts |