RSS Feed
Clever title, huh?
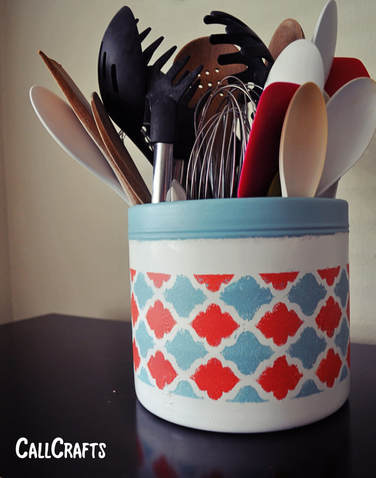
New, super easy craft! The design for this Utensil holder was inspired by my kitchen table. Click here for that tutorial.
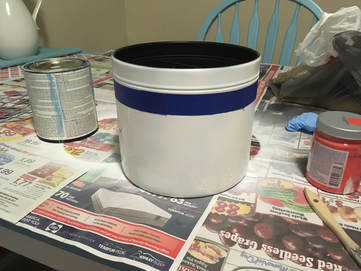
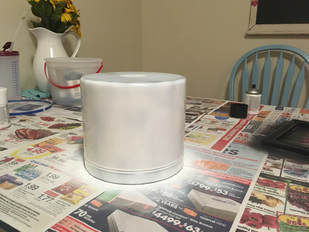
If you aren't aware, this blog is brand new. Today celebrates 2 months since it started! A huge thanks for those who visit my site, you're the reason why I keep blogging. Because the site is so new, I make beginner mistakes. This time, I forgot to take a before picture for this craft! So just imagine this piece with a bronze finish. Which you can kind of see in the photo below. 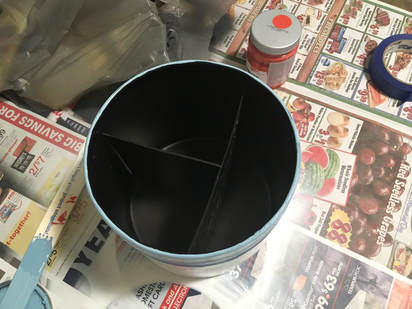
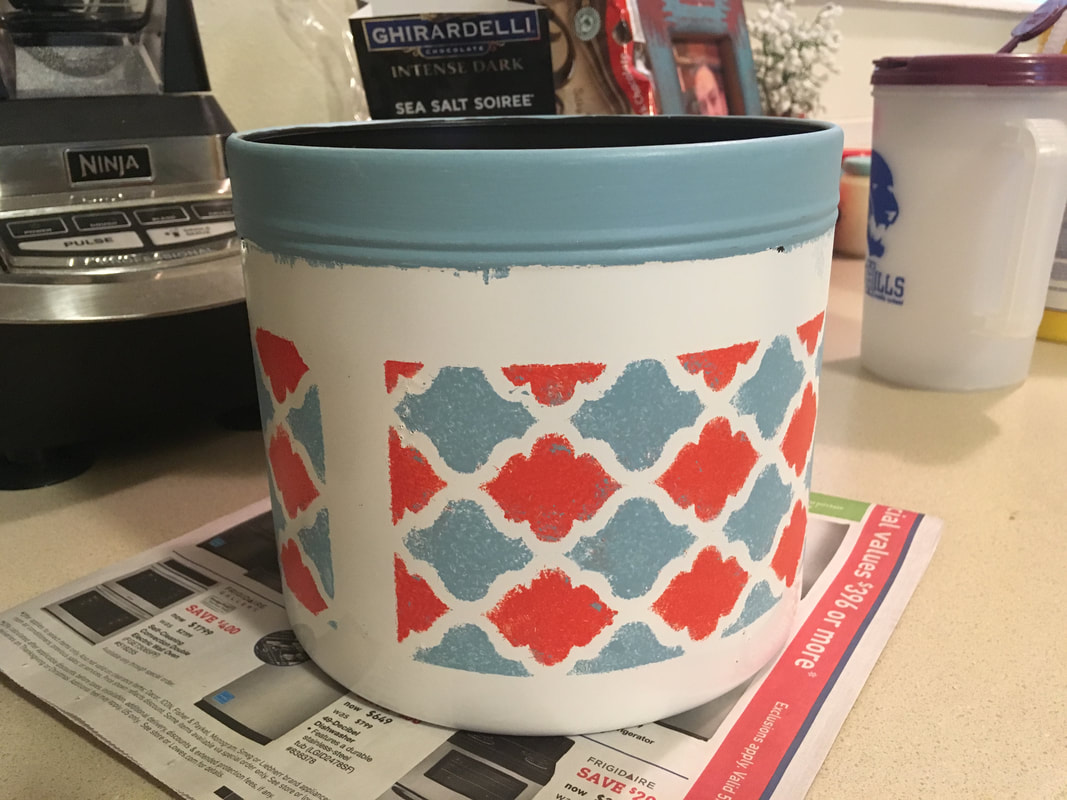
Overall, this was an easy, quick project. I bought this utensil holder before I had settled on my current color scheme for the kitchen. As I have made the transition to my current color scheme, which is red, blue, and white, I wanted this utensil to fit in as well. I decided that the best way to do it was to repaint it.
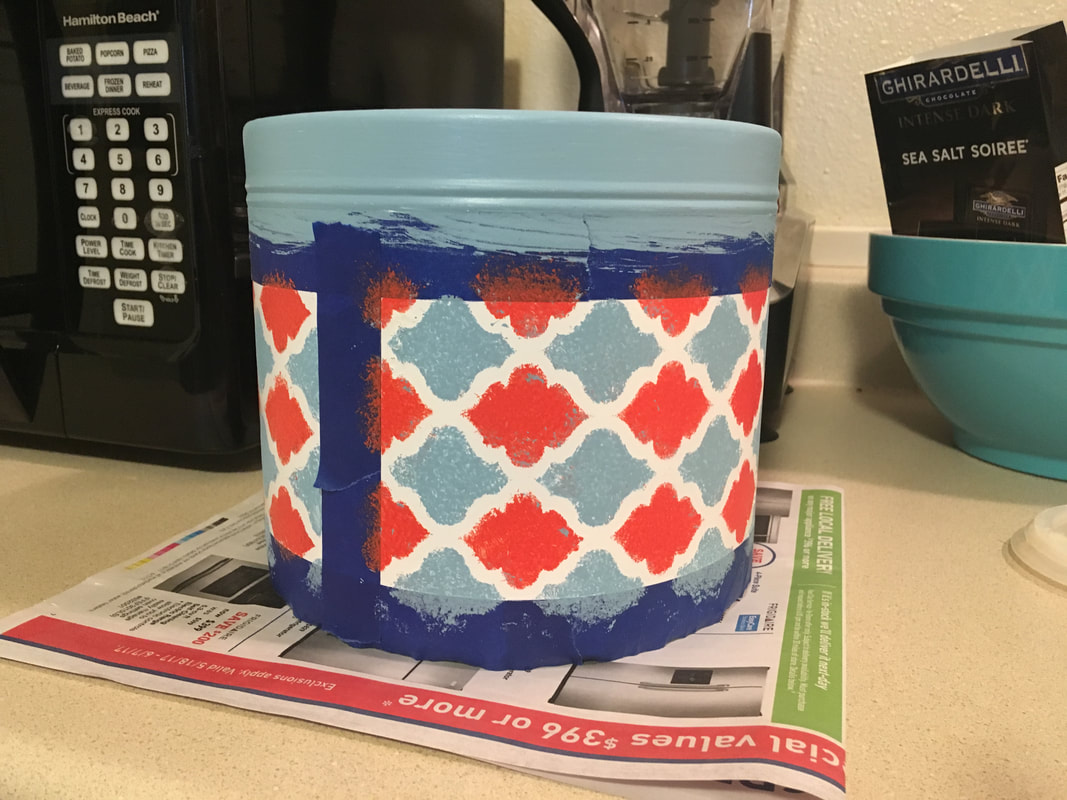
First, you start by cleaning your piece. That way, the paint will stick onto the utensil holder. I used spray paint for the white base. And did two layers of white. In the photo below, you can tell that one layer isn't good enough.
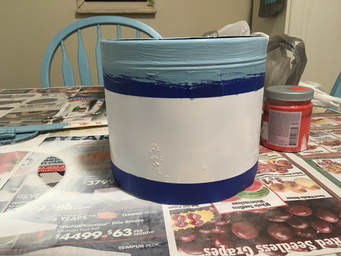
Once it was completely dry, I put painter's tape around the bottom and below the rim. I painted the rim first with two layers of paint.
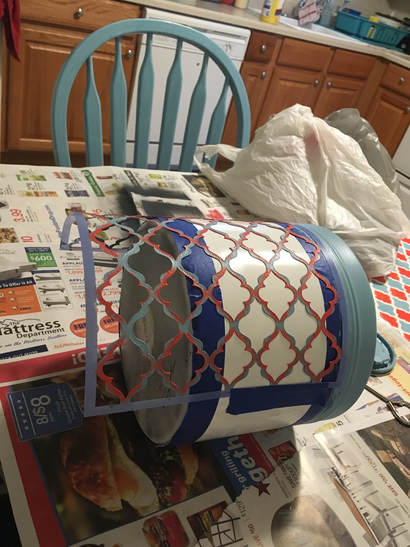
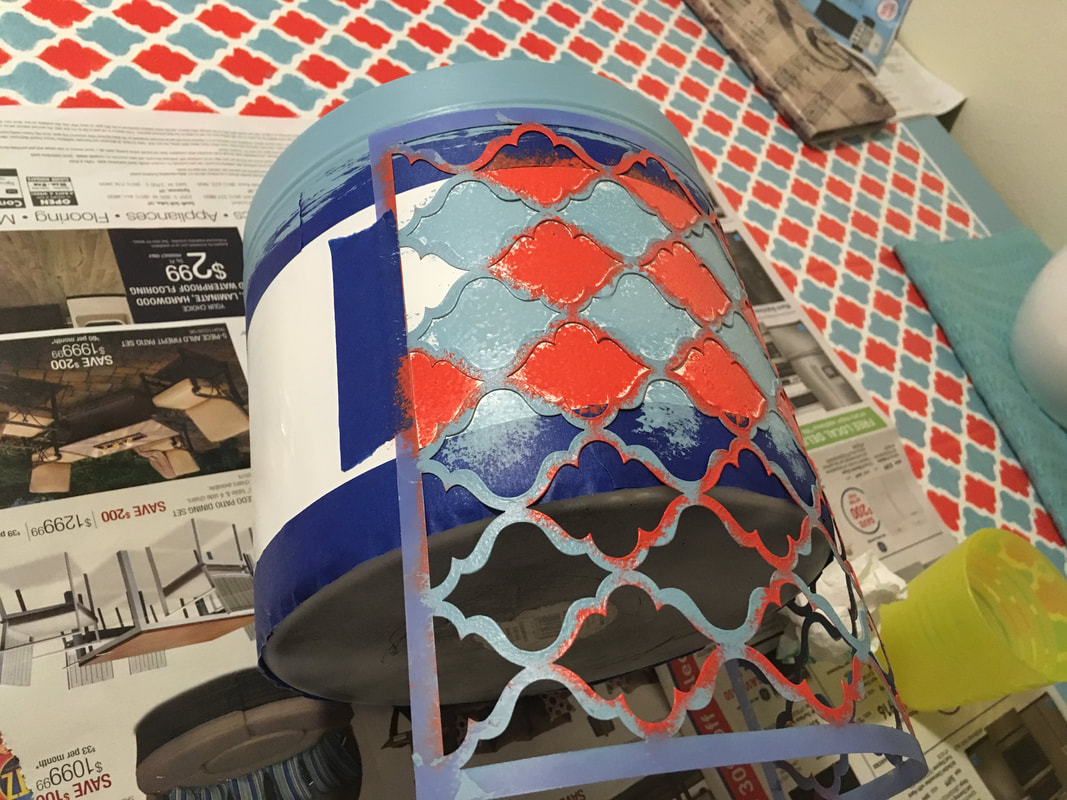
After that, I taped the stencil I used to paint my table onto the Utensil holder and painted around the entire holder.
Pretty easy and quick to do. Just a heads up, be careful with the tape, it could peel off what's underneath. Luckily for me, I had a white paint pen to the rescue.
I've seen this done to other appliances such as a kitchen mixer. So don't feel like you have to buy your item a specific color. Thanks for reading. Please like on FB or pin it!
0 Comments
It's finally here! Only 9 days late. As some of you know, having a new baby is a big adjustment! We're getting there though, one day at a time.
This quote rings true to me. I've been so blessed as I've consecrated my life to the Lord. 
True Success - Aug 2017
Just click on the title below the image to download a copy. If you'd prefer to have a PDF version, please Contact Me
Thanks for reading!
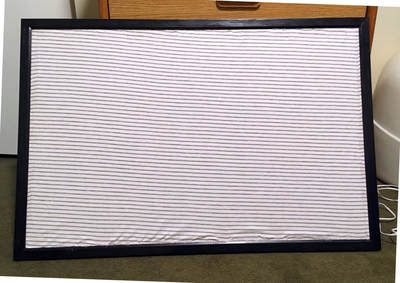
This is a pretty easy, short project to complete. I bought this large cork board at Walmart a couple of years ago and haven’t been able to use it. I accidentally ripped off the cork around the edges where I repainted the frame black, it looked ugly and unusable. Second, I didn’t have the wall space.
So when I started planning this room, the board came to mind, but again, it looked too ugly to use. So I looked around Pinterest and found that some people use fabric to cover up their boards. Here’s my take on how to get it done. After I purchased the fabric I wanted, I spread it out on top and line it up. Then grab some pins and pin it in place. 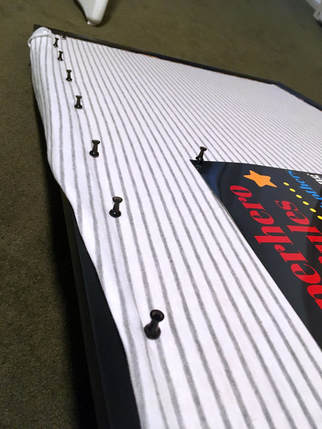
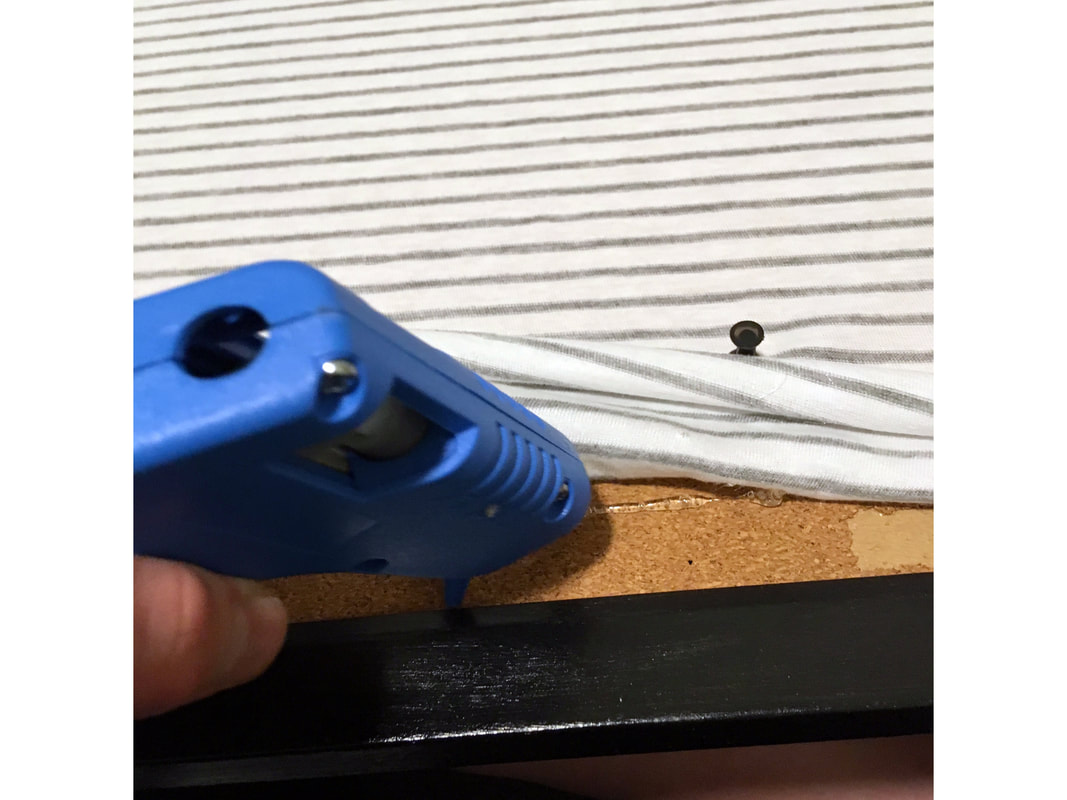
After I cut off the excess, I took my handy-dandy hot glue gun to "seal the deal" and keep it in place. I glued it about a half inch away from the frame so that I could tuck the rest of the fabric underneath the frame.
From there, I took this tiny Philips head screwdriver and used it to tuck the fabric underneath the frame.
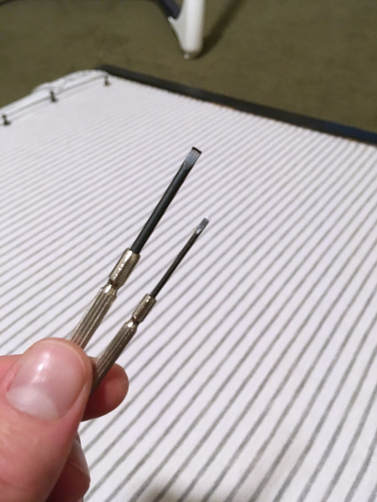
I have two different sizes because the larger helped with some of the larger chunks of fabric. But most of the time, I used the smaller one. 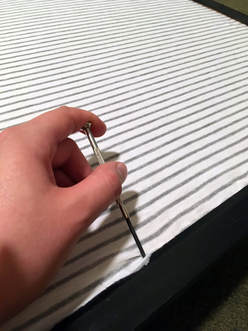
Do that to all four side and done! Pretty simple and only took a half hour to do.
Now I have the flexibility to put whatever I want on this board. I have my Superhero Rules poster, a superhero alphabet Printable I found on Pinterest, and some pictures of my baby.
Since I finished this before my baby was born, the only photos I have were of the ultrasounds. Eventually I'll put up some actual photos of him. 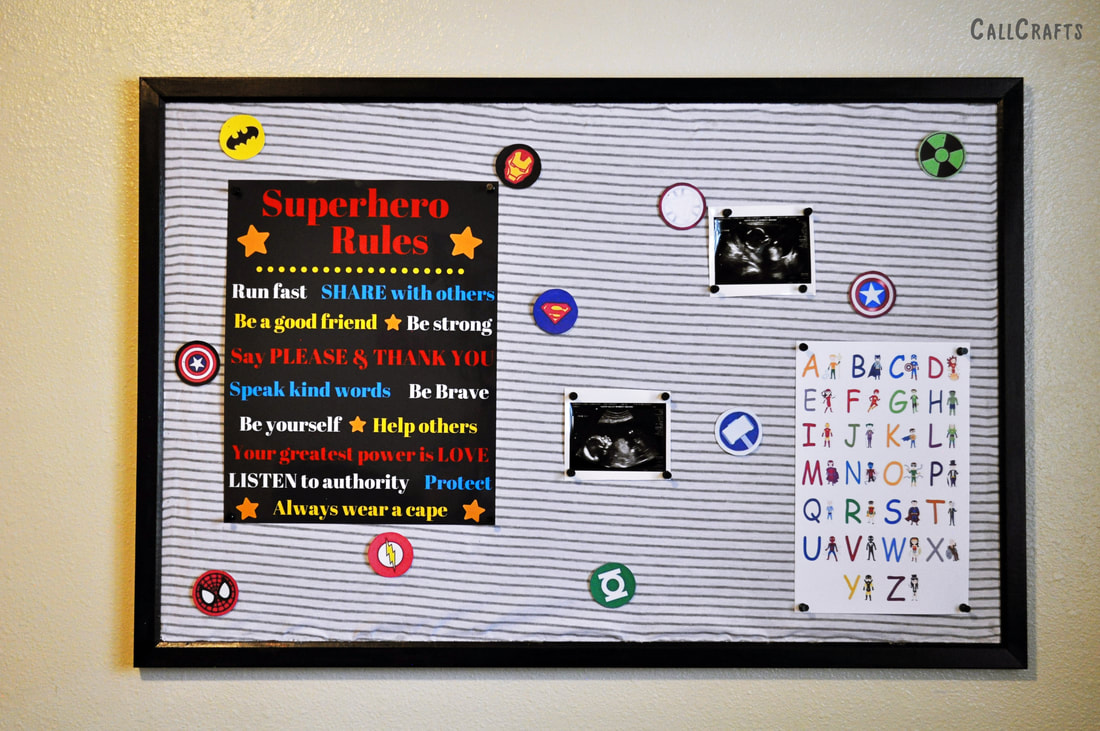
Thanks for reading! Stay tuned for more craft ideas.
|
About Me
Hello! My name is Char. Thank you for visiting my blog, CallCrafts. I am a wife and mother who LOVES to make things. Read tutorials on crafts I've created to decorate my home, for parties, and more! Read more about me in My Story.
Categories
All
Archives
April 2018
Popular Posts |