 RSS Feed
|
It’s coming! The holiday seasons! Even though Halloween is not my favorite holiday, it’s still super fun to decorate for. I guess this holiday is a bit sentimental for me because last Halloween two things happened: I discovered what a rich resource Pinterest is for free printables; and I discovered my niche for paper crafts. I’m not talking about scrapbooking, but using printables to decorate my home.
In this post, I’ll be sharing with you a few things I’ve used to decorate my home, what extra flair I’ve come up with, and provide links so you can make it yourself. Don't worry, I'll be sharing more of my ideas and findings throughout this month. 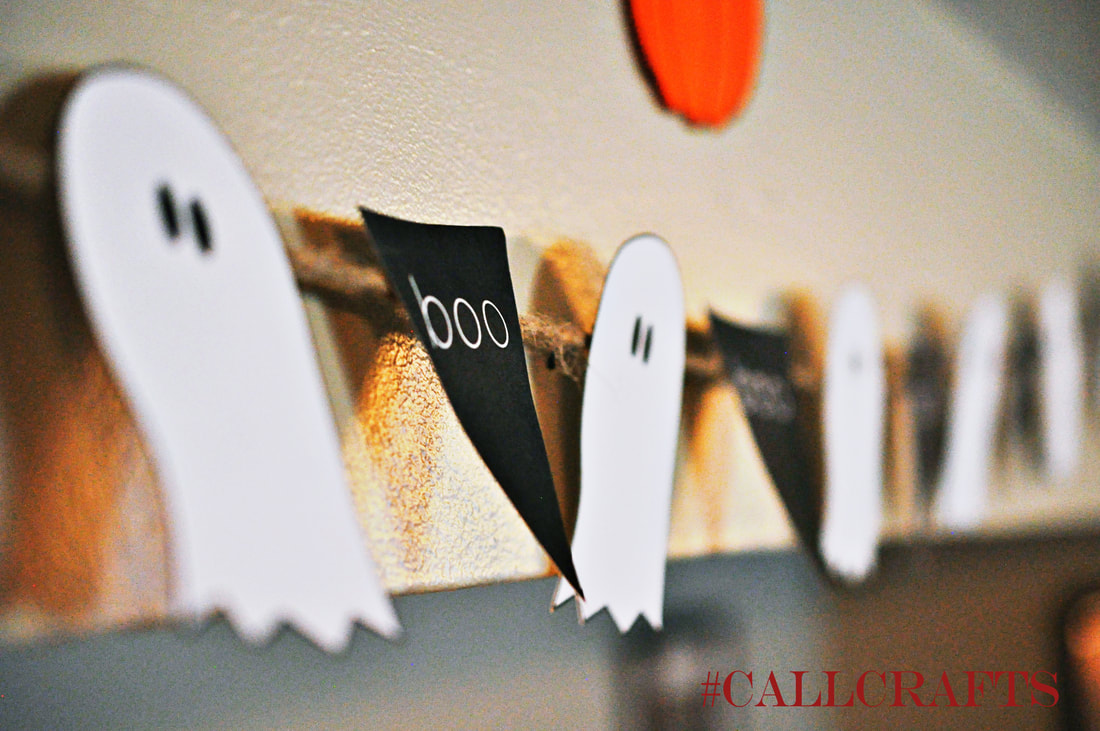
Boo Banner
So we’ll start off with one of my favorites: the Boo Banner.
I LOVE banners, they’re easy and fun to make. This one is no exception. And this one is probably one of my favorites. I got this printable from Tatertots & Jello. Click here to head to their site and print this adorable banner out for your home. Once you’ve printed and cut it out, roughly measure out how much string you need to hang your banner on. I use twine, it suits my home so nicely and it’s cheap. I’ve used it for MANY projects. Then, I simply taped it onto the string. Can’t see the back so why worry about doing something fancier. Now a days, I use a hole punch then “sew” it on when I make new banners, but I didn’t have one at the time. Note: when you print out the ghosts and “boo” signs, you may not end up using all of the “boo” signs. I’ve kept my extra ones and will let you know if I end up using it for something incredible. I do not have the luxury of having a mantel in my home yet, so what I do is take push pins, I have black ones, and place them on the wall above the tv. To place the string on, I simply create a loop and then tie a double knot. That way it’s easy to put on and take off. Halloween Subway Art Canvas
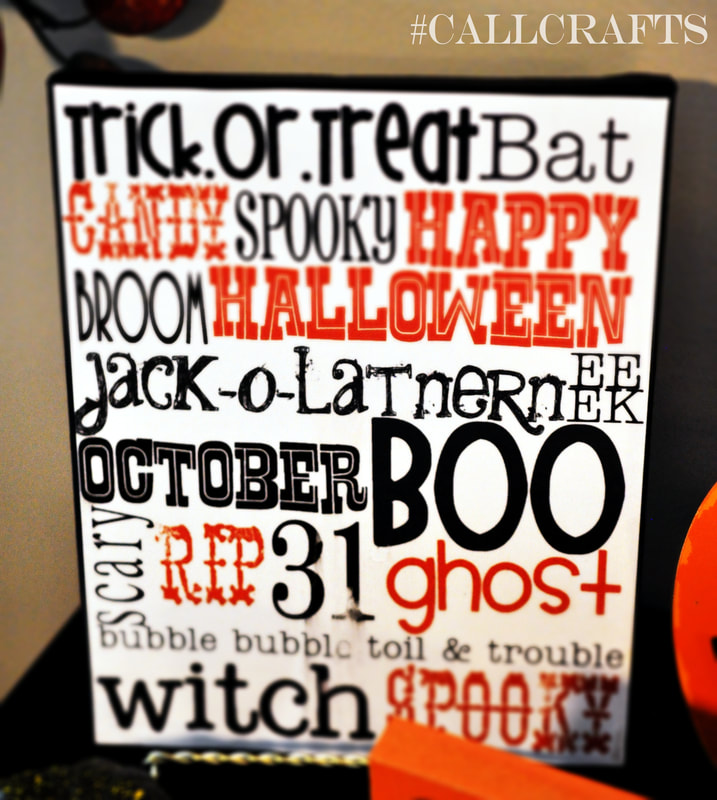
Next, is my Halloween subway art canvas. I can’t remember how I came up with this idea, but I love it and have some form of subway art up on my wall for every holiday. What I’ve done to save a few bucks is instead of having it on a frame, I mod podged it onto a canvas. There are tons of sites that give you a step-by-step tutorial. Since I created this project before I decided to make a blog, I don’t have photos of this process, but I will briefly describe it for you.
This is one of those awesome projects that only take a half hour to make. Which is great if you’re super busy (and who isn’t?). Before I tell you how to make it, click here to go to Lovely Little Snippets where you can download this for free!
Now, first thing I do when making a canvas project is that I trace the outline of the canvas onto the back of my subway art. This way, your printable fits on the canvas. I usually double check to make sure I’ve cut off enough. Sometimes I like to have it a little smaller than the canvas so I have a “frame.” Then I paint the edges and outer rim of the front. I paint the front just in case I cut off too much and I’m not left with a white frame. I usually use at least two coats of paint, but it depends on the color. Using only one coat doesn’t completely cover the canvas and will leave white streaks on your edge. Once the paint is dry, then paint the modge podge onto the canvas. You can put on the paper first, but I find it easier to put it on a harder surface first; it won’t curl up on you as you’re putting it on. Then you place the paper onto the canvas. It’ll still be wet at first for you to adjust and make sure it’s all centered. Then I like rubbing it in to get all the air bubbles out. Sometimes I’ll flip it upside down and rub the back of the canvas. If you do this, just make sure there isn’t extra podge sticking out or it’ll stick to whatever surface you’re using. Not fun. Then let it dry. I used to make the mistake of immediately putting on the top coat, but don’t. You WILL get air bubbles on your canvas this way. Once it’s sat for about 5 minutes, you’re usually good to put on the top coat. You don’t have to do this, but it does protect your project from peeling off at the corners. Like I said, very easy, affordable, and cute. Spell on You Printable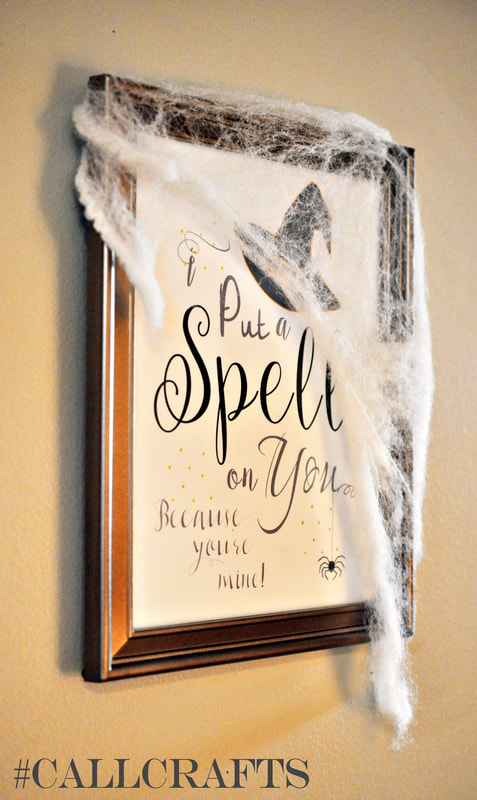
Then there’s this cute printable from Made in a Day.
What I like about this printable is that this designer gives you several versions with different color schemes to pick from. I actually ended up using a different version than what I originally saw on the pin. I’m also one of those super sappy people who likes to put up lovey-dovey decorations like this because she loves her husband so much! I simply put this in a dollar store frame I already had. It matches so well. And then draped on that cotton “spider web” you can get at Walmart for a buck. It’s the little things that really add to your decorations. So there you have it, a few things I've found online that I've printed out at home that have become a part of my home decor. Check out this Pinterest page, Crafts for Halloween for more ideas on how to create your own Halloween decorations. Follow me on Pinterest so you can keep up to date on my fabulous findings. See you next time!
0 Comments
Your comment will be posted after it is approved.
Leave a Reply. |
About Me
Hello! My name is Char. Thank you for visiting my blog, CallCrafts. I am a wife and mother who LOVES to make things. Read tutorials on crafts I've created to decorate my home, for parties, and more! Read more about me in My Story.
Categories
All
Archives
April 2018
Popular Posts |
