RSS Feed
Earlier this month, we had General Conference. For those who don't know what this is, it is a general meeting where all the members of The Church of Jesus Christ of Latter Day Saints meet up to hear from the leaders of the church (of course, nonmembers are invited to). There were many wonderful talks given during this session.
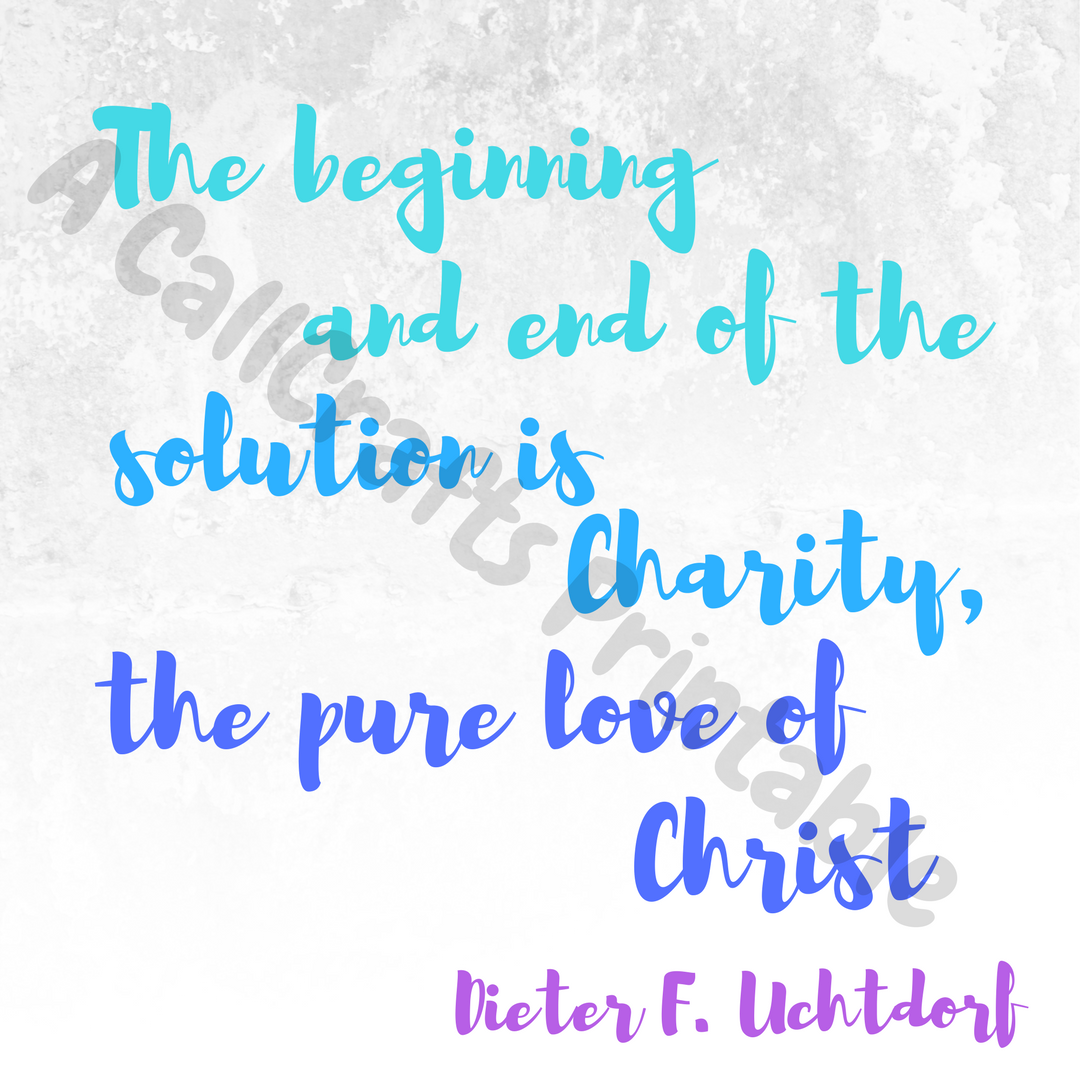
For my Visiting Teaching Printable this month, I have the opportunity to select a quote from a talk that inspired me. I have chosen Pres. Uchtdorf's talk, "The Three Sisters." It touched me so deeply that it's hard for me to describe it because the thoughts I'm processing are so abstract. Maybe one day I'll completely understand why this talk touches me so much. But one thing I do know is that I know this quote is true. If you are interested in downloading this quote, please click on the title below.
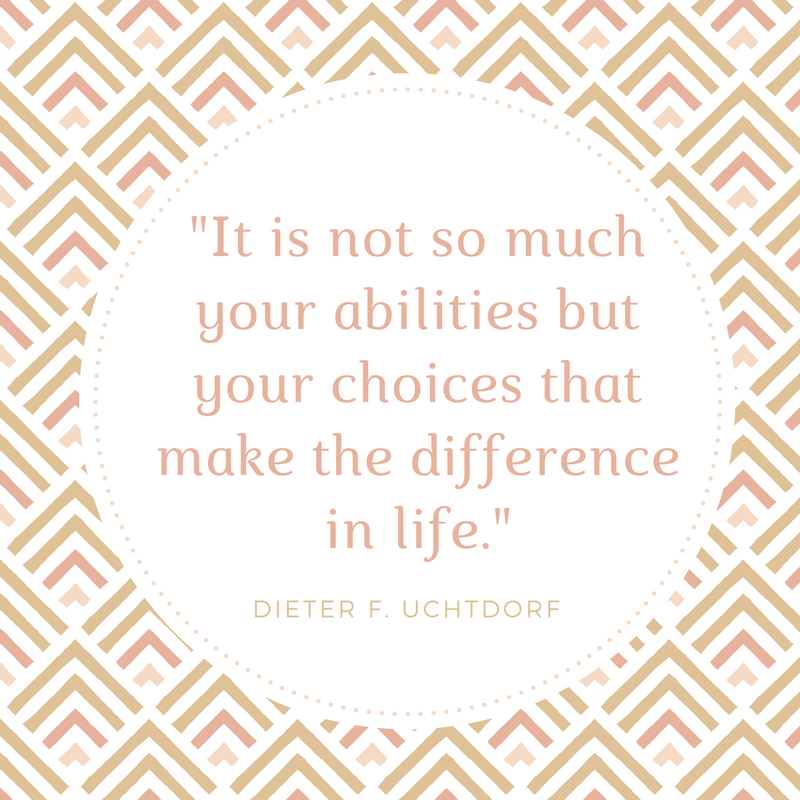
Your Choices - November 2017
0 Comments
It’s coming! The holiday seasons! Even though Halloween is not my favorite holiday, it’s still super fun to decorate for. I guess this holiday is a bit sentimental for me because last Halloween two things happened: I discovered what a rich resource Pinterest is for free printables; and I discovered my niche for paper crafts. I’m not talking about scrapbooking, but using printables to decorate my home.
In this post, I’ll be sharing with you a few things I’ve used to decorate my home, what extra flair I’ve come up with, and provide links so you can make it yourself. Don't worry, I'll be sharing more of my ideas and findings throughout this month. 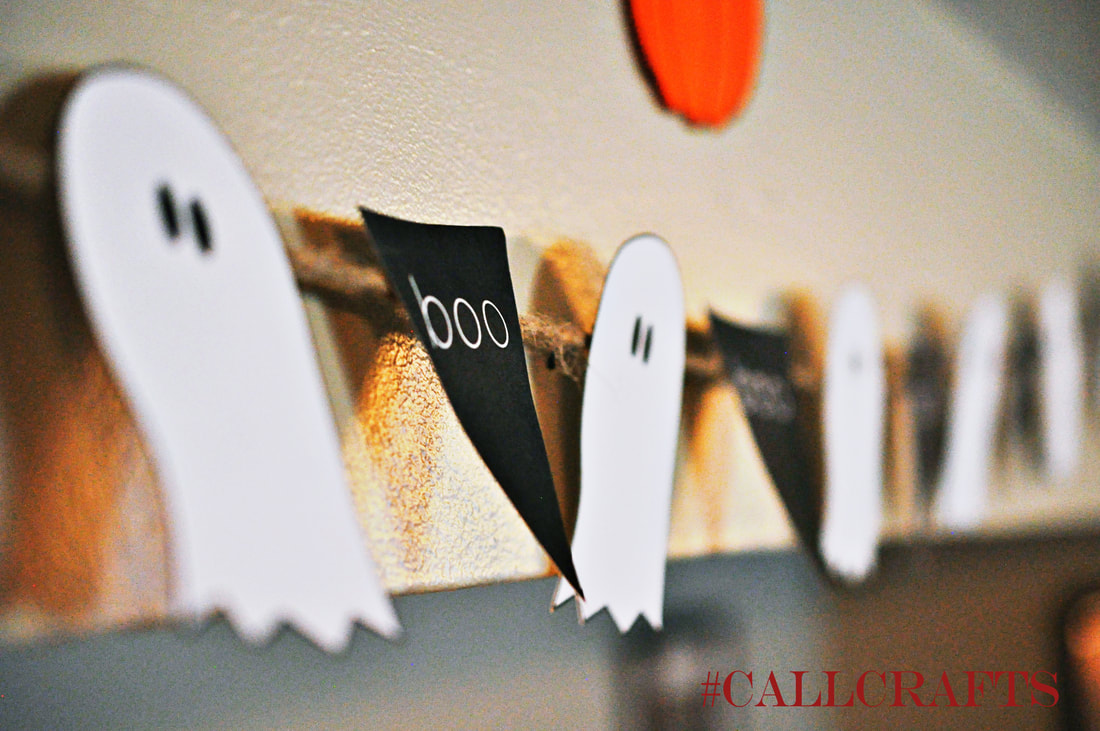
Boo Banner
So we’ll start off with one of my favorites: the Boo Banner.
I LOVE banners, they’re easy and fun to make. This one is no exception. And this one is probably one of my favorites. I got this printable from Tatertots & Jello. Click here to head to their site and print this adorable banner out for your home. Once you’ve printed and cut it out, roughly measure out how much string you need to hang your banner on. I use twine, it suits my home so nicely and it’s cheap. I’ve used it for MANY projects. Then, I simply taped it onto the string. Can’t see the back so why worry about doing something fancier. Now a days, I use a hole punch then “sew” it on when I make new banners, but I didn’t have one at the time. Note: when you print out the ghosts and “boo” signs, you may not end up using all of the “boo” signs. I’ve kept my extra ones and will let you know if I end up using it for something incredible. I do not have the luxury of having a mantel in my home yet, so what I do is take push pins, I have black ones, and place them on the wall above the tv. To place the string on, I simply create a loop and then tie a double knot. That way it’s easy to put on and take off. Halloween Subway Art Canvas
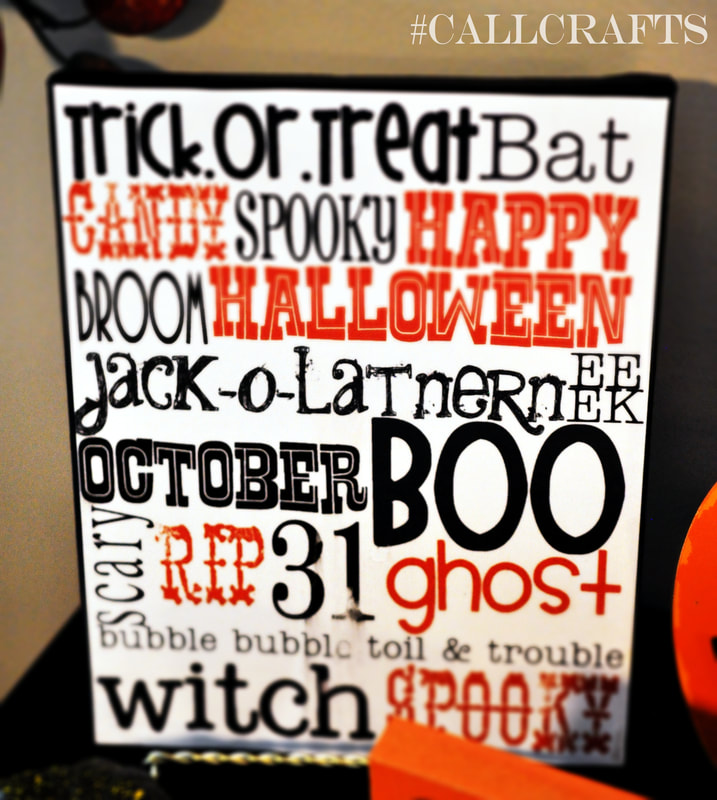
Next, is my Halloween subway art canvas. I can’t remember how I came up with this idea, but I love it and have some form of subway art up on my wall for every holiday. What I’ve done to save a few bucks is instead of having it on a frame, I mod podged it onto a canvas. There are tons of sites that give you a step-by-step tutorial. Since I created this project before I decided to make a blog, I don’t have photos of this process, but I will briefly describe it for you.
This is one of those awesome projects that only take a half hour to make. Which is great if you’re super busy (and who isn’t?). Before I tell you how to make it, click here to go to Lovely Little Snippets where you can download this for free!
Now, first thing I do when making a canvas project is that I trace the outline of the canvas onto the back of my subway art. This way, your printable fits on the canvas. I usually double check to make sure I’ve cut off enough. Sometimes I like to have it a little smaller than the canvas so I have a “frame.” Then I paint the edges and outer rim of the front. I paint the front just in case I cut off too much and I’m not left with a white frame. I usually use at least two coats of paint, but it depends on the color. Using only one coat doesn’t completely cover the canvas and will leave white streaks on your edge. Once the paint is dry, then paint the modge podge onto the canvas. You can put on the paper first, but I find it easier to put it on a harder surface first; it won’t curl up on you as you’re putting it on. Then you place the paper onto the canvas. It’ll still be wet at first for you to adjust and make sure it’s all centered. Then I like rubbing it in to get all the air bubbles out. Sometimes I’ll flip it upside down and rub the back of the canvas. If you do this, just make sure there isn’t extra podge sticking out or it’ll stick to whatever surface you’re using. Not fun. Then let it dry. I used to make the mistake of immediately putting on the top coat, but don’t. You WILL get air bubbles on your canvas this way. Once it’s sat for about 5 minutes, you’re usually good to put on the top coat. You don’t have to do this, but it does protect your project from peeling off at the corners. Like I said, very easy, affordable, and cute. Spell on You Printable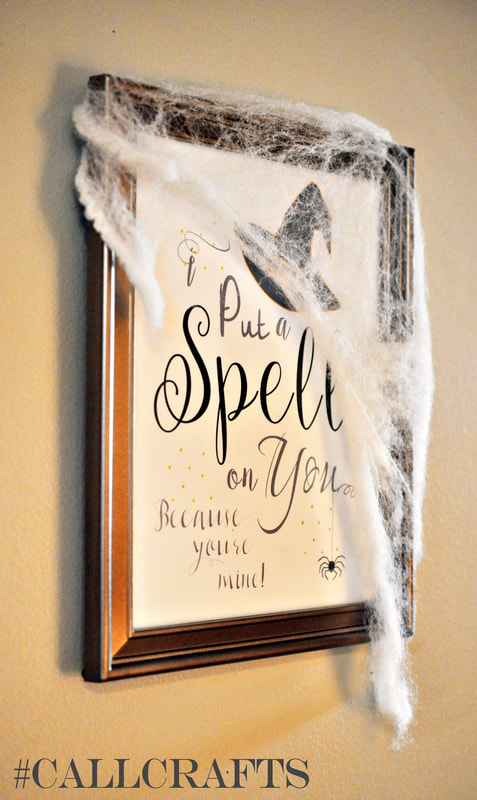
Then there’s this cute printable from Made in a Day.
What I like about this printable is that this designer gives you several versions with different color schemes to pick from. I actually ended up using a different version than what I originally saw on the pin. I’m also one of those super sappy people who likes to put up lovey-dovey decorations like this because she loves her husband so much! I simply put this in a dollar store frame I already had. It matches so well. And then draped on that cotton “spider web” you can get at Walmart for a buck. It’s the little things that really add to your decorations. So there you have it, a few things I've found online that I've printed out at home that have become a part of my home decor. Check out this Pinterest page, Crafts for Halloween for more ideas on how to create your own Halloween decorations. Follow me on Pinterest so you can keep up to date on my fabulous findings. See you next time!
What a great message for this month! It's such a great reminder that despite any hardships we face, not just the ones in our families, we can turn to Christ.
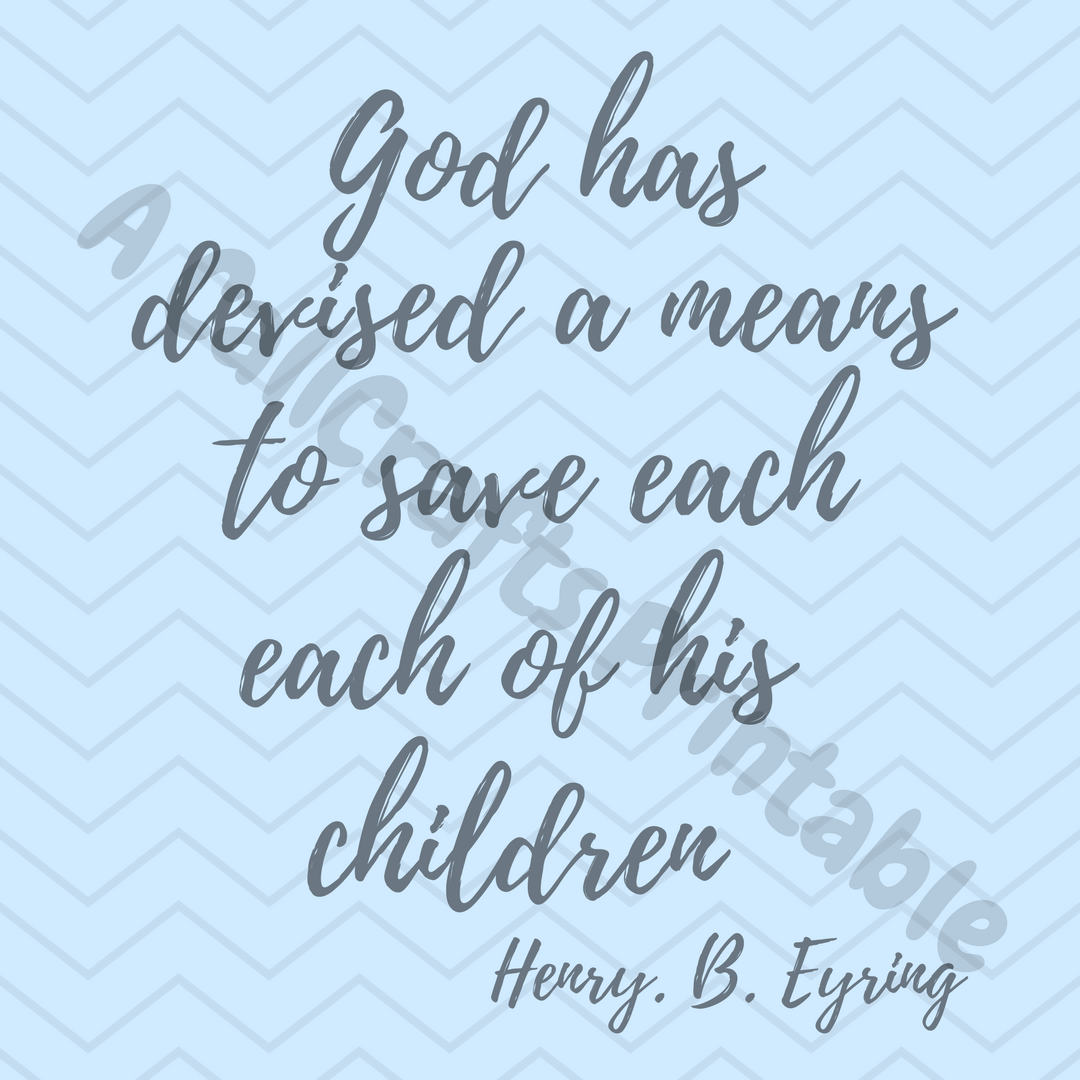
Hope you all are having a great General Conference Weekend. My husband and I are having a great time. We made breakfast together. We had french toast, scrambled eggs, and hot chocolate. Yum! Plus it's grey outside, a perfect day for staying at home snuggled up in your pj's. I plan on creating a few General Conference memes, so stay tuned for those. Reading through this month's message, there were two quotes I was touched by. So instead of picking a favorite, I did both.
If you've noticed, there's a lovely watermark on the image. Well, folks, I want people to come to my site. So therefore, if people want to download my printable, they need to come to my site to do it. It's still free, its just not as easily accessible. Just click on the titles above for your free download. It's a png, but I can give it to you in PDF format, just let me know through my Contact Form.
Thank you for coming to visit. If you love what I do, please subscribe. It's at the top and the bottom of the page. You can also follow me on Facebook or Pinterest. Stay tuned for more inspiring quotes.
I've finally created and posted this month's Visiting Teaching Message! Better late than never, right?
What a great message this month! It's so amazing how the power of the Atonement can change our hearts to make us more like Christ. This is the quote I selected for this month. 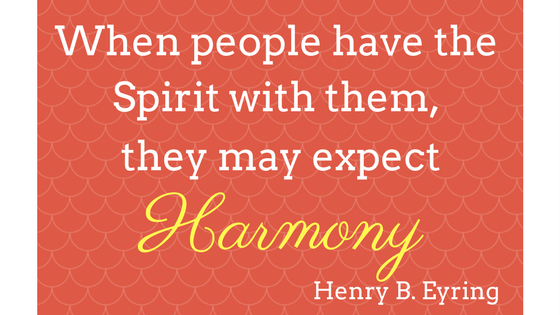
Expect Harmony - Sept. 2017
It's so true! When you follow the commandments, everything in life seems to come together. Click on the title above to download a PDF version of this design.
Thanks for following! Stay in tune for future posts! 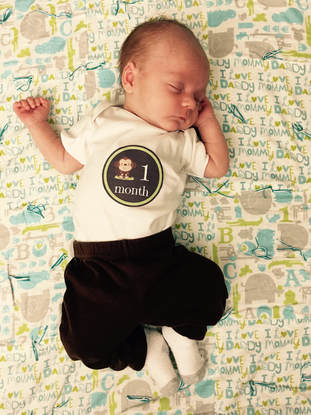
I have the cutest baby ever! A few weeks ago, he turned one month old. And he'll be two months old next Saturday (holy cow! Where did the time go?!).
Of course I have to take those monthly photos and share them on FB, but I thought, I'd really like to design my own stickers. So I made these. I choose to feature a monkey on these stickers because of his "monkey" toes. He can spread them out so wide and the curl them up so tight that he could probably grab something with his toes. I found this design on Miss Kate Cuttables. I am not receiving an financial compensation for this information, just simply sharing where I received my clipart. So after I created the design, I printed them out on printable sticker paper. I got mine at Hobby Lobby. Just make sure it's a plain sheet that it isn't made for a specific shape. Then you cut them out and stick them on a plain onsie!! As I do not own the rights to the adorable monkey clipart on my sticker, I cannot distribute this design. But stay updated on more craft and designs.
Sorry I've been MIA. It's been SUCH a busy month! I've been adjusting to the duties of Motherhood, making sure I get enough sleep, and I applied for and was accepted as a teacher for VIPkids!!
I am soooooo excited to be a part of this company. I can still earn an income and be a SAHM. I am so lucky! I love being home with my son. And maybe one day I'll earn an income from blogging too. Baby steps...baby steps.
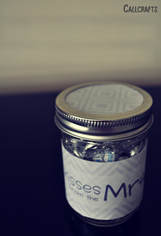
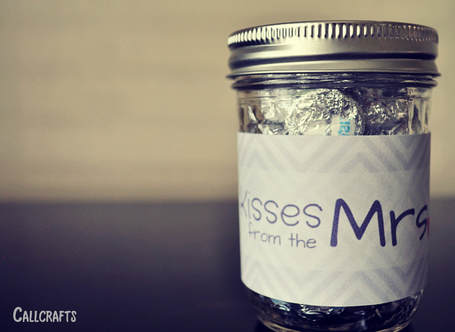
This project is easy to make. I found the idea on Pinterest, but I couldn't find a printable. All of the labels were handwritten. I have a confession to make, I don't have great handwriting. So I decided to design my own label.
When I created the printable, I printed it out, cut it out, and taped it onto the jar. See? Simple. It was a labor of love, as I gave this jar to my husband when it was finished. Below is the image of the printable. Just click on the title below the image to download. Enjoy!! 

Kisses from the Mrs. Jar Label
It's finally here! Only 9 days late. As some of you know, having a new baby is a big adjustment! We're getting there though, one day at a time.
This quote rings true to me. I've been so blessed as I've consecrated my life to the Lord. 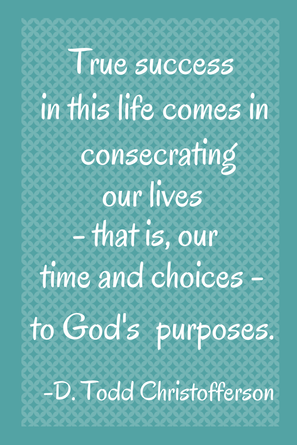
True Success - Aug 2017
Just click on the title below the image to download a copy. If you'd prefer to have a PDF version, please Contact Me
Thanks for reading!
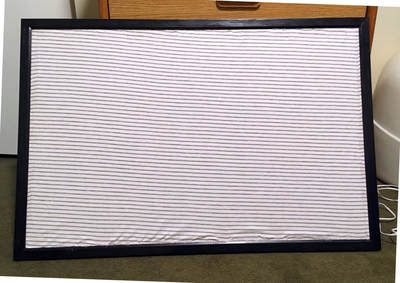
This is a pretty easy, short project to complete. I bought this large cork board at Walmart a couple of years ago and haven’t been able to use it. I accidentally ripped off the cork around the edges where I repainted the frame black, it looked ugly and unusable. Second, I didn’t have the wall space.
So when I started planning this room, the board came to mind, but again, it looked too ugly to use. So I looked around Pinterest and found that some people use fabric to cover up their boards. Here’s my take on how to get it done. After I purchased the fabric I wanted, I spread it out on top and line it up. Then grab some pins and pin it in place. 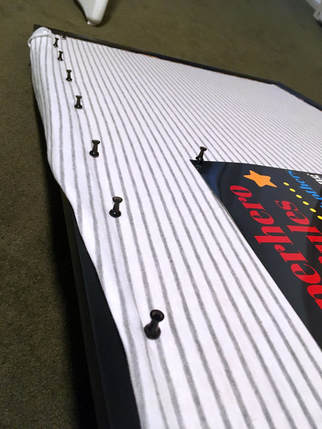
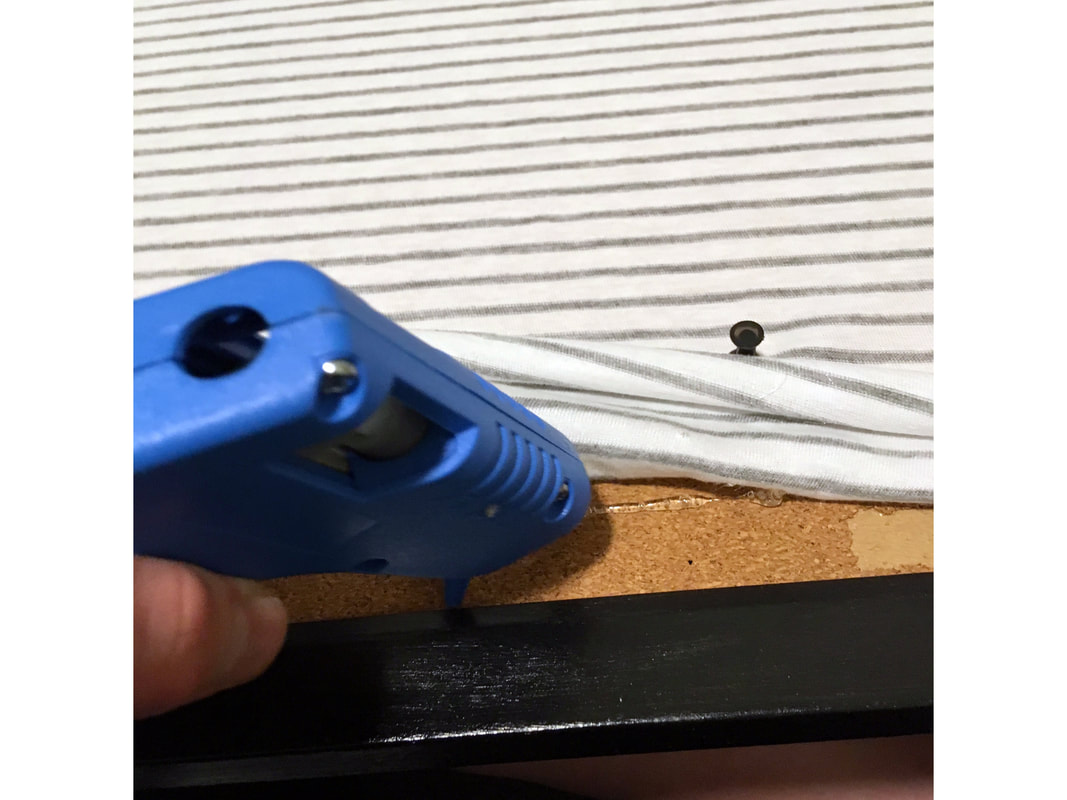
After I cut off the excess, I took my handy-dandy hot glue gun to "seal the deal" and keep it in place. I glued it about a half inch away from the frame so that I could tuck the rest of the fabric underneath the frame.
From there, I took this tiny Philips head screwdriver and used it to tuck the fabric underneath the frame.
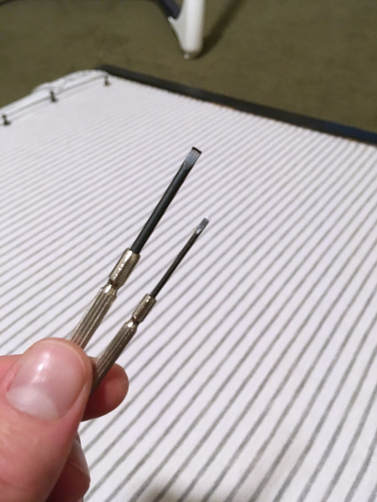
I have two different sizes because the larger helped with some of the larger chunks of fabric. But most of the time, I used the smaller one. 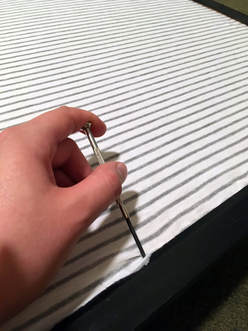
Do that to all four side and done! Pretty simple and only took a half hour to do.
Now I have the flexibility to put whatever I want on this board. I have my Superhero Rules poster, a superhero alphabet Printable I found on Pinterest, and some pictures of my baby.
Since I finished this before my baby was born, the only photos I have were of the ultrasounds. Eventually I'll put up some actual photos of him. 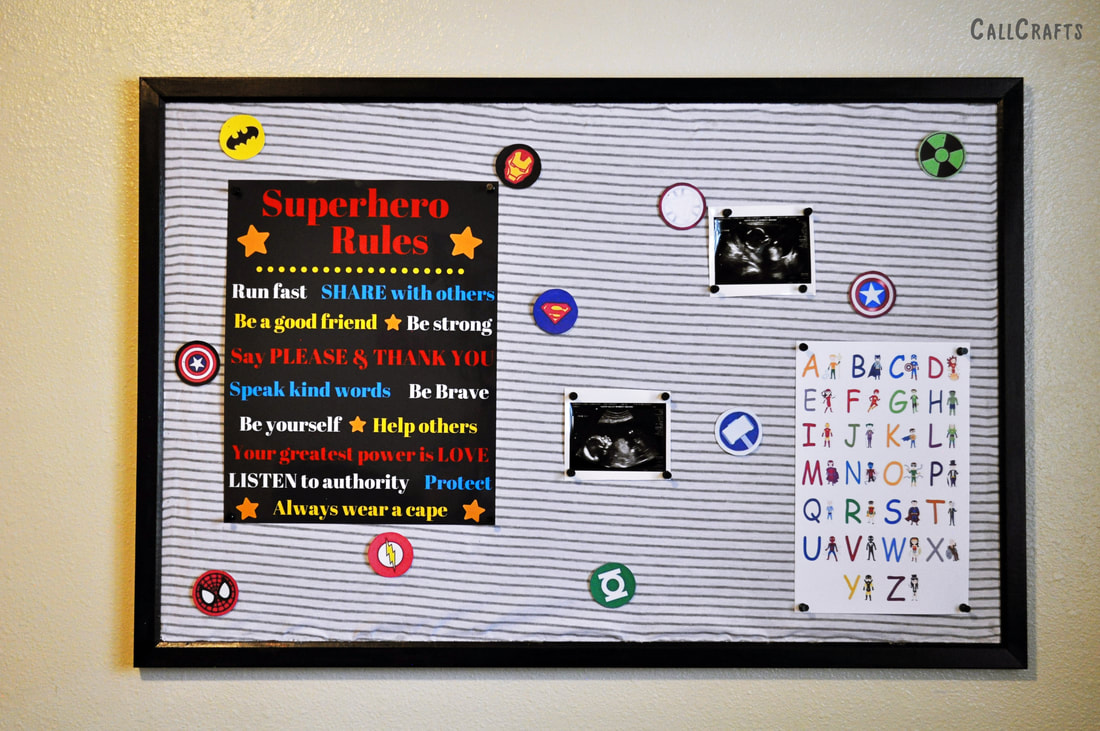
Thanks for reading! Stay tuned for more craft ideas.
Hey, I've been out for a while, a lot has been going on lately. I'm keeping this post short, but I wanted to announce the birth of our superhero, Ethan.  He was born on July 16, 2017. My husband and I love him very much. We're both doing fine, though its been a HUGE adjustment to my schedule, but he's worth it. When he was born, he weighed 7.4 lbs, was 19 3/4 inches long, and was born at 5:55 pm. If you saw my nursery post, I had put up a "fake" birth stats printable. I'm working on replacing that today.
Cool part was that I guessed the weight correctly! That's one less change I have to make! Like I said, we're doing great, just going through typical postpartum pains and other things that come with being new parents. I'm hoping to be back to two posts a week next week. So stay tuned for more craft posts!! 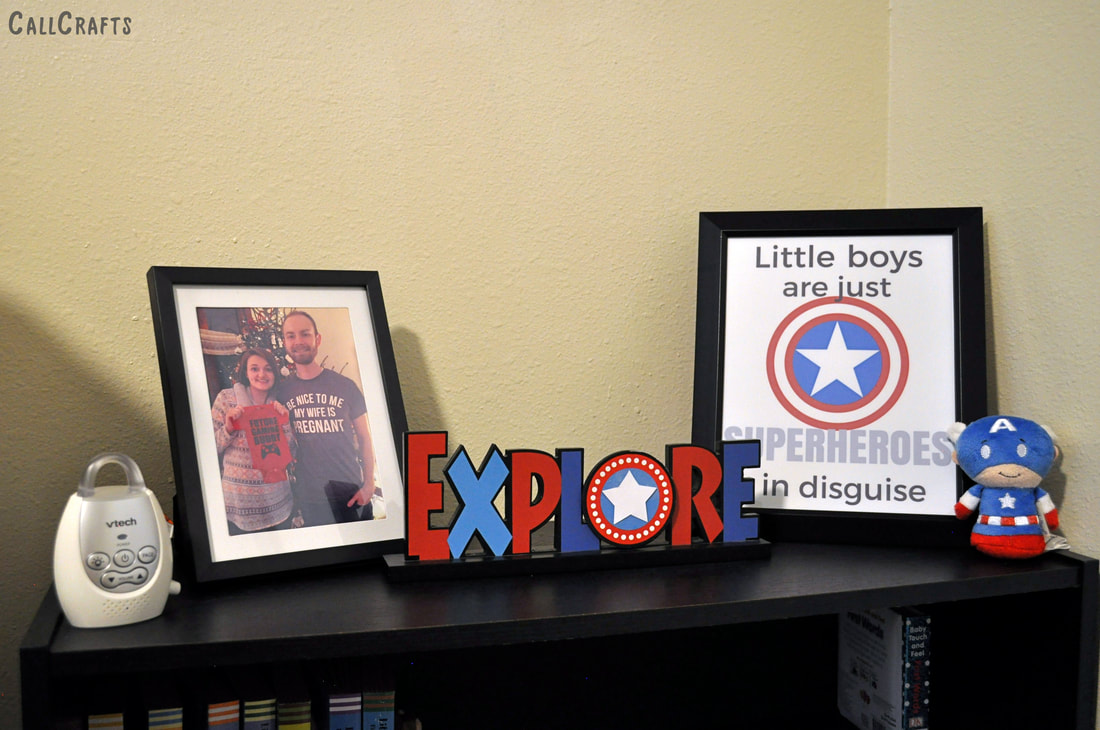
As I was finishing up my son's nursery, I realized there was some extra space on top of his bookshelf. I thought through several options, getting a wooden letter and putting scrapbook paper on it, etc. Ok, I only thought about that option...
But you know, I really liked the message in this Printable. And of course, I couldn't find a free printable so I designed my own. Then, as you can see in the image above, I purchased a frame from the dollar store to hold the print. 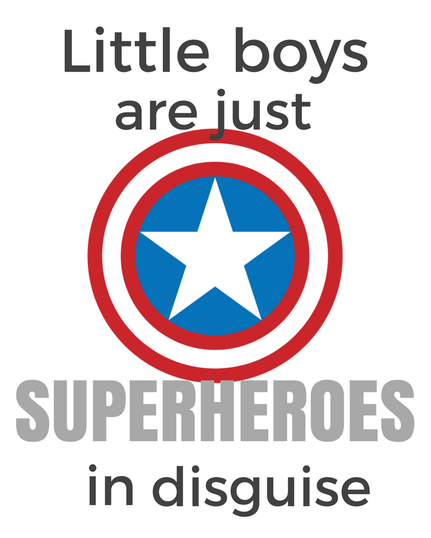
Superhero in Disguise
This is available as a PDF, which can be printed out on an 8x10. Please Contact Me if you need assistance printing this out, or would like to have the png version. But to download this image, just click on the title below the image.
Just remember, it's for personal use only! Happy Crafting everyone! |
About Me
Hello! My name is Char. Thank you for visiting my blog, CallCrafts. I am a wife and mother who LOVES to make things. Read tutorials on crafts I've created to decorate my home, for parties, and more! Read more about me in My Story.
Categories
All
Archives
April 2018
Popular Posts |