RSS Feed
Welcome back, VIPKID teachers! I hope last night's frenzy treated you just as well as it treated me. I FINALLY have a completely booked schedule for the next two weeks! Whoot whoot! Took me 6 weeks to get there, and here's hoping it stays that way!
Anyways, I'm assuming that if you're reading this post, you've probably already read my other two background posts: Backgrounds for your VIPKID Classroom and Mid Autumn Festival Background. If you haven't read those posts, be sure to check those out for some inspiration. Today's post is a little more about the nitty-gritty details of it's development. Plus, I'll be revealing some of my newest background projects (!!). Before we continue, I wanted to make this disclaimer: I am not advertising in any way. I have no idea if this set-up has affected my booking rates in any fashion. This is something that I have come up with and I wanted to share it with you. For me, it keeps the classes interesting. I love decorating and making decorations; it's a creative outlet for me. All I know is that in my 40 days, I've had consistent bookings. But it just might be my adorable personality...no idea! This is also with Level 2 students in my mind, I have no idea what older kids would think... 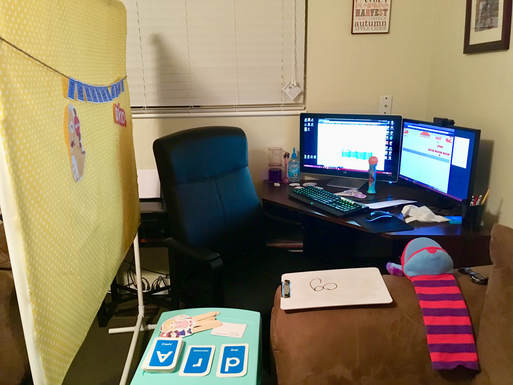
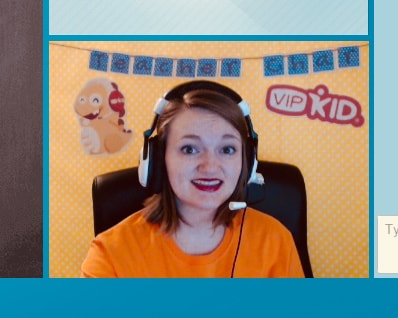
This is my classroom. I work on my husband's desk, which sits in a corner of our living room.
As you can see, my classroom background is held up by a PVC frame, you can read about how I constructed this frame here: PVC Pipe Stand. So far, it's pretty great. It takes 3 minutes to set up and put away the frame and the fabric and another minute to set up the background I want. It's also easy to store as well. The down-side is since the pieces are 5' long, I can't take this frame with me on a plane. Unless you cut the pieces into smaller chunks and connect them... I might do that and let you know how it goes...stay tuned.... I've printed out several images of Dino and tape one them up everyday, again, it's the variety that keeps things interesting for me. I've also printed out the VIPKID logo, and then I've created a banner that has my name on it. This is my "typical" set-up. It's for days I don't feel like being creative and just want something up.
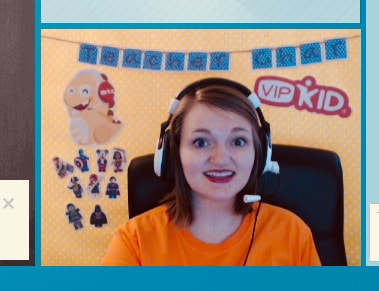
Pretty simple, but cute. This isn't a specific theme, so in terms of rewards, I can use any of the ones I've created, like Legos. As you see in the photo on the right, I have some rewards placed up after the student has earned them. These rewards are put on with tape. It worked for a while and if I only put those rewards in that corner of my background. Eventually, the tape gets old and doesn't guarantee sticking for an entire lesson. I've had several drop on me during lessons. It's a little embarrassing.
So here is my solution:
VELCRO!!
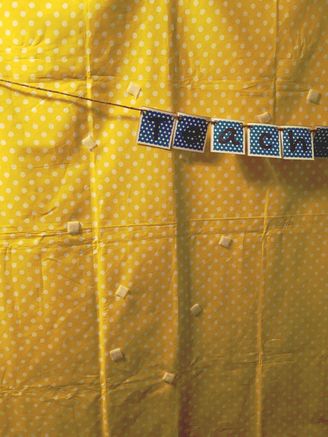
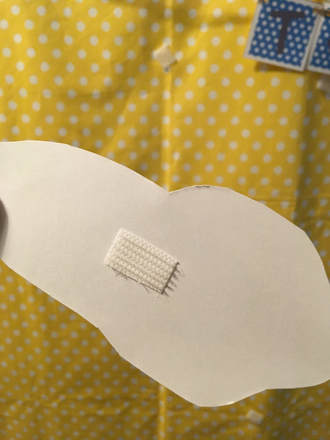
I've placed about 15-20 (I lost count...) pieces of loop velcro onto my fabric. I used the velcro that has an adhesive back on it. And unless you buy a industrial strength version, you'll need to sew the loop velcro onto your fabric as well for reinforcement. Just be aware that it'll ruin your sewing needle with a awful stickiness...so maybe don't use an adhesive back for your loop velcro and just sew it on in the first place. :D Or just don't care about it because you don't want to buy two versions of velcro. I LOVE this because now my set-up is even FASTER. I use the velcro as markers for where I place my pictures and banners and I'll know that they'll fit on the screen the way I want them to. Plus now my rewards can be scattered throughout the screen instead of just stuck in one corner, like this: 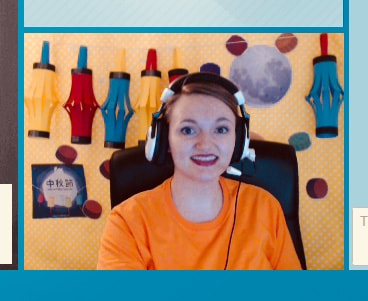
This is from my Mid Autumn Festival Background. Read more about it here.
As I've been taping hook velcro pieces onto my rewards. I came across another problem: I need WAY more hook pieces than I need loop pieces. I don't want to keep buying loop pieces whenever I run out of hook pieces! Well luckily Amazon is amazing and they sell just hook pieces. You can find it here. Note: I am not a part of an affiliate program with Amazon, I'm just sharing the wealth. I'm going to make life EASIER for me buy purchasing the count coins instead of the roll of tape. It saves time on cutting out the pieces. So there you have it, a typical day in the set-up of my classroom. Next, I'll be sharing my Starry Sky background. Further on this month, I'll be revealing my Halloween background. I'm so excited! I've been collecting reward clipart, including this fun one where Dino is dressed in different costumes. Thanks for reading, subscribe if you can't wait to see my Halloween background. Or join my Facebook page. Links are at the top of the page. See you next time!
P.S. If you think this will be a fun job to join, I’d love to help you through the interview process. You can email me with the mail icon below for any questions. My referral code (for when you apply) is: 04A7J3
Want more tricks? Check out my new post: My VIPKID Classroom Upgrade. You'll love it!
1 Comment
Karen Magaro
3/9/2018 03:20:30 pm
I just wanted to say thank you for these great ideas for vipkid. I have been a teacher for VIP a few months but I was a brick and mortar Teacher many many years !!!but when it comes to making things like the backgrounds or props like you have. I really appreciate your help. You are very creative. Thank you so much ... Your comment will be posted after it is approved.
Leave a Reply. |
About Me
Hello! My name is Char. Thank you for visiting my blog, CallCrafts. I am a wife and mother who LOVES to make things. Read tutorials on crafts I've created to decorate my home, for parties, and more! Read more about me in My Story.
Categories
All
Archives
April 2018
Popular Posts |