RSS Feed
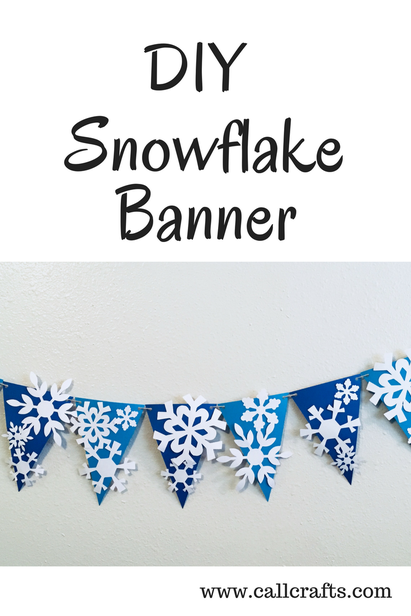
I really want to show this off! Look how beautiful is this!! It's my first Sillhouette project! First time using the machine. They weren't kidding when they said there is a steep learning curve.
Unfortunately, I don't have any other pictures of this project, but I can go through a quick tutorial and share some links I used to create this. You'll need: -Cutting machine -White Construction paper (6 sheets) -2 sheets of light blue paper -2 sheets of dark blue paper -Twine -Double sided tape -Hole puncher First, you'll go to this site: Holly Brooke Jones to download the template for the snowflakes. There are two separate sheets. Then on your cutting machine, you'll cut 3 copies of each sheet. This was the longest part, seeing this was my first time. (I will not share how I used my machine, there are plenty of site to help you with that. I might share a tutorial later...but not now) 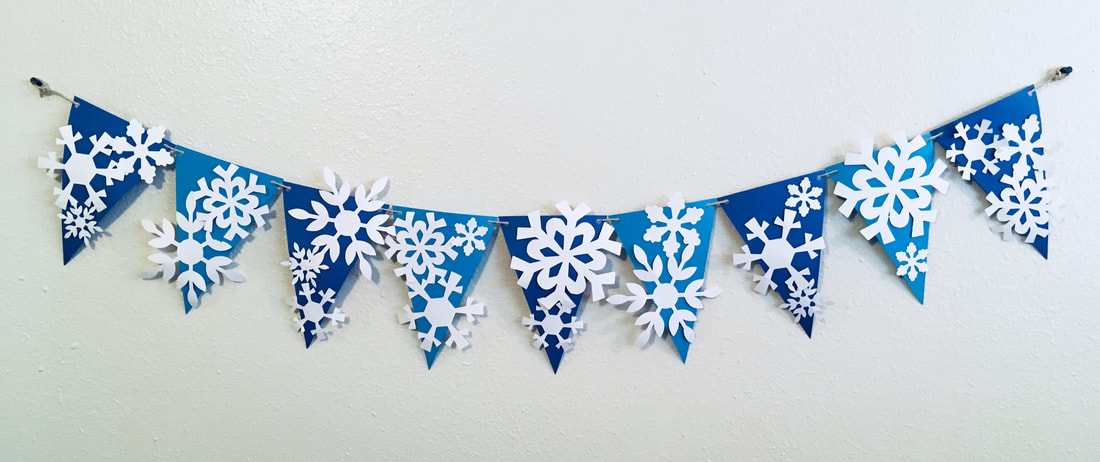
Afterwards, my snowflakes curled, so I placed under a book to flatten them out. It kinda worked... Oh well.
Next, you'll need to print out the template for your bunting. I got mine on this site: The Spruce. Then you'll print it out on the light and dark blue paper and cut it out. From there, you'll tape your snowflakes onto the bunting. Use a variety of sizes on the bunting. I suggest only using 2-3 snowflakes for each bunting. Use double sided tape. Once that looks just the way you want it, punch holes in the corners of the bunting and string it with twine, tie the ends into the loop, and hang it up! Thanks for reading. Please subscribe or follow me on my Facebook on Pinterest Page. See you next time!
0 Comments
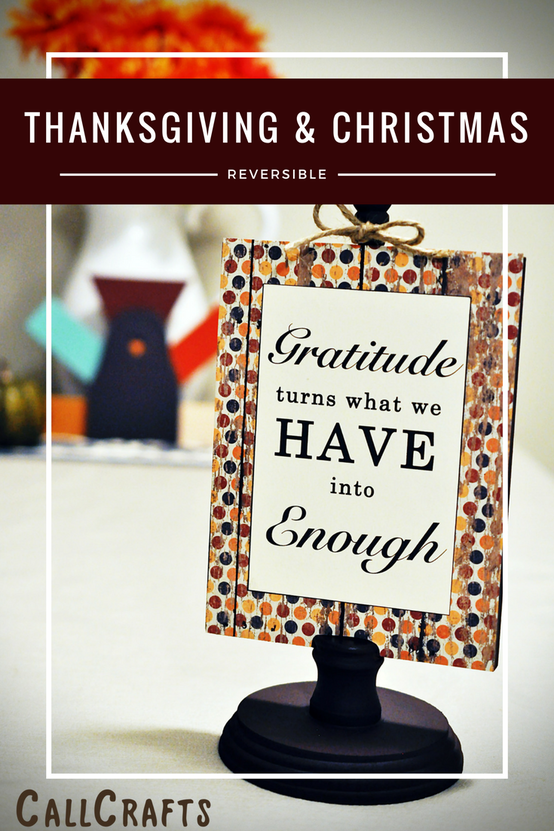
This was one of my favorite projects to make. It was also my first SUCCESSFUL modge podge project and lead me to discovering Canva, which is one of my favorite sites I use for my crafting.
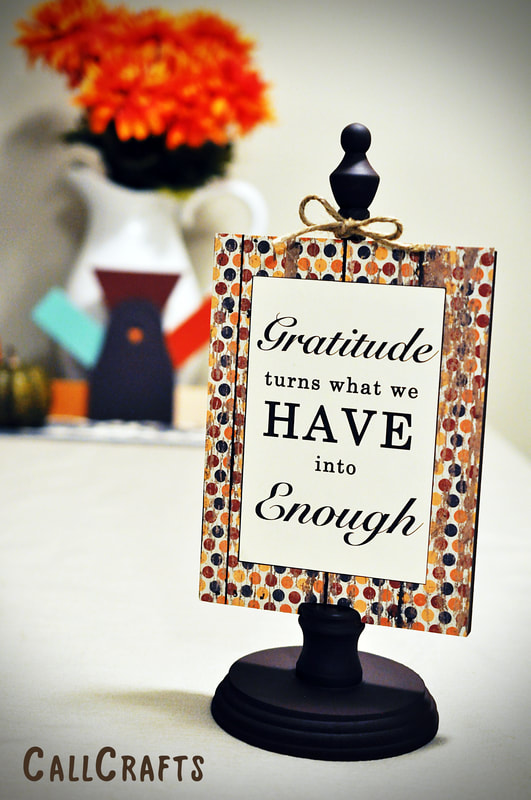
As you can see, one side is for Christmas and the other Thanksgiving. But I’ve recently found that the Thanksgiving side is also suitable to use for any other time of the year because it matches the colors in my living room.
If you want to be super technical, the project two me two months to make because I completed the Thanksgiving side first and waited until I had more time to work on the Christmas side. So, how was this wonderful idea conceived? It was that time of year when you start thinking about Christmas and gifting; October. I wanted to be frugal in my gift giving this year and craft my gifts to my family and friends. I was looking around Hobby Lobby for ideas and stumbled upon the wood frame. I have always loved the following quote: “Gratitude turns what we have in enough.” It always spoke to me because sometimes the difference between someone who is happy in their life is gratitude. It’s such an important trait to have. Anyways, I saw the wood frame, thought of my beloved quote and the idea was born. 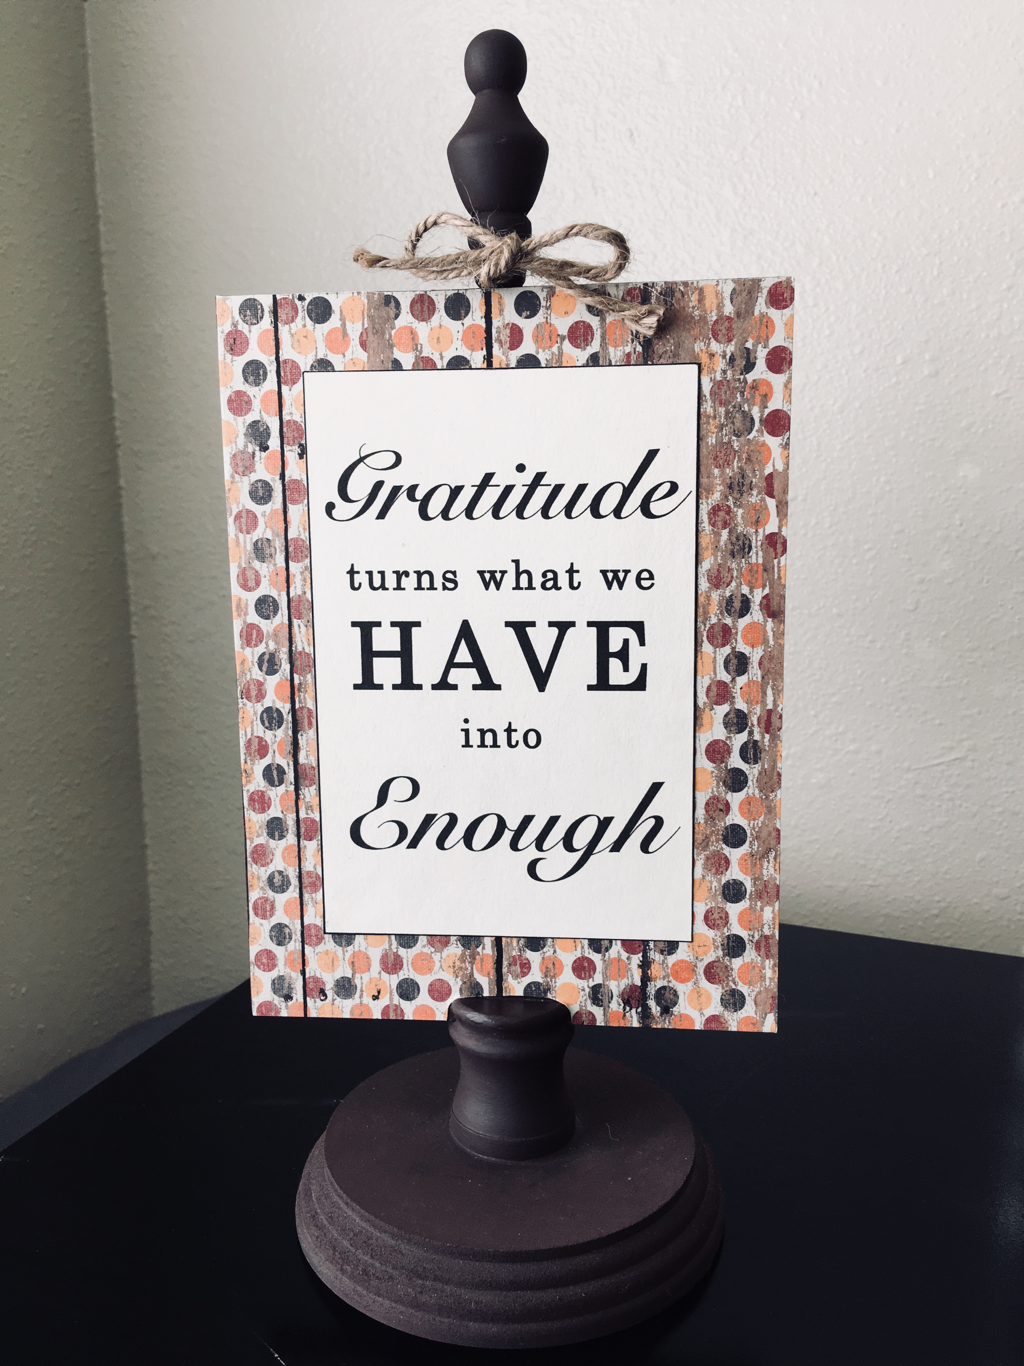
Here's what you need:
-Wooden frame (I got mine at Hobby Lobby) -2 Designed scrapbook papers for the background -2 Plain sheets for the text -Printer -Paintbrushes (just 2) -Acryllic paint of your choice -Scissors -Mod Podge I purchased the scrapbook paper for the background and another one for the text. I love how craft stores allow you to purchase a single sheet. As much as I loved this design, I knew I’d only use it for this project. At the time, I couldn’t find a Christmas scrapbook paper I liked. And seeing that you only see one side at time, I figured I could come back later. Now, the design itself. I must admit that I used Microsoft Word to create this. My brother is a film editor and is well-versed in Adobe Photoshop. For me, it’s hard to get past the interface. I spend 5-10 minutes looking around and then my brain has had enough and I have to leave. Two years earlier, I was getting married and wanted to find a cheap option for wedding invitations. So what did I do? I designed it on Microsoft Word. I'll just spare you from having to look at it. It wasn't bad, but it's not on the same level of what I can create now. My brother was a little embarrassed for me. Oh well, everyone who has gotten married knows how busy you can get and I was planning my wedding AND was going through the busiest time of year at work. You just make it work. Ok, back to my craft. I simply googled the quote for design inspiration, took what I liked and played around with it. Overall, I’m happy with the design but I knew there was a better way to make more designs like this. More on that later. Overall, the project is simple, with lots of room for flexibility to make it the way you want, and then come out with a pretty result you can’t stop looking at. That’s what I love about crafting. 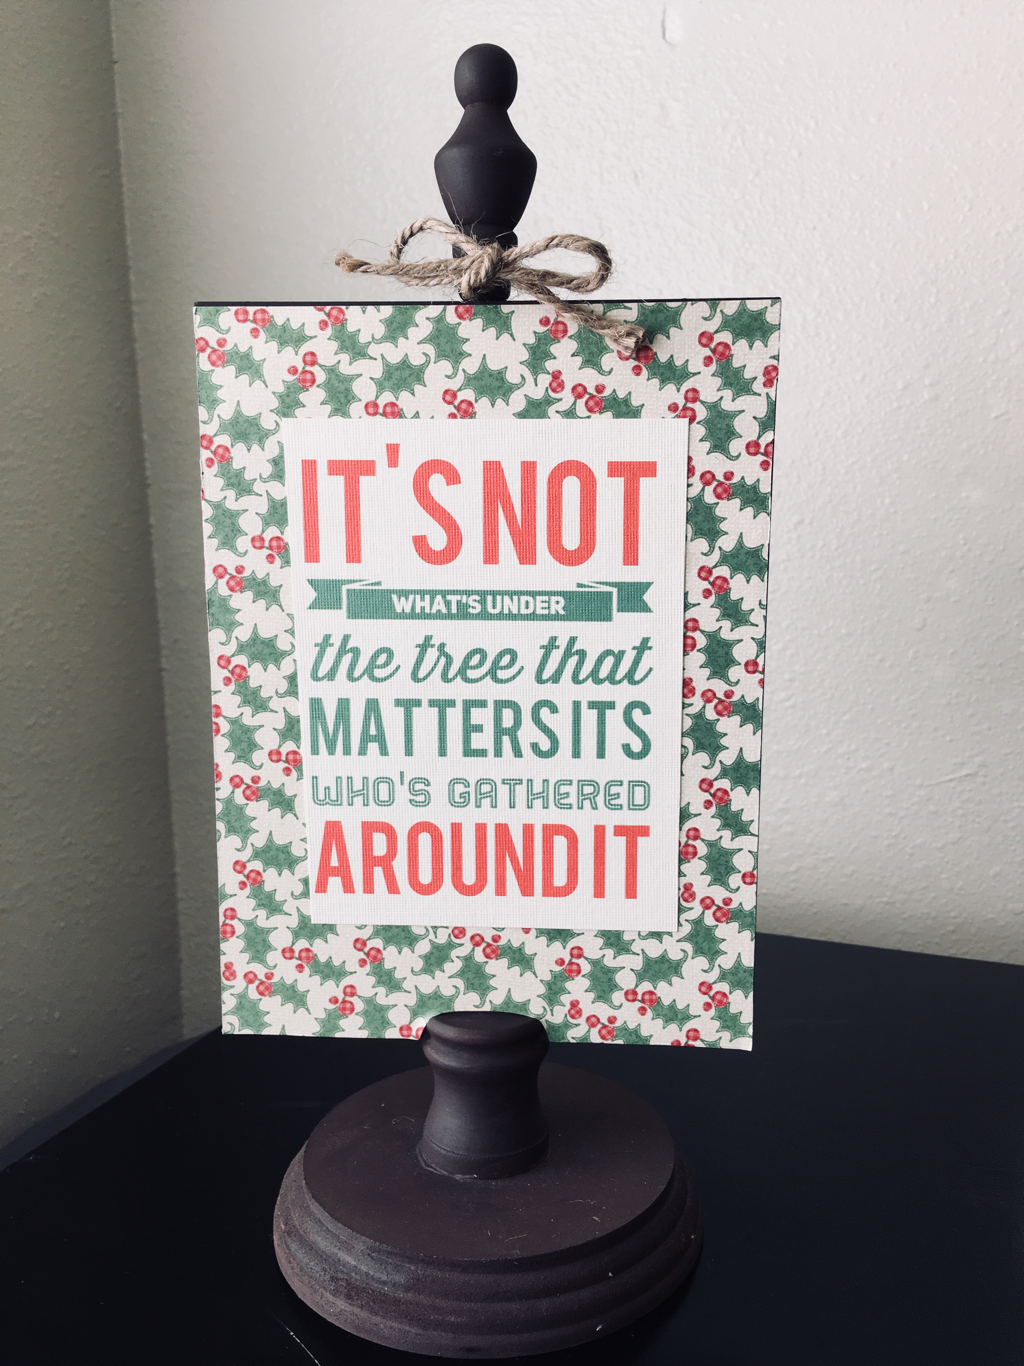
Yes, I had to paint the frame. I actually started off with a lighter brown. Once the first coat started drying, I realized it was not the color I wanted. For the second layer, I added a little bit of black to the brown I was using and it was perfect! After the coats were done, I stenciled out the frame onto the back of the scrapbook paper. I creased the paper in order to get it to shape around the base. You can stencil and cut the paper before you paint the frame, it doesn’t matter.
Overall, with lots of attention, it worked out really well. If you are nervous about cutting too much off, get the initial stencil and then cut it out larger than what you marked it as. Then when you double check to make sure it fits, you have more to cut off. You can always cut off more, but you can’t put it back on. Another tip, if you paint onto the front of the frame, it will hide the fact you accidentally cut off too much. Now, the modge podge. Like I said, this was my first successful modge podge project. A few of the other ones I had made previously look fine, but there are air bubbles :( At this point, I had only been seriously crafting for a couple of months and this was more ambitious project of mine. 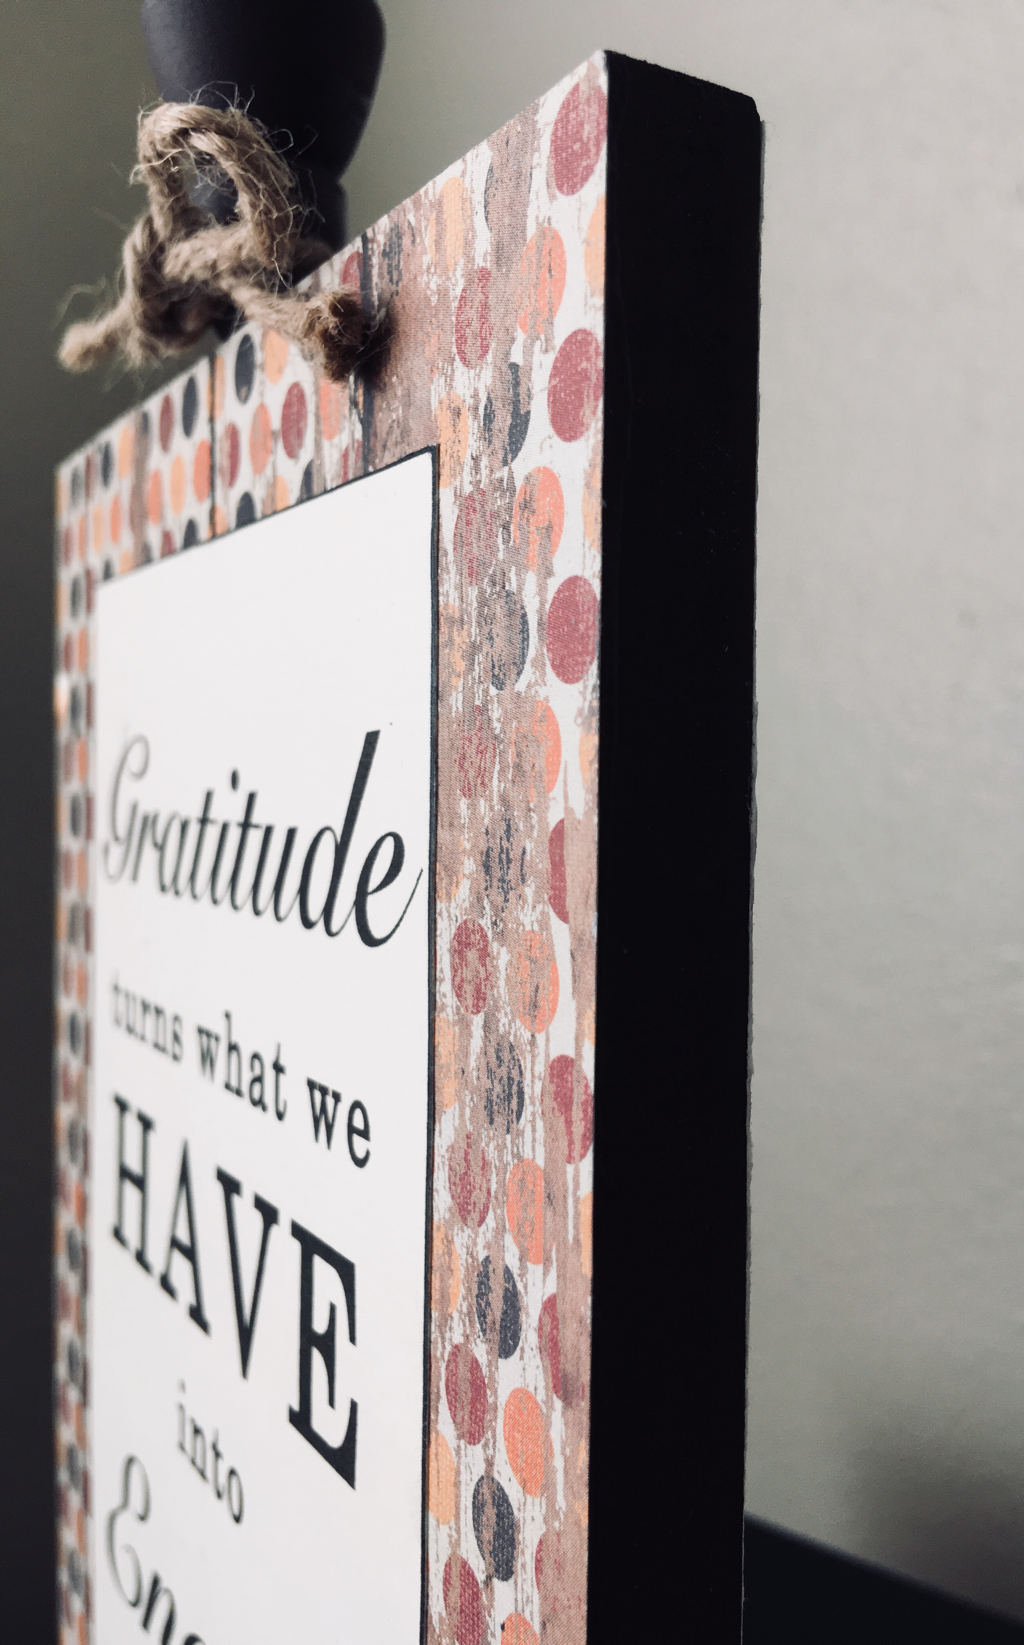
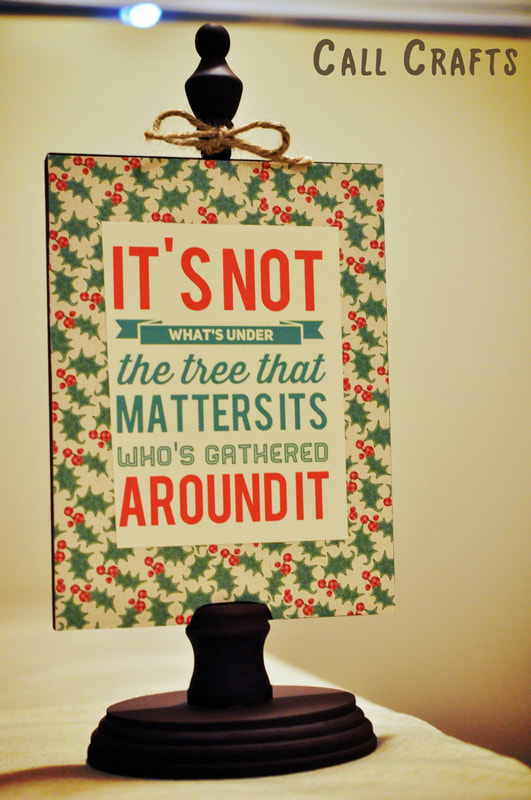
As you can see, it’s turned out beautifully. Now, here’s my trick: don’t put the podge on the paper, but on wood frame itself. I found that when you place podge on the paper, it starts to curl, making it difficult to spread on the whole paper evenly. Also, you want a decent coat of podge and you can’t get that when you spread it on the paper. However, if you can put on the paper and make it work for you, more power to you, but I prefer putting it on a hard surface.
First, I placed on the scrapbook paper and then the design. I chose to not to spread podge on top of the paper because I didn’t want the glossy finish. A benefit of putting podge on top is that it gives it a protective seal which will prevent the paper from peeling off in the future. I decided to take my chances. Give it 5 to 10 minutes to dry before you put this top layer on or else you WILL get bubbles. Oh, I did spread the podge on the paper when I put the paper with the text on the scrapbook paper, I guess the success I had with the scrapbook paper gave me confidence to try spreading the podge on the paper instead of the hard surface. It is a smaller paper and that's easier to handle. 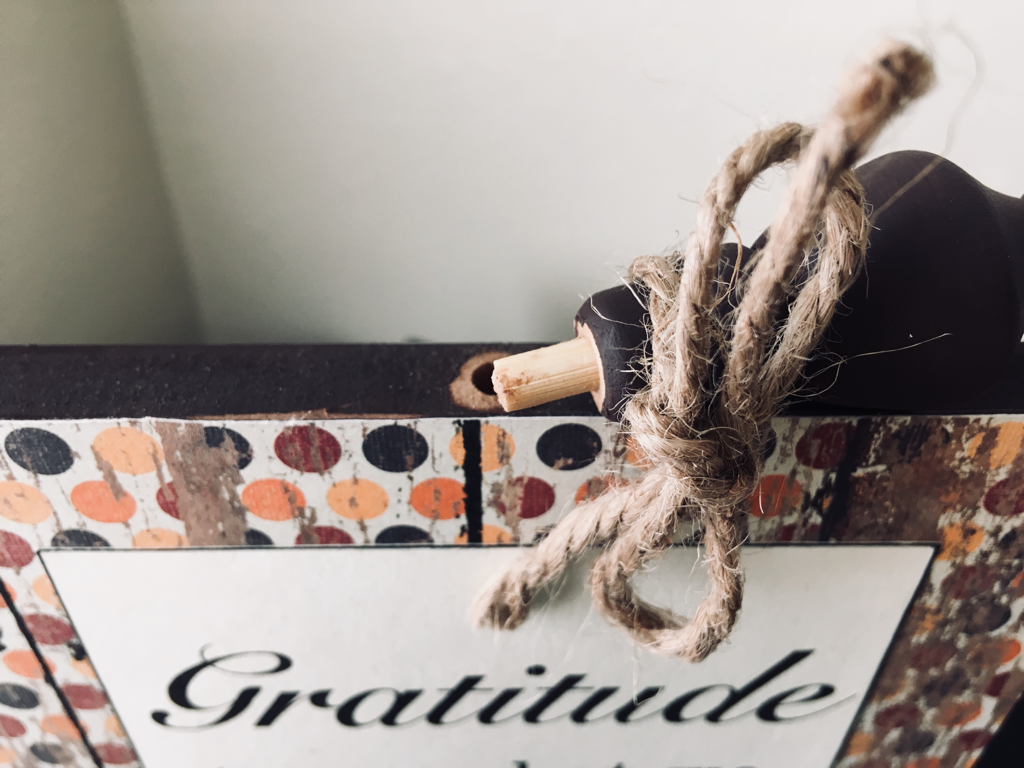
Now, the knob on top. It’s removable so it wasn’t on when I stenciled and podged the paper on the frame. When I placed it back on, I knew something was missing. So I pulled out my handy-dandy twine! I bought this months ago for a project and is now one of my favorite products for my crafts. I use it for all of my banners. Best purchase I have ever made.
The bow was inspired by a photo block I saw at my aunt’s, which also had a bow tied on top. Most of the time when you see bows tied on top of projects like this, there’s multiple strands of ribbon with many colors. Not what I wanted though, simplicity usually works best for me. Plus it’s easier to match with the other side of the reversible when you chose something simpler. I was so excited with how this turned out! I could finally podge on a piece of paper onto a project and make it look beautiful, it was a big step in my crafting. There was a victory dance involved in celebration. Now the Christmas side. Selecting the scrapbook paper and the quote I wanted was easy. But the design for the quote was the tricky part. I really didn’t want to use Microsoft word again. So I did some research on software programs you can use to create these. I ran into an app called, “Typorama.” I used this program for the design, however, it’s the only one I plan on using it for. It didn’t have the flexibility I wanted and if you want to print it out or share it, you have to have to make a purchase to get rid of the watercolor. Lame. I used a photoshop program I have called, “Photoscape X” to rid of this problem, just don’t tell them.
After some tinkering, I was satisfied and stuck with it, but knowing I’d use something else in the future. You know, that’s the thing about building a skill such as crafting; you make mistakes, make it work, learn from it, and do better next time. And I wouldn’t have discovered Canva. I am absolutely in love with their software and I haven’t even bothered trying other programs. But I think that’s a story for another time. I will say this: after I started using Canva, my printables have become a big part of my crafting. I’ve found it’s something I LOVE to make. It’s my little niche in my crafting.
Stay tuned for more projects and tips on how to decorate your home on a budget. 
One holiday done, two more to go! You can find some pretty cute stuff to use for Thanksgiving, you just have to look. I make things easy for myself and use some of my Fall decorations again during this month. I mean, why not, I really like them and you can use them for more than a month.
In this post, I’ll share another set of links to FREE printables I like and use for my own personal decorations. "Thanks" Banner
I had a hard time finding a Thanksgiving banner I liked. I wanted to have a message that went along with the holiday, but my apartment is small, so I have to be careful not to have a banner that is so large it overpowers my wall space. Most of the banners said, “Give Thanks” or “Thanksgiving” etc. There were also designs I just didn’t like. I’m not a huge fan of the vintage look, it’s alright, but it’s not who I am. This particular banner was a great find! I found this on Mimi's Dollhouse, be sure to check it out!
Once you go to the link, you’ll see I didn’t print out all the pages of the banner, I only used part of it. It’s simply because: 1. The letters are HUGE; 2. I didn’t have the wall space. So for me, a simple, “Thanks” felt sufficient. I used a hole punch to cut out the holes I needed to hang it up on the twine. 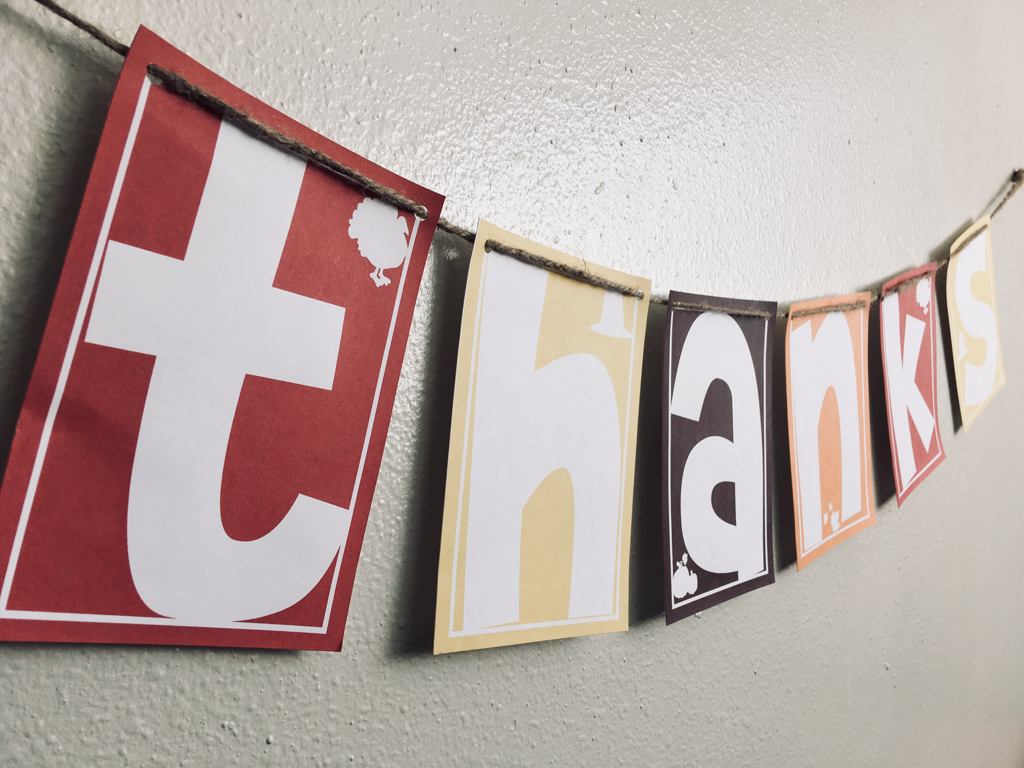
Thanksgiving Subway Art
I found this free printable on: How to Nest for Less. You guys, the internet is a wonderful place full of so many great things.
Again, a simple subway art modge podged onto a canvas. If you need an explanation of how to modge podge, refer to my DIY Decor: Halloween (Part 1). There were many subway arts available, but this is the one I liked the best. Refer to my Pinterest page for more references. 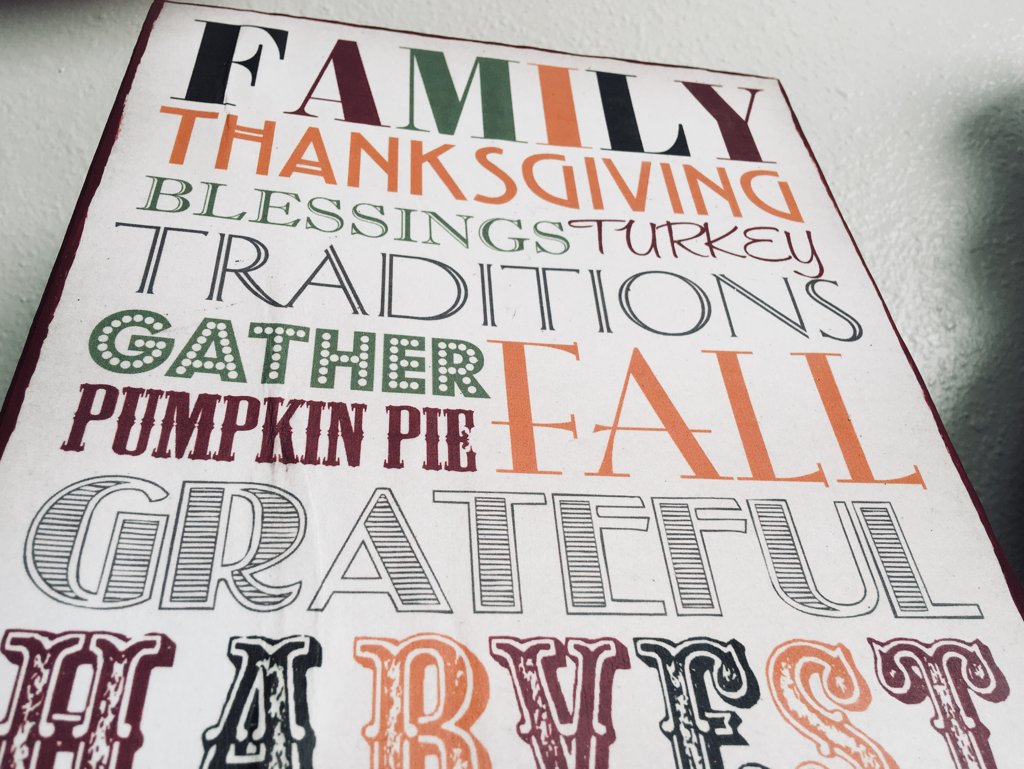
Fall Leaf Banner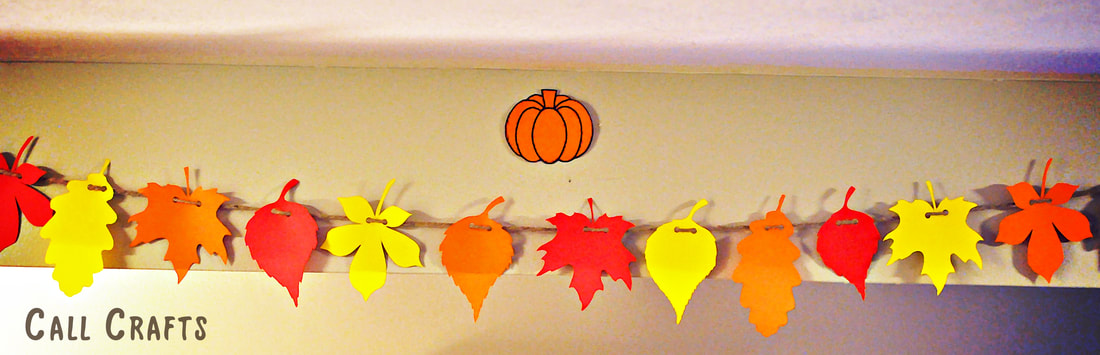
This took a long time to do, but it’s so worth it! I found this printable on A Beautiful Mess.
What I love about this is it gives you the flexibility to choose which colors you want! I used yellow, orange, and red colored paper. I printed one copy of each color. Cutting it out took a long time, so make sure you have something on Netflix to help pass the time. Then, cut out a whole with a hole puncher, string it one your twine, and done! If you'd like a more complete tutorial, I also wrote about this craft on another site as a guest writer on DIY Craftz. You'll read a more detailed tutorial for putting a printable onto a canvas. Thanks for reading, guys. I have some pretty fun posts coming up, see you soon! 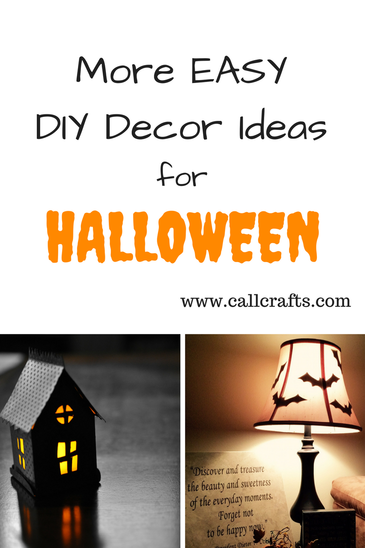
As promised, here are more Halloween Decoration ideas for your home. This is a series post, if you are interested, read Part 1. Again, I'll be sharing projects that I have found and made. I'll provide links and any additional tips you'll need to make this project successful! Thanks for reading!
Spooky Haunted House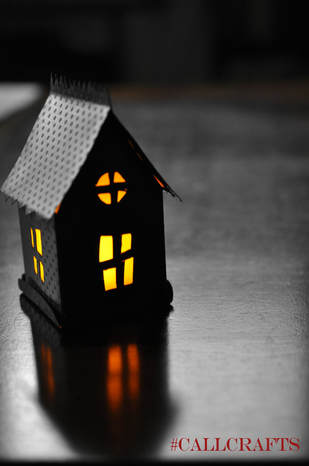
This project is a little more elaborate and time consuming, but has super cute results!
This is a paper house with a battery-powered candle inside. I got it from Catherine Holden's Inspired Barn. However, since I have visited her site, she has deleted the post. You can still find this template on my Pinterest page. Just make sure it's only for personal use. Making the house is pretty self explanatory. Even on the template it tells you where to cut and fold. I used a baking sheet to cover the back of the windows instead of buying a sheer paper. It also creates a sheer effect on your windows, and its something I already had in my home. I simply taped it onto the inside of the house before I folded it all together. Instead of using just black card stock, I purchased a textured scrapbook paper to add more to the look. I love it. I printed out the template of the house on a separate piece of white paper and then traced it onto my black scrapbook paper with a silver sharpie that way I could see where to cut. If I was using a different color, I probably would’ve just printed it out on the scrapbook paper itself. To cut out the windows, you'll need a craft knife. Once you've cut it out and folded it, just glue it together on the extra flaps. I couldn’t figure out how the roof fit onto the rest of the house from the template and directions provided (which are now gone). So I improvised. I cut off the roof from the rest of the template. Then, I glued the top of the roof together, then cut out the points you see on the edges. Afterwards, glued it back onto the rest of the house. The house itself ends up being about 2 to 3 inches tall, but it’s still so cute! This is one of the templates you can use to create a little village. I was going to make another house, but I never made the time after I finished this one. I’m sure you have the freedom to cut out the roof in any style you want or even make the roof a different color than the house itself. I also liked how easy it is to take the house off the base for easy access to the candle. You probably don’t even have to cut out a base, honestly. I'm a little sad to find that this project has been removed from the blog universe. It's super cute and easy to make. I even bought a craft knife specifically for this project and have rarely used it since. Bat Lamp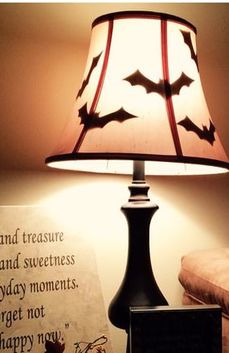
Give yourself a reason to turn on your lamp this Halloween!
This is a super easy project to get done. I saw the idea on Pinterest. I actually looked online for bat printables and found a free printable through Our Hopeful Home. You can also find this on my Halloween Pinterest page. I cut out the bats and then taped this onto the part of the lamp shade you see. I didn't have enough bats to cover the entire circumference of the lamp shade, but then, why would put bats on the part of the lamp shade you can't see? So far, I've probably only spent $15-$25 on decorations, probably even less! Most of the crafts I made were with things I already had; colored paper, twine, and acrylic paint. Then many of the other things I needed cost less than a dollar. Talk about awesome. Thanks for reading, be sure to stay tuned for more Fall decor ideas. Soon, I'll be sharing my Thanksgiving crafts. You're going to love them! Subscribe if you wish, or join my Facebook or Pinterest page. See you next time!
It’s coming! The holiday seasons! Even though Halloween is not my favorite holiday, it’s still super fun to decorate for. I guess this holiday is a bit sentimental for me because last Halloween two things happened: I discovered what a rich resource Pinterest is for free printables; and I discovered my niche for paper crafts. I’m not talking about scrapbooking, but using printables to decorate my home.
In this post, I’ll be sharing with you a few things I’ve used to decorate my home, what extra flair I’ve come up with, and provide links so you can make it yourself. Don't worry, I'll be sharing more of my ideas and findings throughout this month. 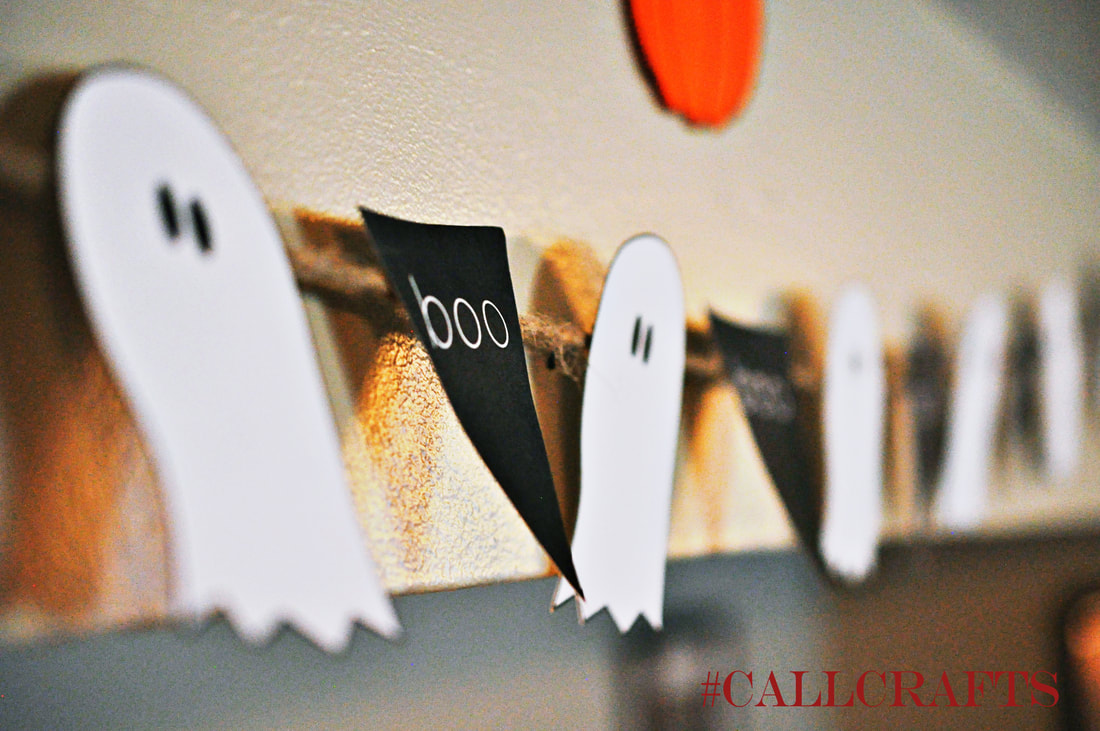
Boo Banner
So we’ll start off with one of my favorites: the Boo Banner.
I LOVE banners, they’re easy and fun to make. This one is no exception. And this one is probably one of my favorites. I got this printable from Tatertots & Jello. Click here to head to their site and print this adorable banner out for your home. Once you’ve printed and cut it out, roughly measure out how much string you need to hang your banner on. I use twine, it suits my home so nicely and it’s cheap. I’ve used it for MANY projects. Then, I simply taped it onto the string. Can’t see the back so why worry about doing something fancier. Now a days, I use a hole punch then “sew” it on when I make new banners, but I didn’t have one at the time. Note: when you print out the ghosts and “boo” signs, you may not end up using all of the “boo” signs. I’ve kept my extra ones and will let you know if I end up using it for something incredible. I do not have the luxury of having a mantel in my home yet, so what I do is take push pins, I have black ones, and place them on the wall above the tv. To place the string on, I simply create a loop and then tie a double knot. That way it’s easy to put on and take off. Halloween Subway Art Canvas
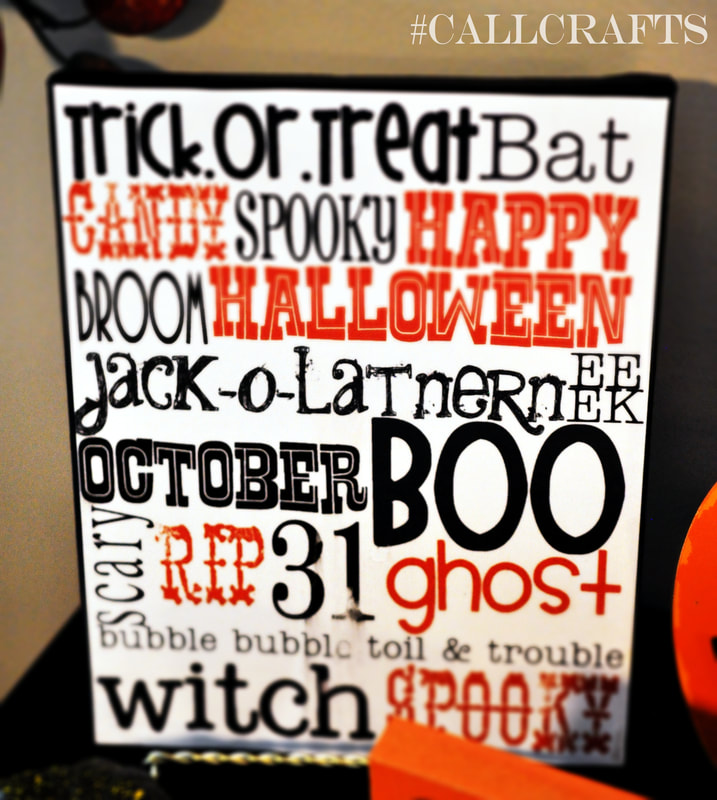
Next, is my Halloween subway art canvas. I can’t remember how I came up with this idea, but I love it and have some form of subway art up on my wall for every holiday. What I’ve done to save a few bucks is instead of having it on a frame, I mod podged it onto a canvas. There are tons of sites that give you a step-by-step tutorial. Since I created this project before I decided to make a blog, I don’t have photos of this process, but I will briefly describe it for you.
This is one of those awesome projects that only take a half hour to make. Which is great if you’re super busy (and who isn’t?). Before I tell you how to make it, click here to go to Lovely Little Snippets where you can download this for free!
Now, first thing I do when making a canvas project is that I trace the outline of the canvas onto the back of my subway art. This way, your printable fits on the canvas. I usually double check to make sure I’ve cut off enough. Sometimes I like to have it a little smaller than the canvas so I have a “frame.” Then I paint the edges and outer rim of the front. I paint the front just in case I cut off too much and I’m not left with a white frame. I usually use at least two coats of paint, but it depends on the color. Using only one coat doesn’t completely cover the canvas and will leave white streaks on your edge. Once the paint is dry, then paint the modge podge onto the canvas. You can put on the paper first, but I find it easier to put it on a harder surface first; it won’t curl up on you as you’re putting it on. Then you place the paper onto the canvas. It’ll still be wet at first for you to adjust and make sure it’s all centered. Then I like rubbing it in to get all the air bubbles out. Sometimes I’ll flip it upside down and rub the back of the canvas. If you do this, just make sure there isn’t extra podge sticking out or it’ll stick to whatever surface you’re using. Not fun. Then let it dry. I used to make the mistake of immediately putting on the top coat, but don’t. You WILL get air bubbles on your canvas this way. Once it’s sat for about 5 minutes, you’re usually good to put on the top coat. You don’t have to do this, but it does protect your project from peeling off at the corners. Like I said, very easy, affordable, and cute. Spell on You Printable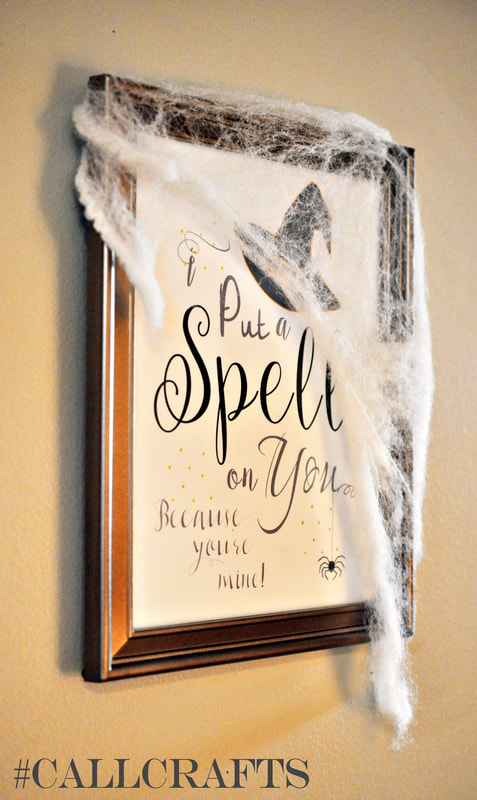
Then there’s this cute printable from Made in a Day.
What I like about this printable is that this designer gives you several versions with different color schemes to pick from. I actually ended up using a different version than what I originally saw on the pin. I’m also one of those super sappy people who likes to put up lovey-dovey decorations like this because she loves her husband so much! I simply put this in a dollar store frame I already had. It matches so well. And then draped on that cotton “spider web” you can get at Walmart for a buck. It’s the little things that really add to your decorations. So there you have it, a few things I've found online that I've printed out at home that have become a part of my home decor. Check out this Pinterest page, Crafts for Halloween for more ideas on how to create your own Halloween decorations. Follow me on Pinterest so you can keep up to date on my fabulous findings. See you next time! |
About Me
Hello! My name is Char. Thank you for visiting my blog, CallCrafts. I am a wife and mother who LOVES to make things. Read tutorials on crafts I've created to decorate my home, for parties, and more! Read more about me in My Story.
Categories
All
Archives
April 2018
Popular Posts |