RSS Feed
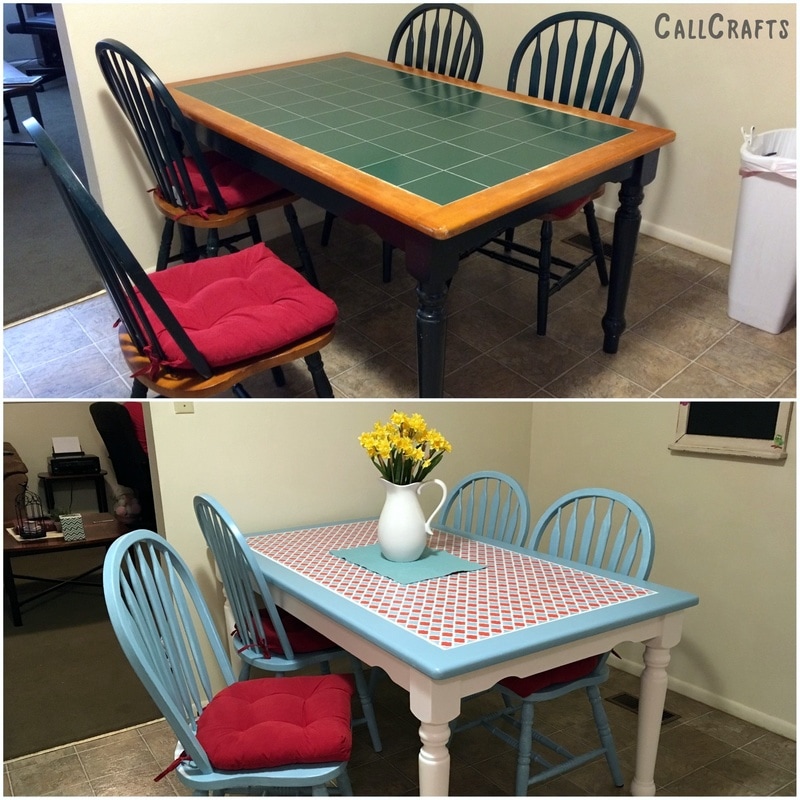
I am in LOVE with the result. Even this is won't be a typical post for my blog, however, I’ve done it, and I want to share it. I’m in love with how unique the piece is and how it fits in my kitchen. Especially when you consider what it looked like beforehand. I got the table from my sister’s mother-in-law a month after I got married. Yay for free stuff! It’s a solid table and I am grateful we have it. But I have always hated how it looked. For the past two years, I’ve always just put a cream table cloth over it to hide the green. It’s worked, but I’ve always wanted it to be better. The chairs actually about 6 months came after we got the table. We were using our folding chairs until one day, my brother found a friend who was giving away their table and chairs and asked if we wanted it. Of course we did! So he snagged it and brought it up for us. Somehow, they miraculously matched. I’ve thought about repainting the table for a year now. Now there’s a baby on the way, I knew it would be at least another year or so before I’d have a chance to work on this. So I planned a date, and got going. 
I did some research before beginning this project. However, I didn’t really plan which colors I wanted for the table. THIS IS A BAD IDEA. This pushed me back a day on getting the table done. The whole project took two weeks, not bad, but if you’re painting in your kitchen, which I was, it’s awful. I’m not doing another refinishing job until I have garage. Not only do you lose the functionality of your kitchen, but all the sawdust and other things that fall on your floor when you paint gets all over your house. Back to my beautiful table. I wanted it to match our kitchen, which right now is themed to our wedding colors. I have what I call a “wedding shrine” above our white food pantry with the decorations pieces my Mom made for my wedding reception. I loved how bright and happy it made our kitchen that I decided from then and there that would be the color scheme for the kitchen. I’ve slowly “built” our kitchen from there. Obviously the table had to match. Looking through Pinterest, I really liked how some people painted their chairs a different color than the table, so I went with the blue chairs to keep it warm and inviting, but doesn’t take away the design on the tile. The tile took a little more thought to put together. I saw people simply paint a solid color over the tile, but I had also seen people repaint the tile altogether. I felt because I had a tile top it was unique feature, and should still show it off, in a sense. I thought about putting new tiles on the table. As soon as I saw how much that cost, I quickly had second thoughts. I did not want to spend too much money on this project. So back to how to repaint the tile. On this, I was stuck. There weren’t many options I was in love with and whatever I searched didn’t match exactly what I was looking for. But I did find something. It came when I looked at how others repainted their floor tile using a stencil. I soon found the stencil I used at Hobby Lobby. It wasn’t the exact size I wanted, so I won’t lie; I was beginning to become anxious about completing this project. Still, I went with it. Lots of people will tell you to sand the furniture before you paint the primer, but I didn’t. I did sand the border on the table top, but couldn’t bring myself to attempt it with the rest of the furniture. Mainly because simply sanding that part of the table took 3 days. 3 exhausting days when you are 6 months pregnant. When I tried sanding off the green, it wouldn’t come off. All because I didn’t buy the correct sandpaper and didn’t bother buying or borrowing a sanding machine. This image was one day's worth of sanding :( 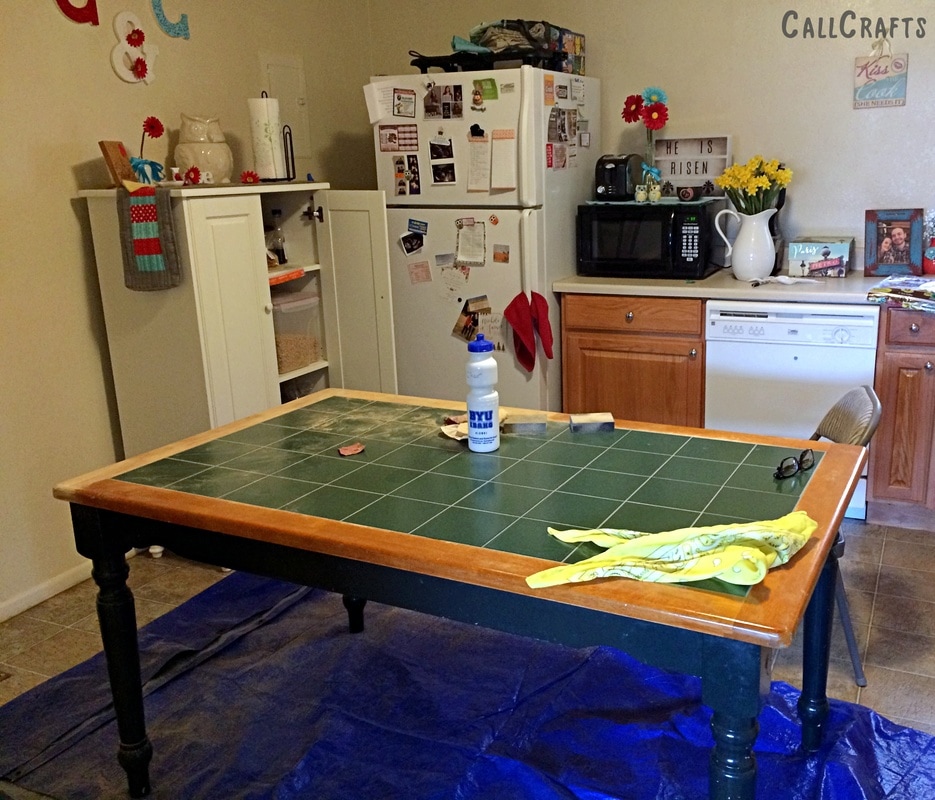
I was doing my best to keep this project low budget and underestimated the costs. Then because I was buying the wrong tools, I had to spend MORE to get the right ones. So I guess I didn’t do enough research. But I learned that sanding blocks don’t cut it. You need actual sandpaper. If you have enough money, you should invest in a sanding machine or at least a hand-sander. 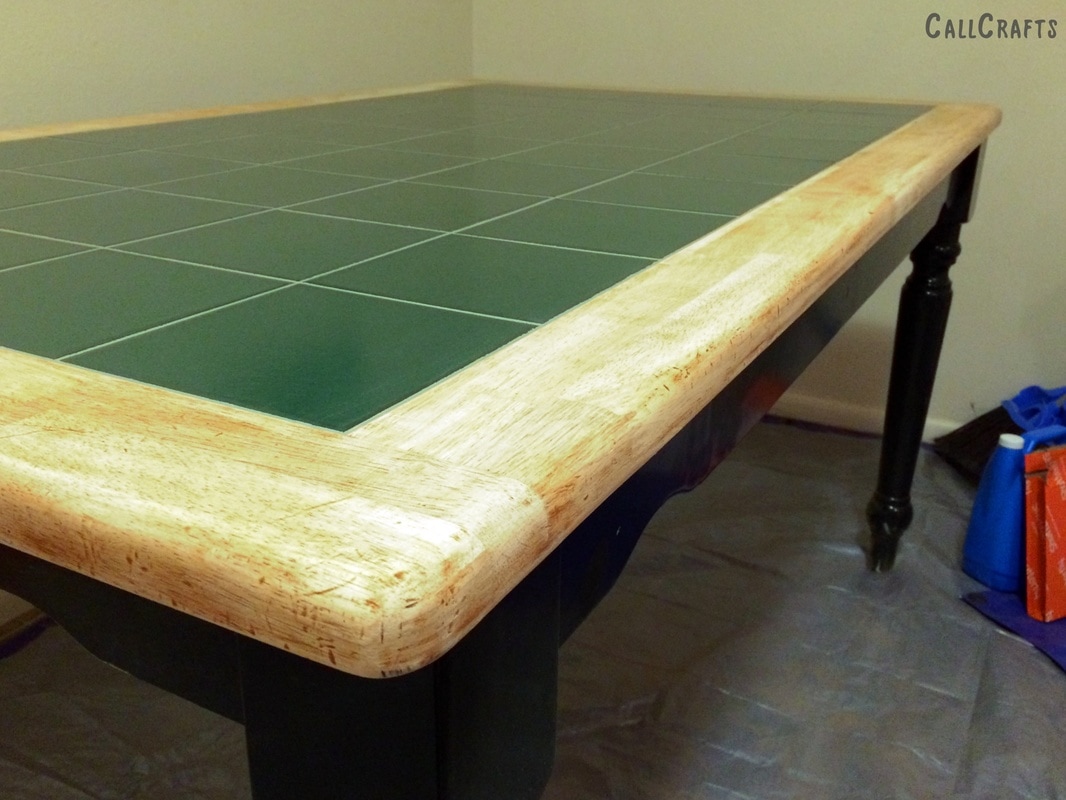
I got it done, and then moved on to the fun part: the painting. I read on other blogs that if you don’t sand, you MUST prime twice. And I did, and it was hard and time consuming. Again, because I was pregnant, it was hard to move around on the floor. If you notice, I had decided to paint the tile before the border and used painter’s tape to keep the lines clean. If I did this again, I probably would’ve painted the border before the tile. At the end, when all I had to do left was paint the border, I was so worried the tape would ruin the tile. Luckily, it didn’t. 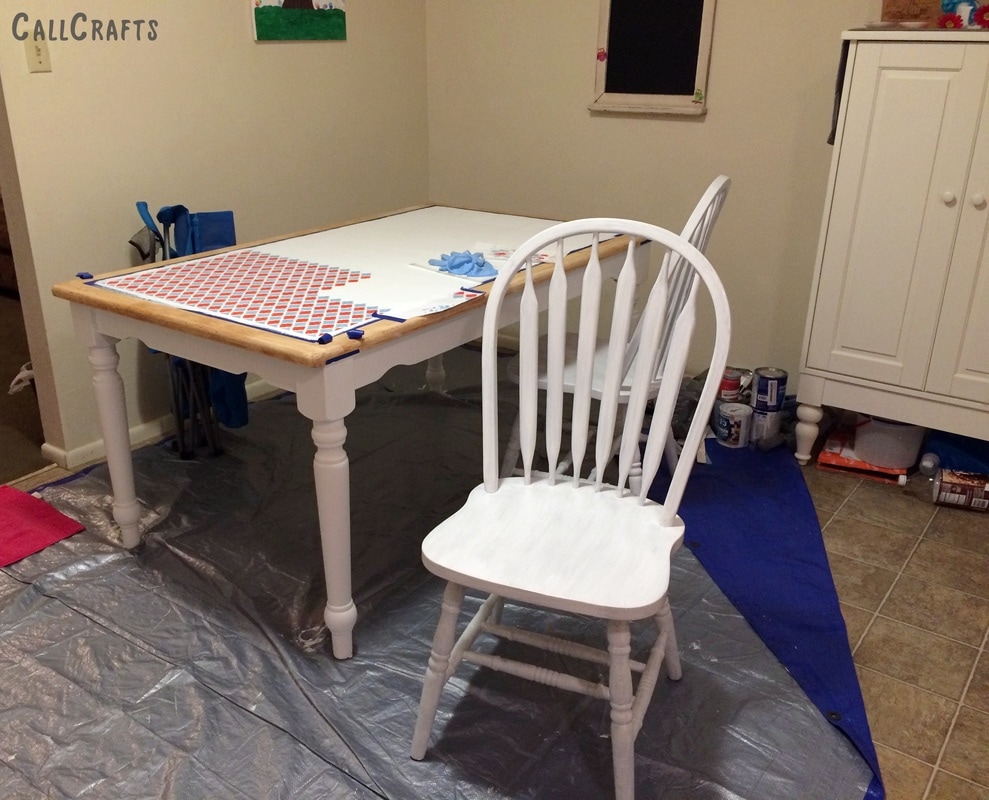
Then I painted on the colors, oh it was such a relief to see some progression in my project! This was the first time I did a project that took more than an hour to complete. So it can be hard to see the big picture. 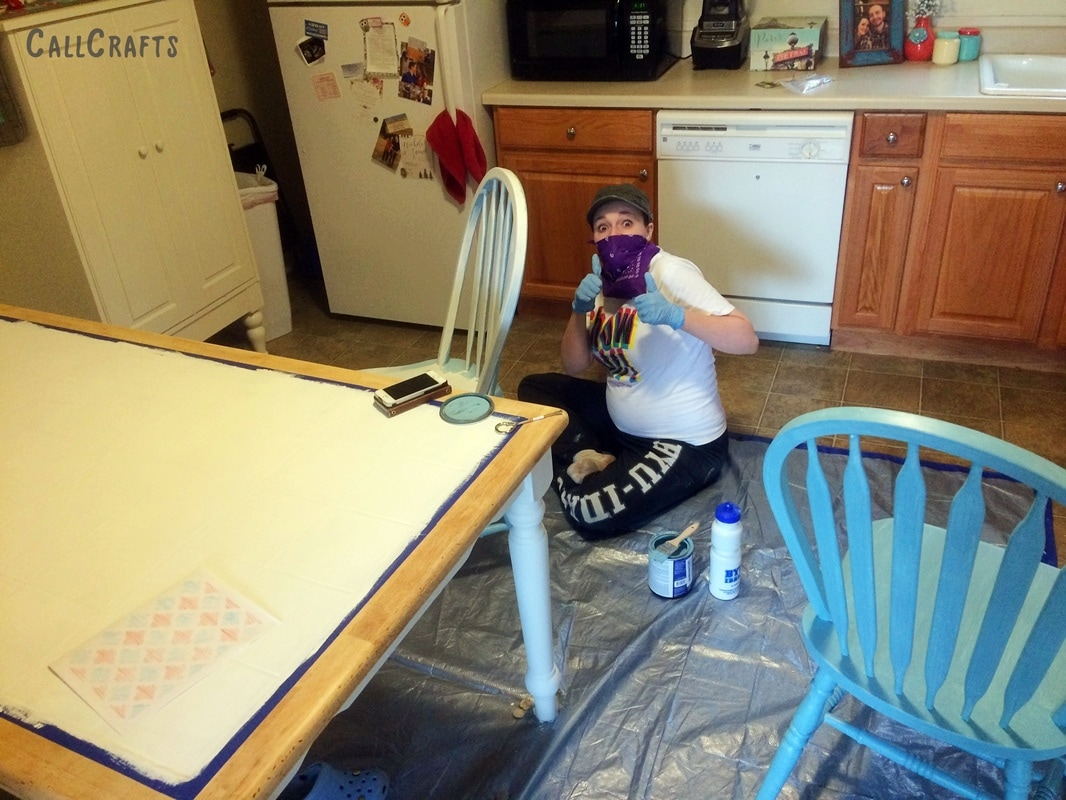
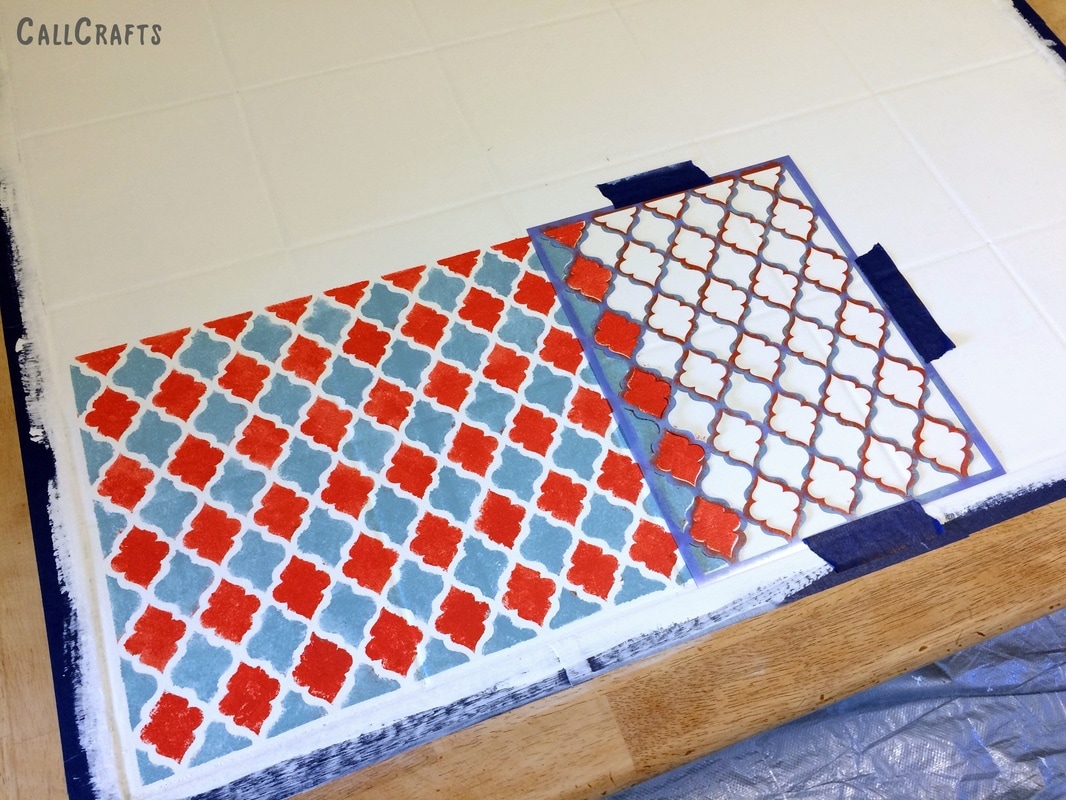
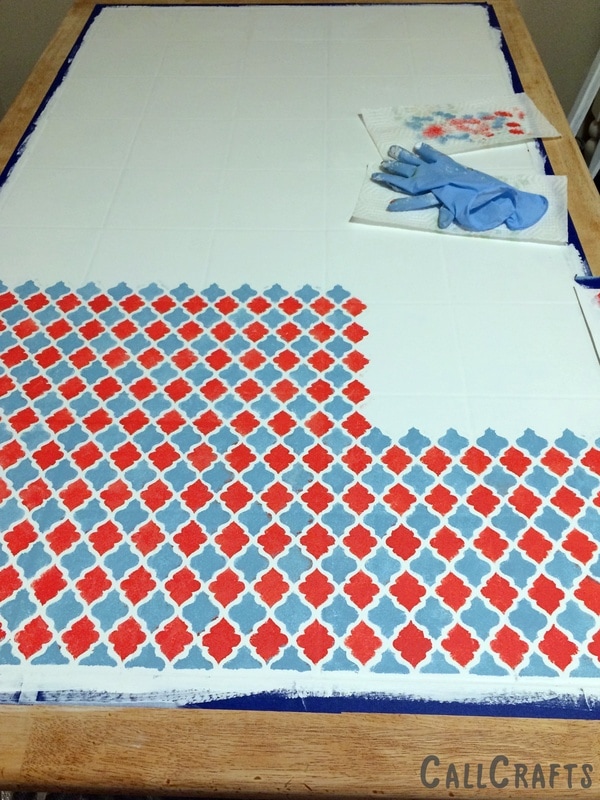
I had 4 chairs to do and now there were two done! After two coats of primer, I put one coat of paint on the blue chairs, and then the final sealing clear coat. I stuck with one coat of color because I really liked the texture it created. If I had a chance to do it again, I’d go with two coats of color instead. I would have lost the texture, but after a month of the project being done, there’s now some chipping going on. I’m sure part of it was because of the lack of sanding, but I also think part of it was because I didn’t put a second coat of color on. Oh well, you live and you learn. Plus your furniture will chip when you have kids. It wasn’t until I finished the first two chairs that I start stenciling the tile top. The reason was because I had no idea what I wanted until that point in the project. I put two coats of primer and two coats of white paint, then let it sit for two days before I began to stencil. I only purchased one stencil and painted each shape individually before peeling the stencil off and moving on to the next part of the table. As you can see, I taped the stencil onto the table while I was painting. I don’t think this project would have turned out so well if I hadn’t done this. This took 5 days to complete.
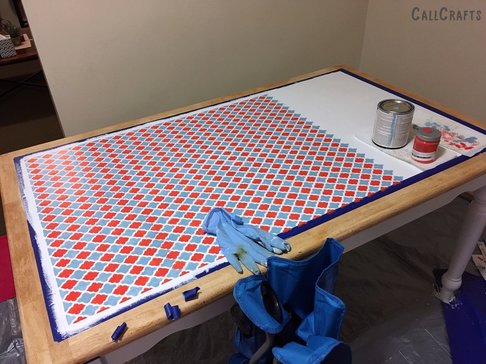
But you know, it was so worth it. When I was working on the stencil, I'd paint the reds first and then the blues. It was easier to use blue to cover the red if I accidentally painted into the other shape. Eventually, I got pretty good at keeping the amount of paint consistent. There’s one tiny section of the table where I didn’t line up the pattern correctly and the shapes started running into each other. You only make that mistake once and from there you are more careful about how the pattern lines up. 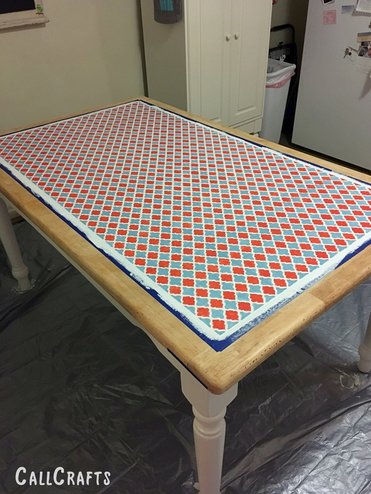
It was all done, and the clear sealing coat was placed on! Yea! Now to the border. The original idea was to stain it and make it a light gray. But it wasn’t gray and I hated it. So I had a choice: either buy gray paint and paint over the top or use a color I already had. White was not an option, red was too overpowering and would compete with the tile for attention, and I didn’t want to spend more money, so I went with blue. I didn’t bother sanding the stain out and I painted the primer on while the stain was still sticky. Not the best thing ever, but I haven’t had any chipping problems yet. Then I put on two coats of blue paint and was done!! 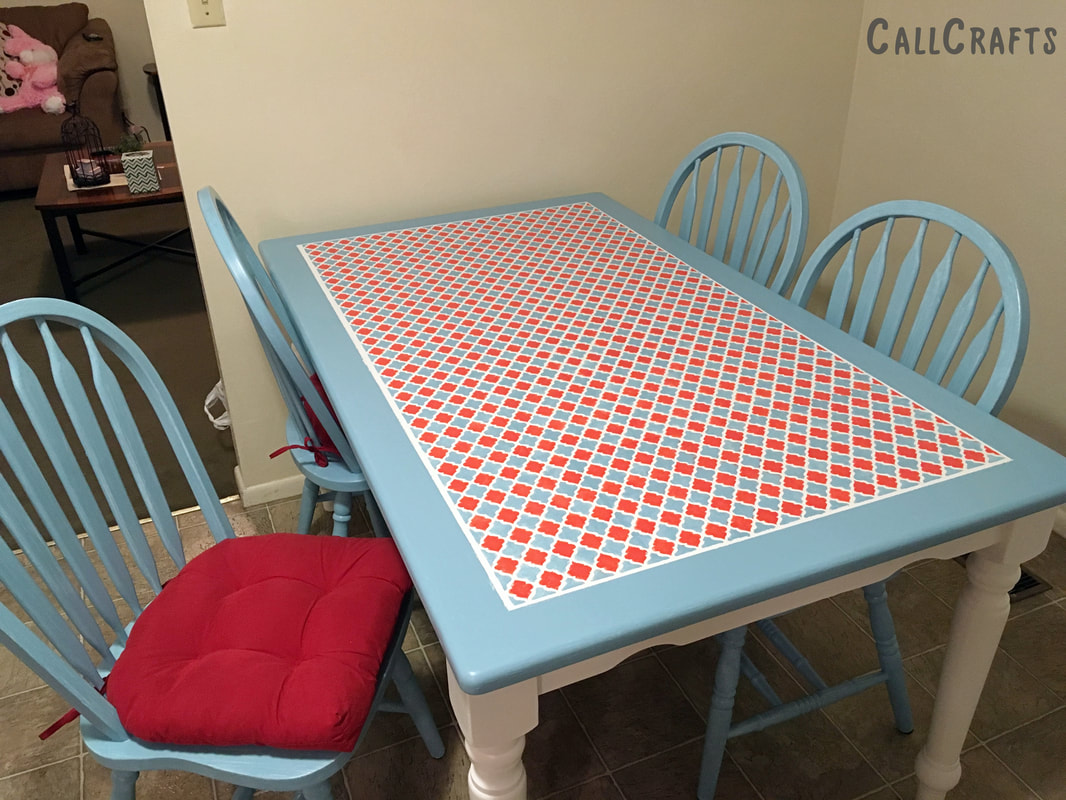
It’s so beautiful! In the morning when I'm so tired in the morning and eating breakfast, I just zone out and stare at my creation. It’s awesome. So did I necessarily did it the right way? Probably not. I’m pretty sure I’m going to run into some more chipping problems in the future, especially as my baby gets older, but it’s the tile I’m the most excited about. It’s the crowning jewel of the project and makes this table so unique. I’m proud with how it turned out. I have to add that I’m so glad I have a husband who is very supportive! He didn’t complain once about how nasty our kitchen looked as I was painting and he even helped me finish painting the chairs one day. 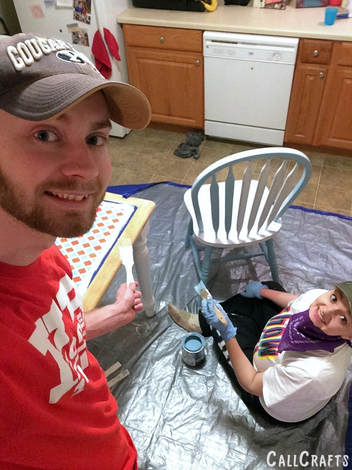
I love that he’s proud of what I accomplished and makes sure our guests have a chance to see our table. He’s so great. Thanks for reading! Stay tuned for more posts!
6 Comments
7/11/2017 02:16:11 pm
Oh, wow... I love this so much :) It looks great.. thanks for sharing... I have one old table too... I will try to do something like this :)
Char Call
7/11/2017 02:22:56 pm
Thanks!! Apart from it taking a long time to paint, it was a pretty easy project. 7/11/2017 05:59:35 pm
Your table is gorgeous. I'm a DIY enthusiast but have been so nervous to start my next project (painting my cabinets). You just gave me courage
Char Call
7/11/2017 06:01:40 pm
Well, thank you! I know, it's super scary starting a huge project like this. I'm sure it'll look amazing. I'd love to see it when you're done :)
Kristi Juhl
11/9/2017 01:05:13 pm
What kind of paint did you use on the tiles. I love this and the whole idea.
Char Call
11/9/2017 02:00:57 pm
I used Latex paint. Specifically the Olympic Assure brand. I used Zinsser primer for the base and Valspar Clear Protector for the top coat. Your comment will be posted after it is approved.
Leave a Reply. |
About Me
Hello! My name is Char. Thank you for visiting my blog, CallCrafts. I am a wife and mother who LOVES to make things. Read tutorials on crafts I've created to decorate my home, for parties, and more! Read more about me in My Story.
Categories
All
Archives
April 2018
Popular Posts |